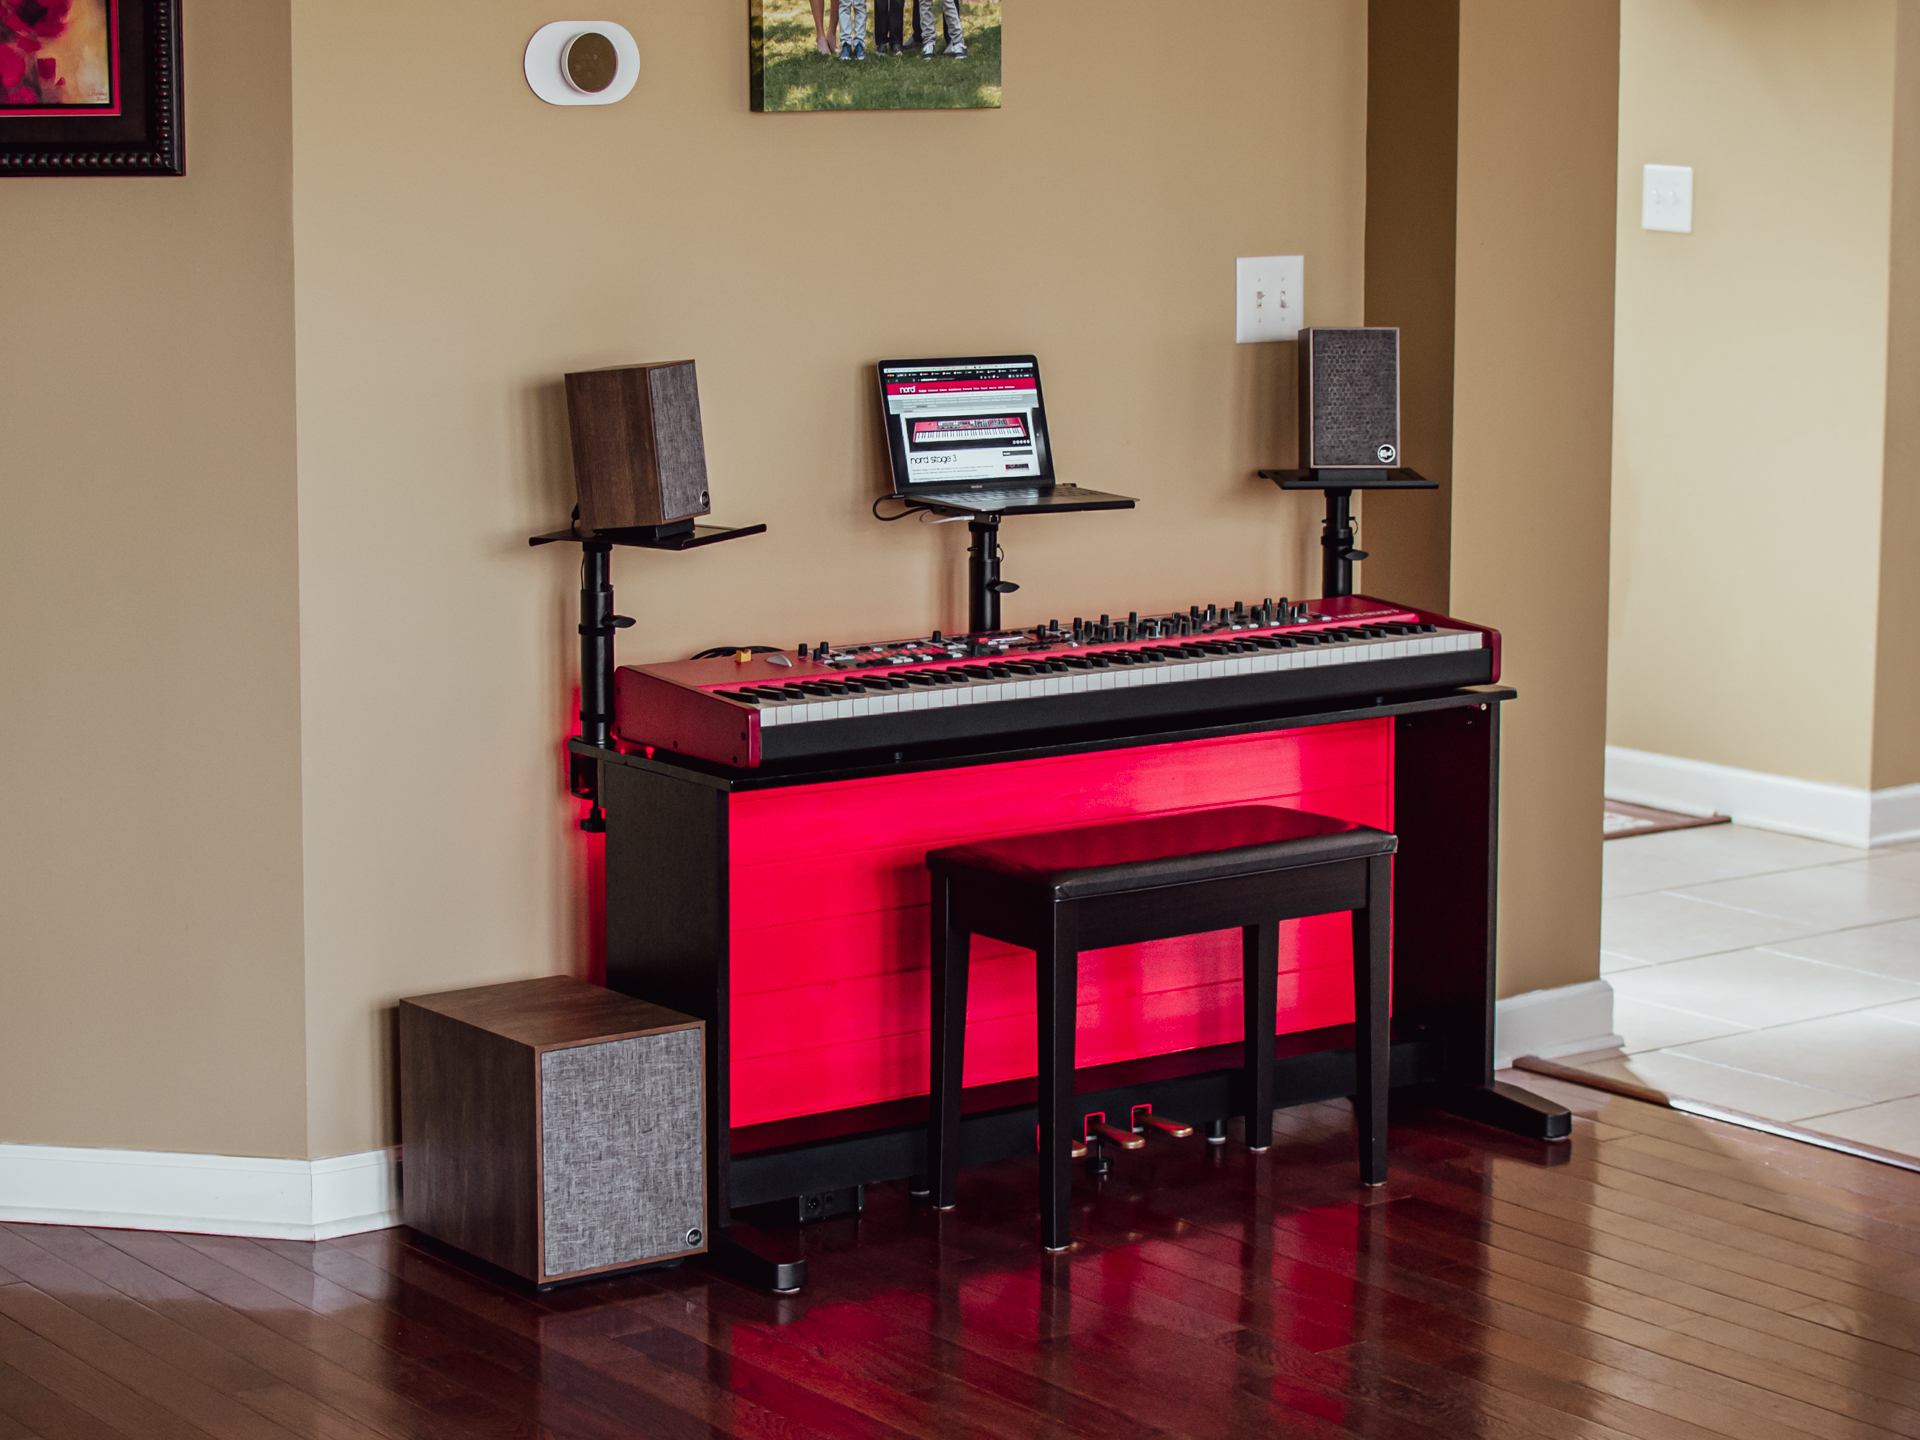
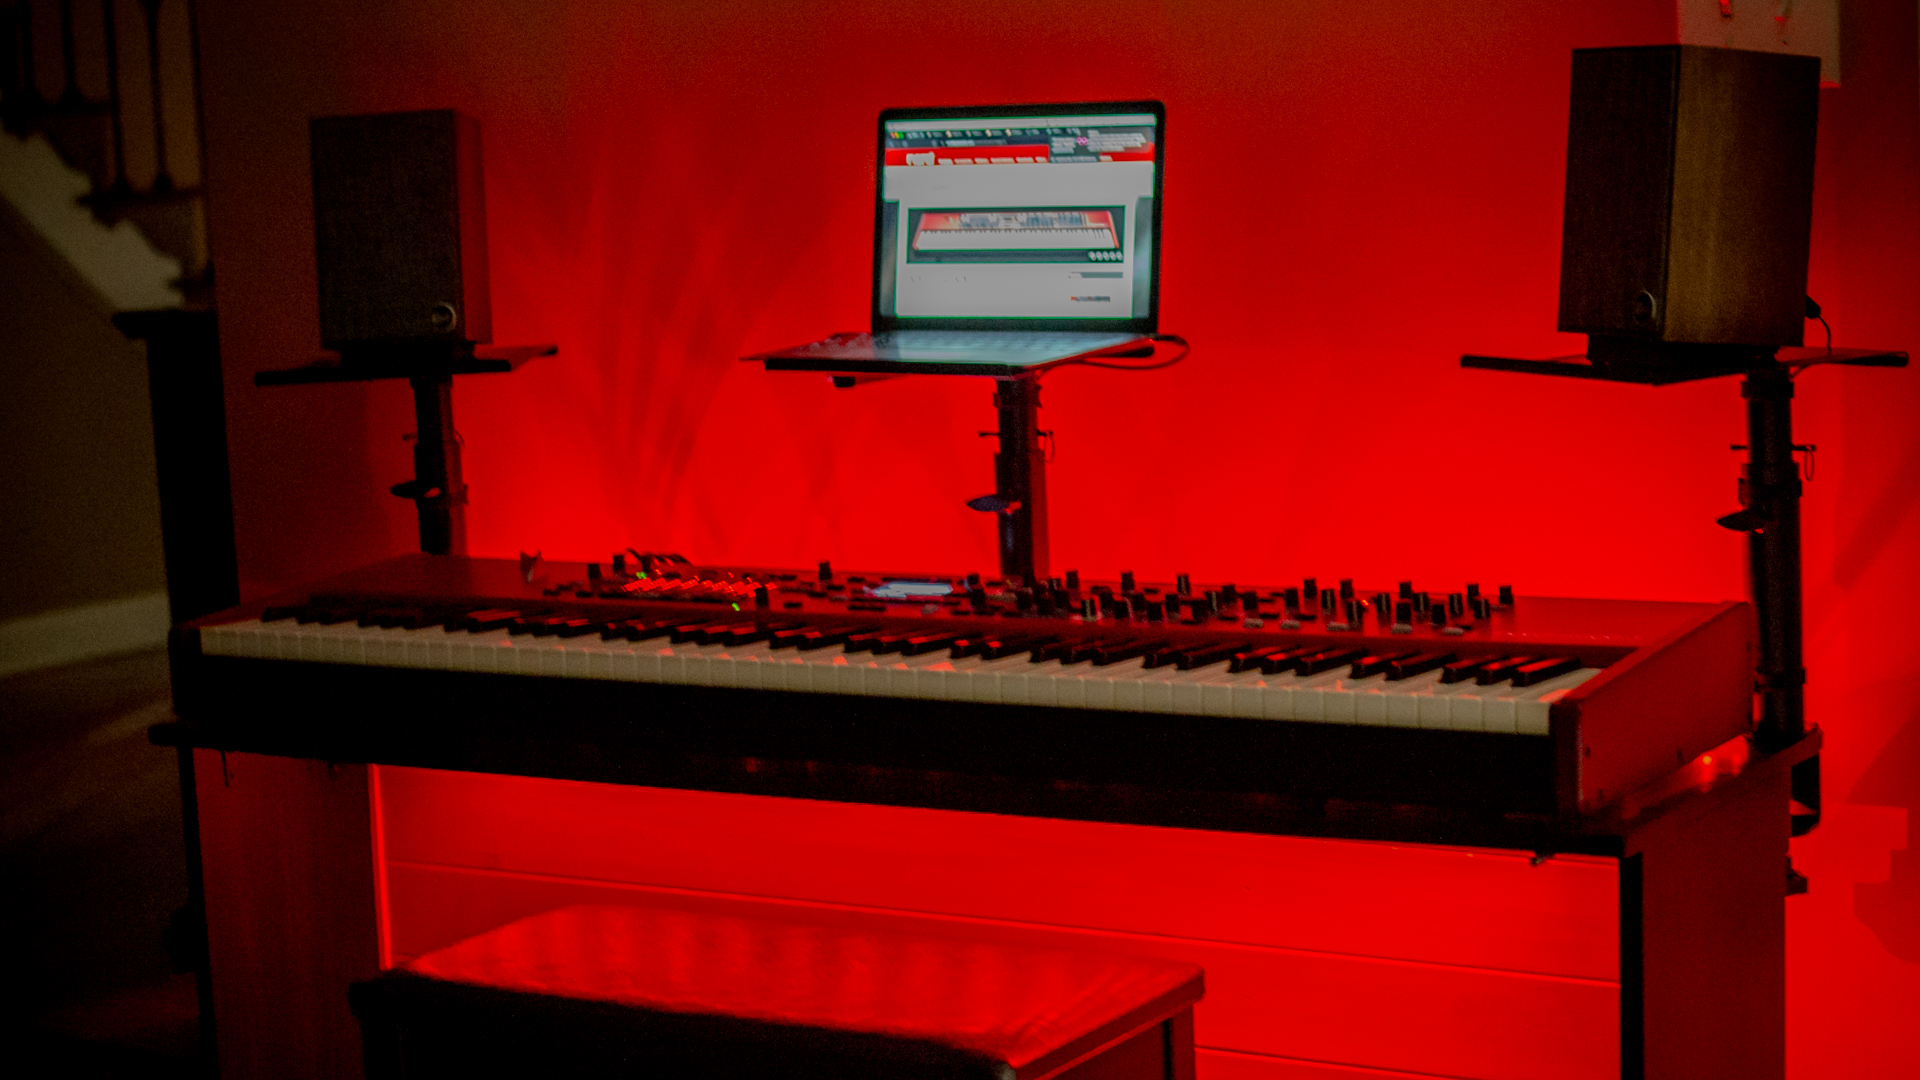
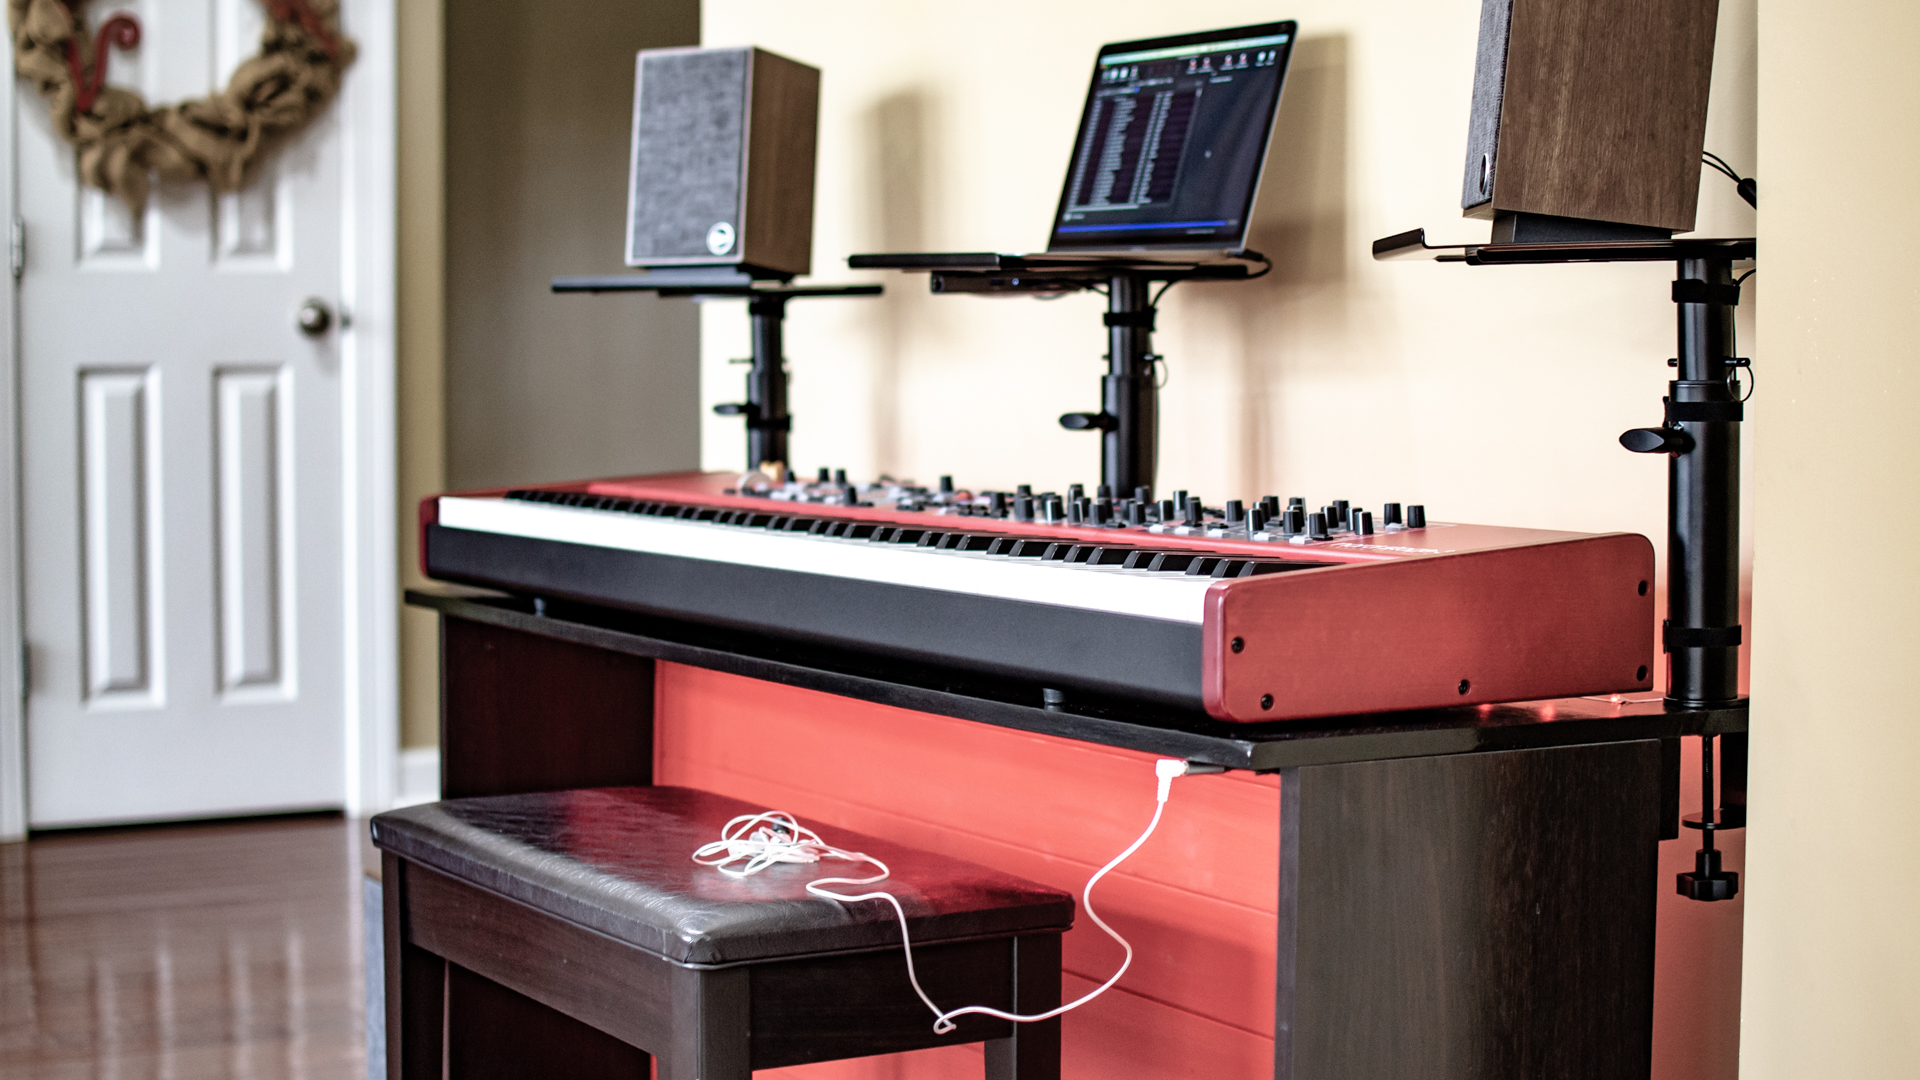
Dubbed “the ultimate instrument for the performing musician,” scores of reviews praise the Nord Stage lineup. When our family’s venerable Yamaha YDP-121 digital piano accumulated nearly as many stuck keys as working ones, I selected the Nord Stage 3 88 as our new digital instrument centerpiece. No doubt, the Nord Stage 3 is a magnificent keyboard.
In our home, the keyboard is part of the central living space — in the living room, at the edge that flows into the kitchen and bar. Unfortunately, most keyboard setups you’ll see leave wires dangling everywhere, or are best suited to a full home studio. I wanted the Nord Stage 3 to fit right into our living space with style, tech, and function.
Here’s how I created a high tech, low-clutter setup that showcases the Nord’s gorgeous styling in a compact, family-friendly setup.
Origins and inspirations
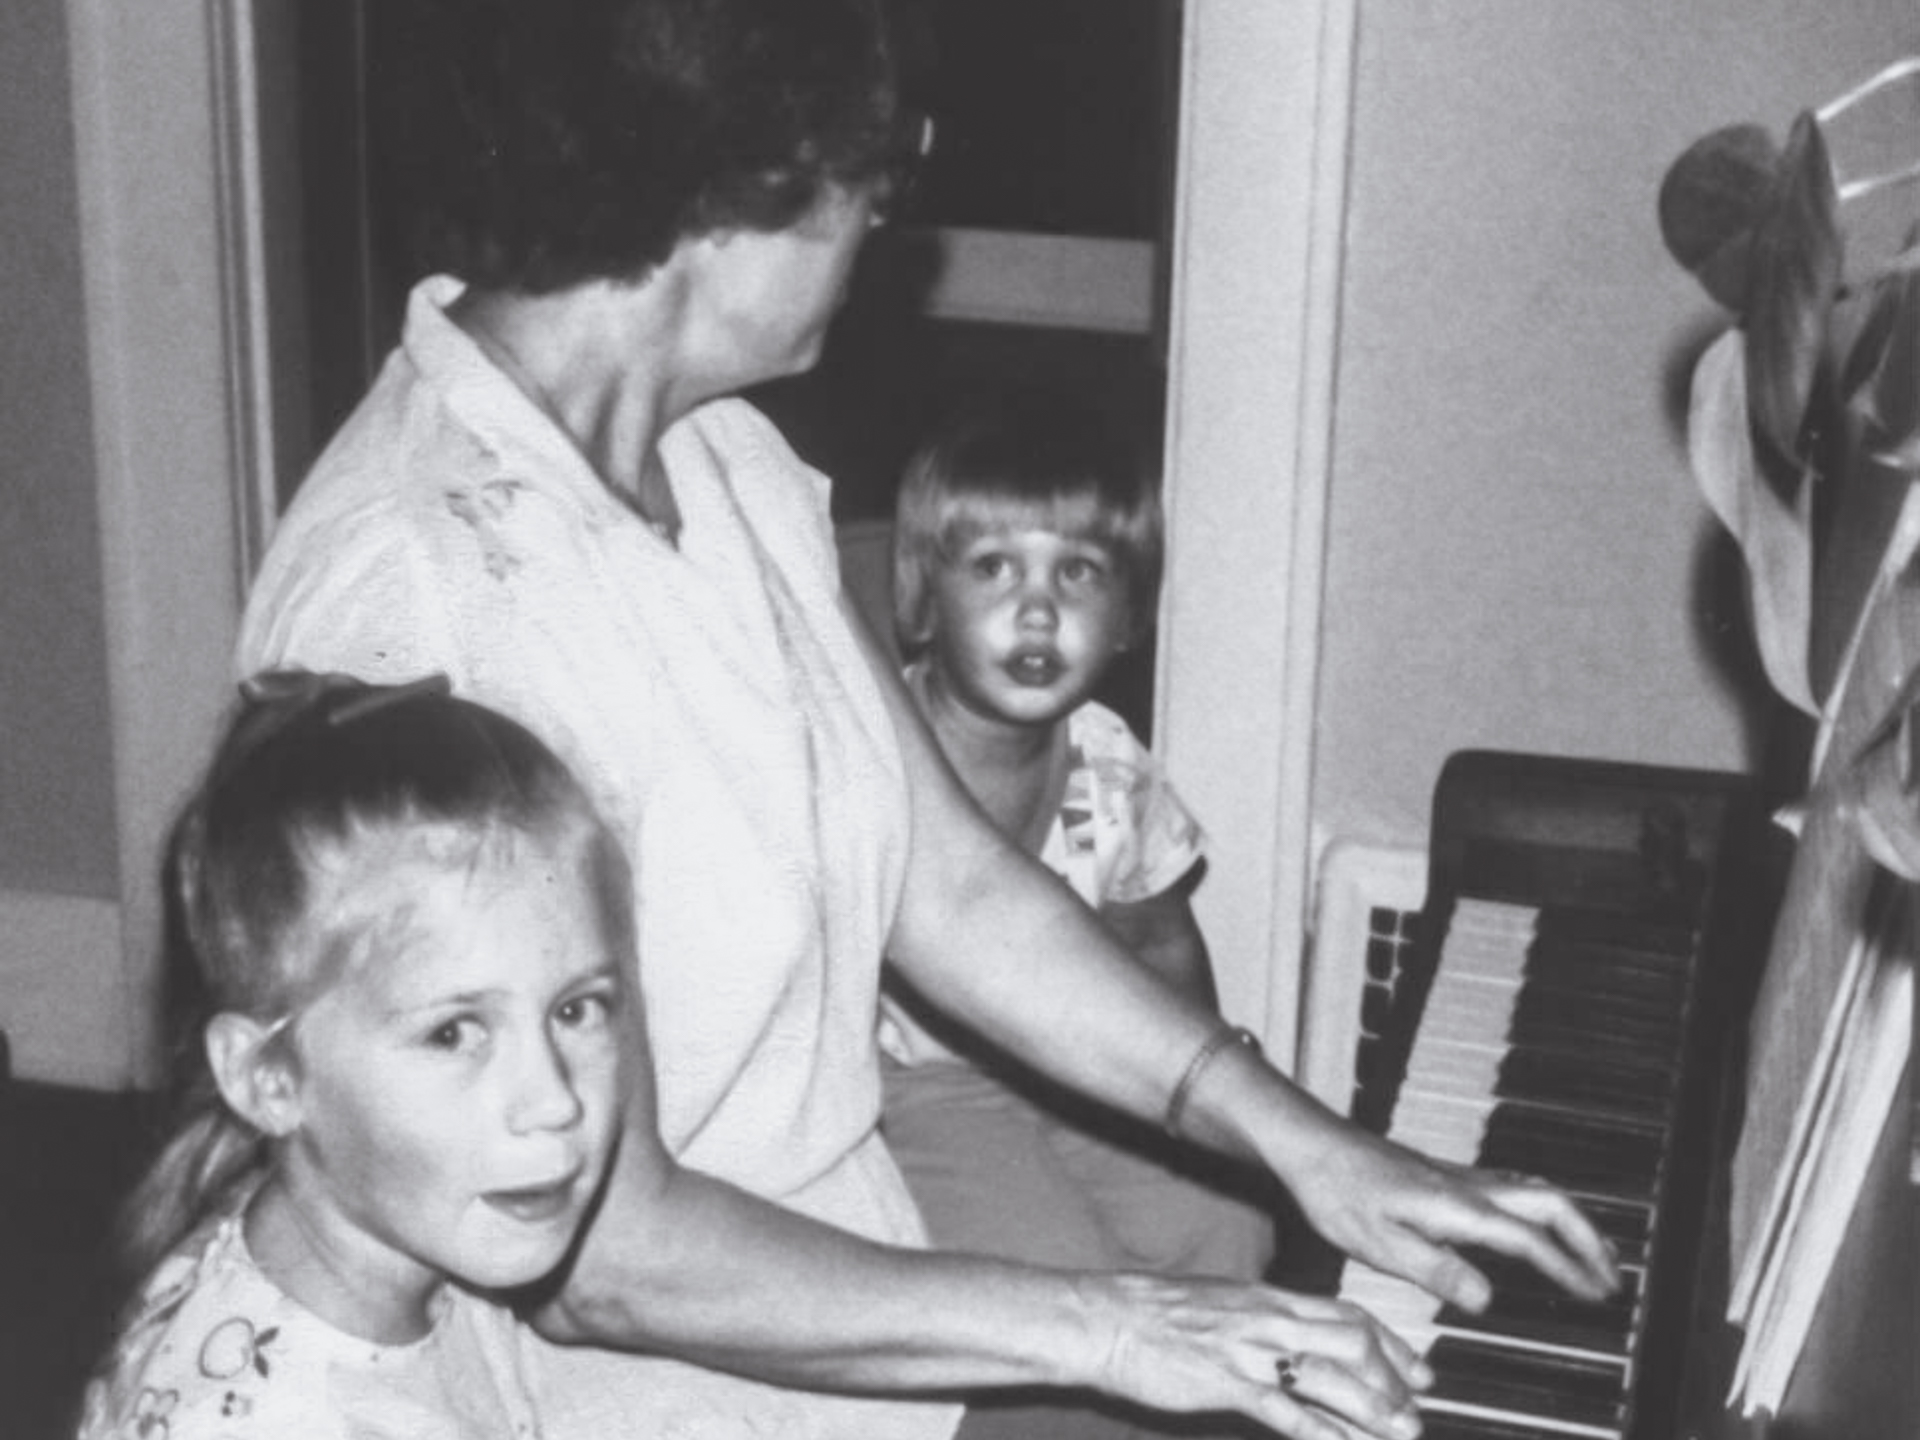
Making music with my Grandma
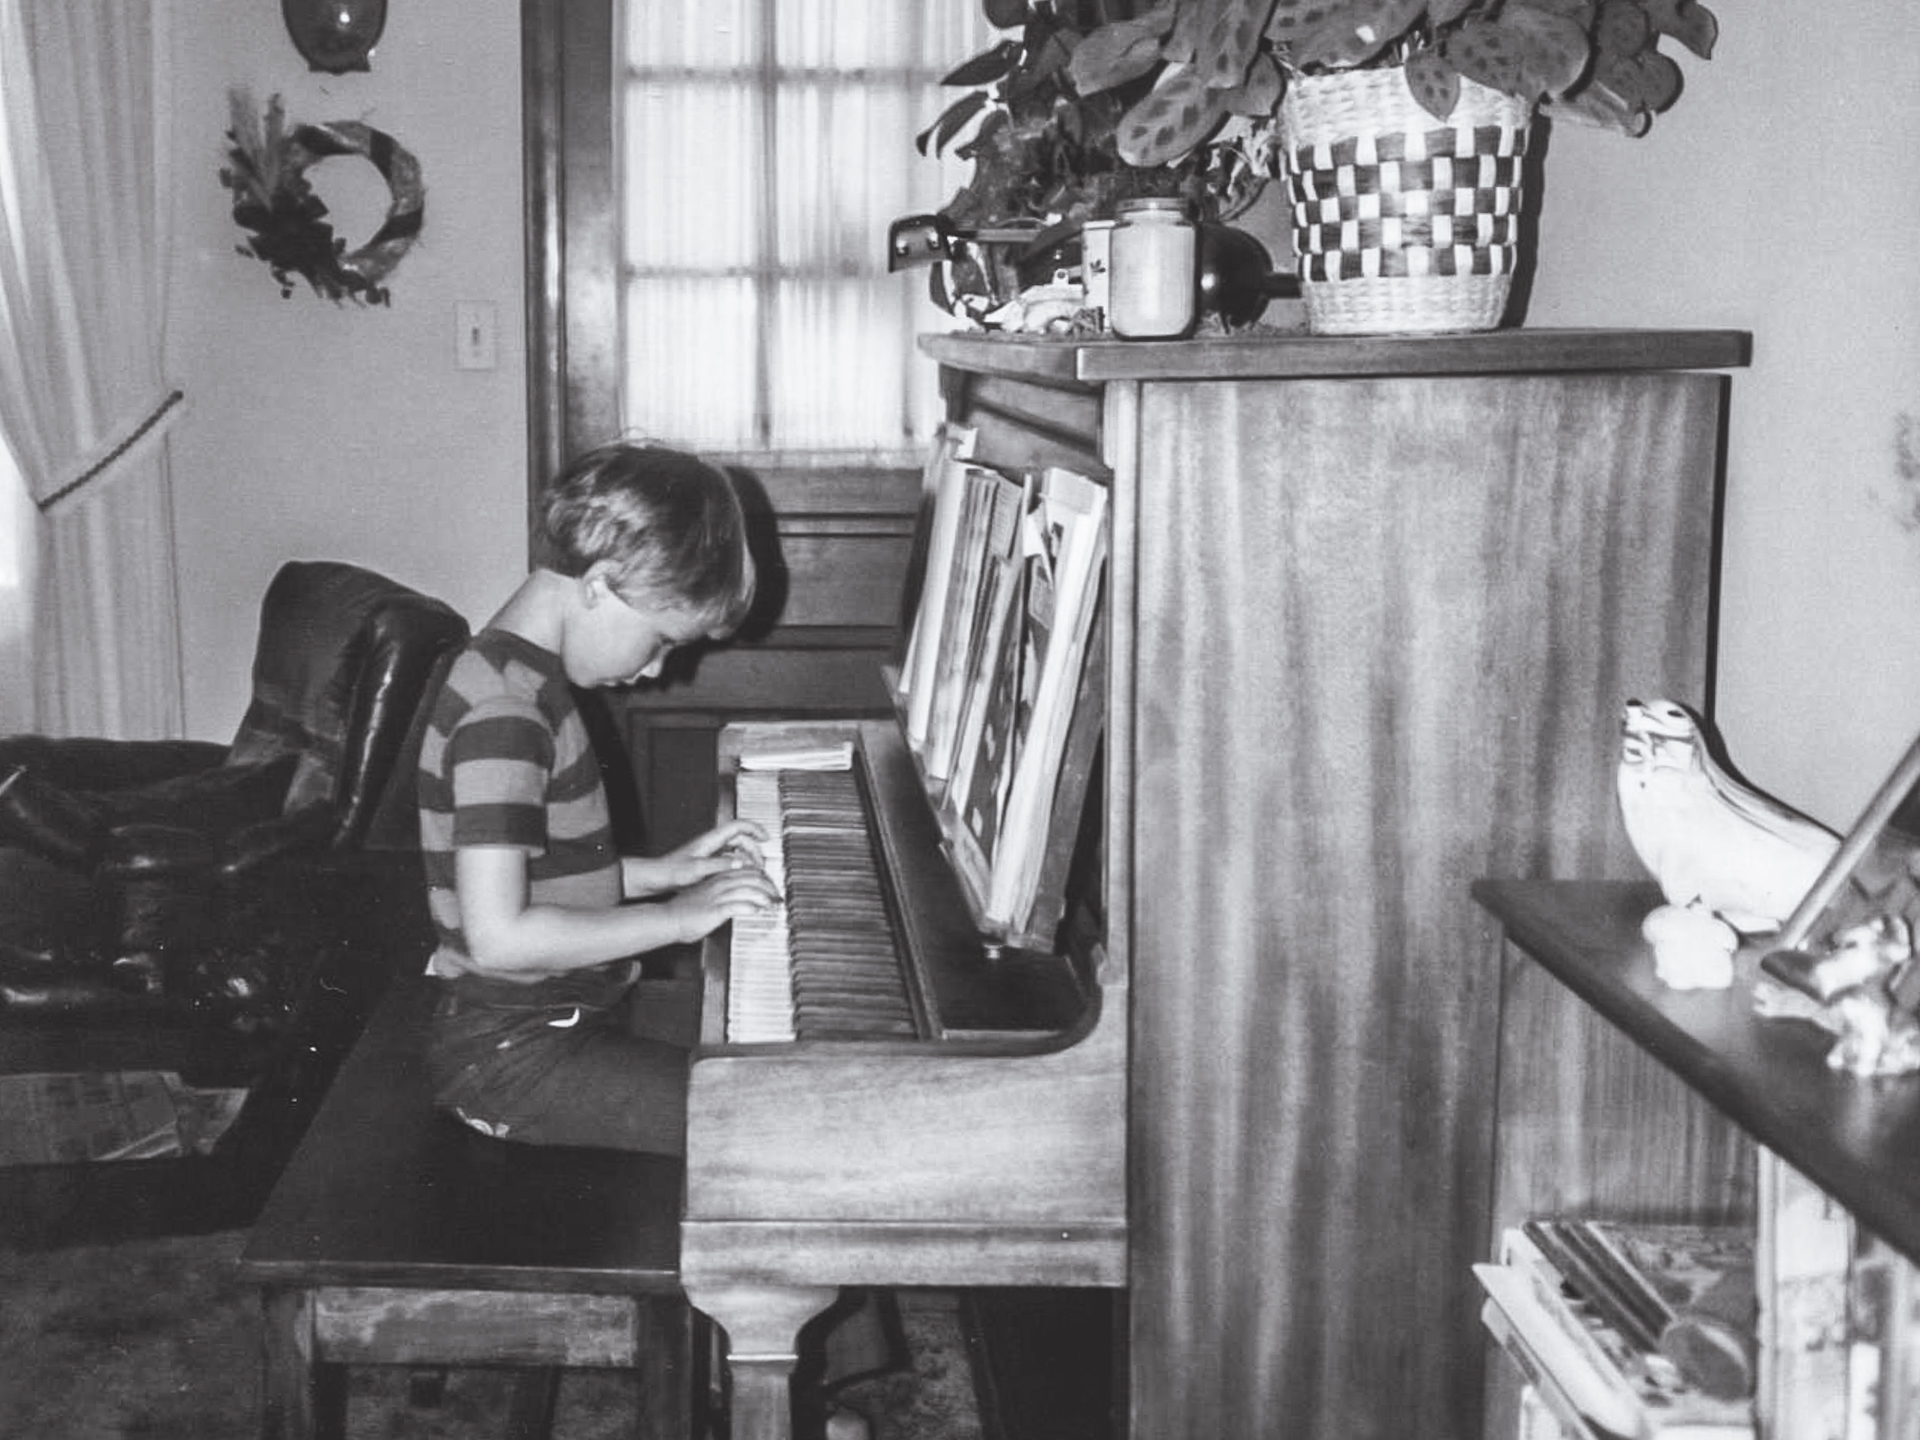
Practicing my piano lesson
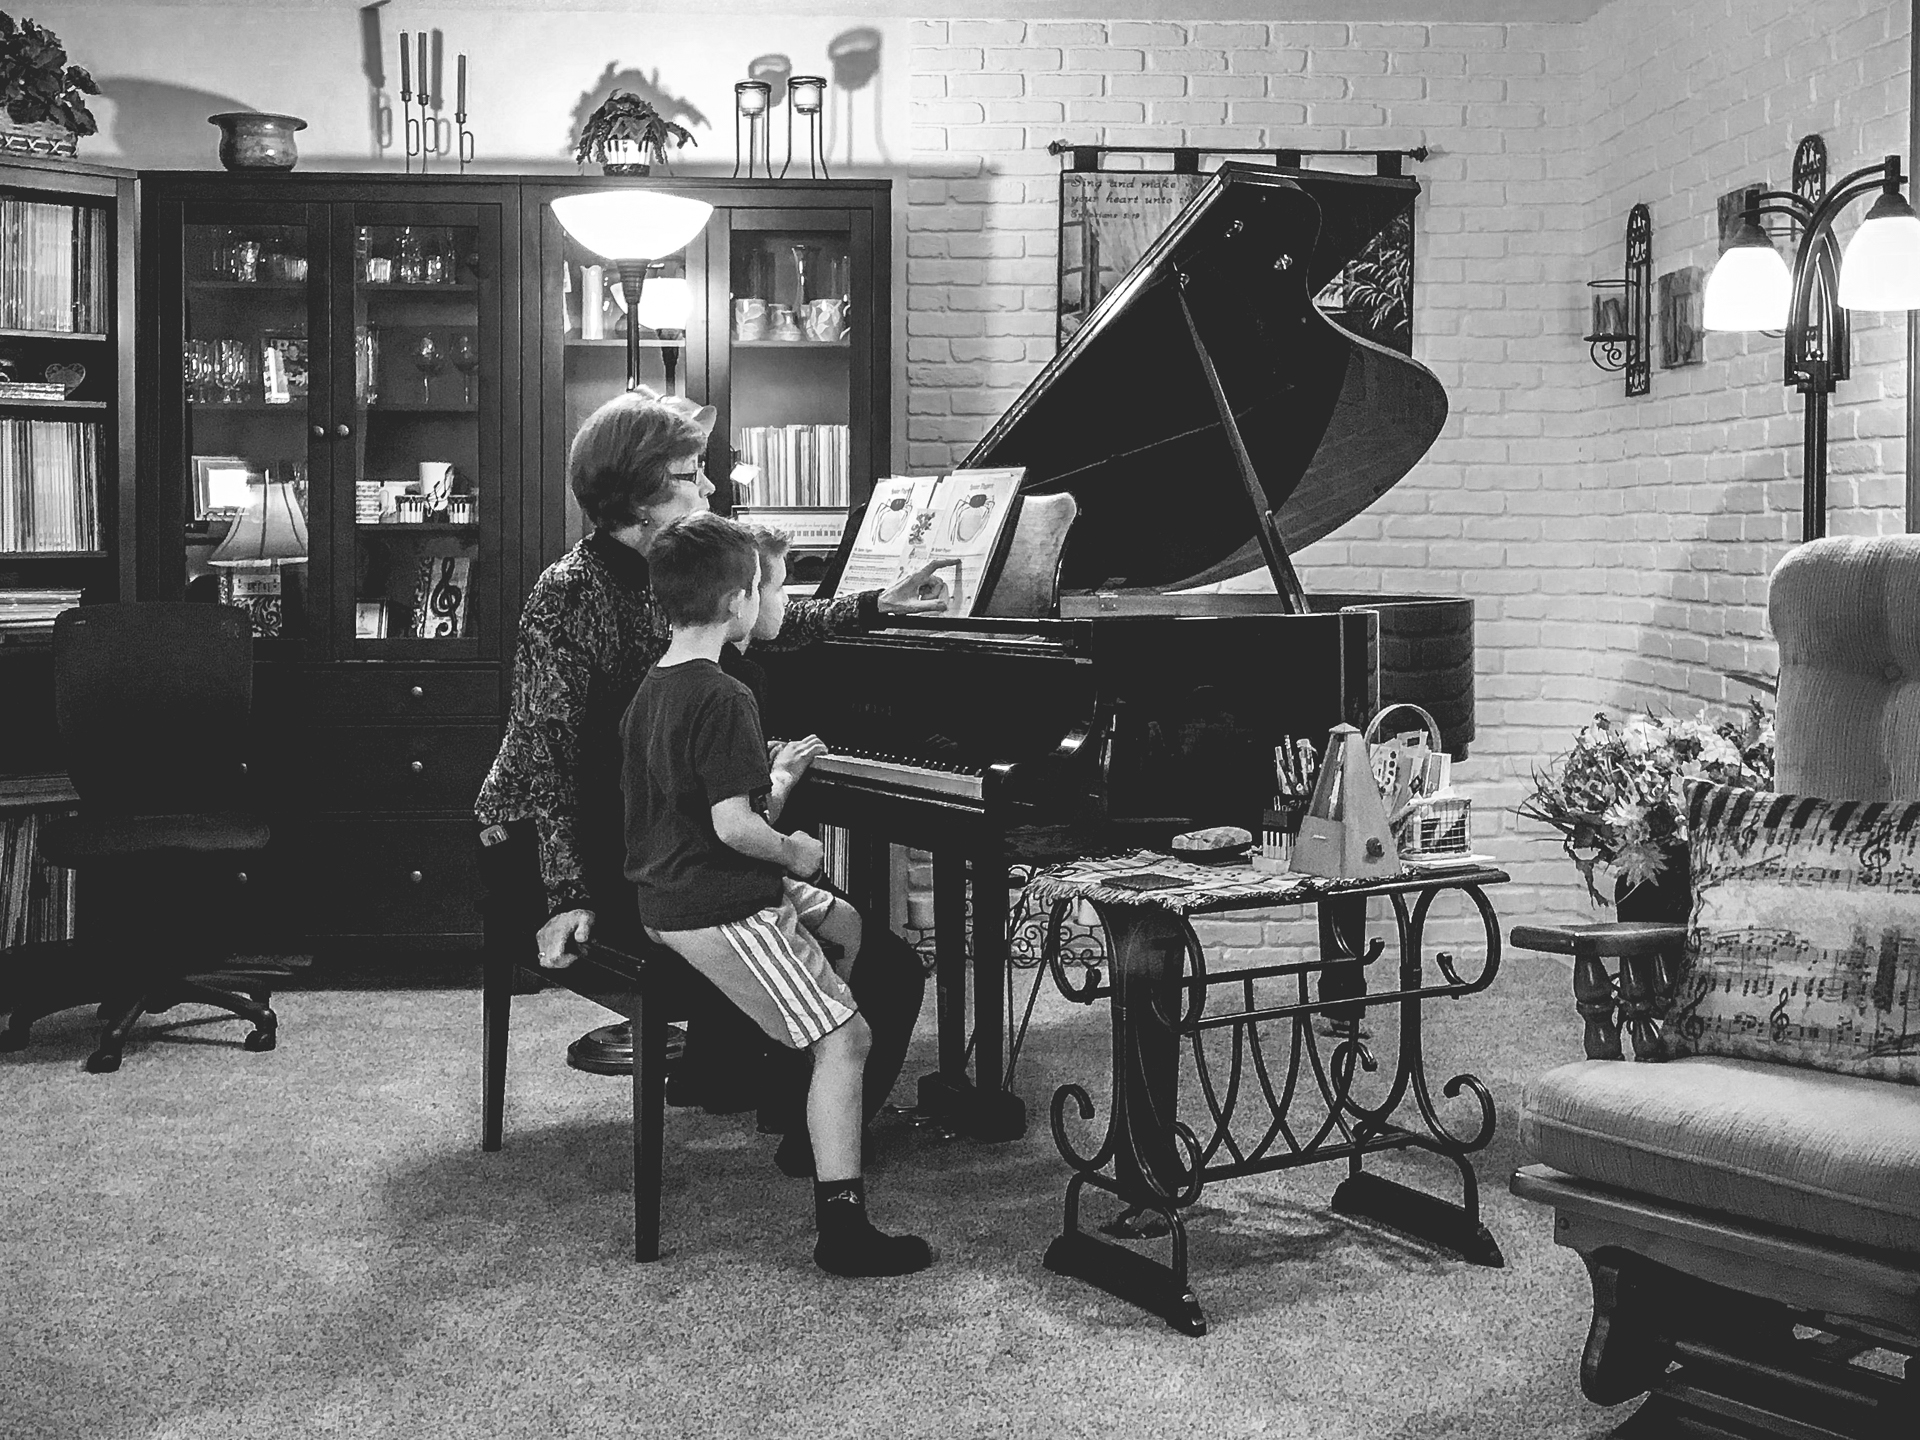
My mother teaching two of my boys
Duet improv on the YDP
Jam session
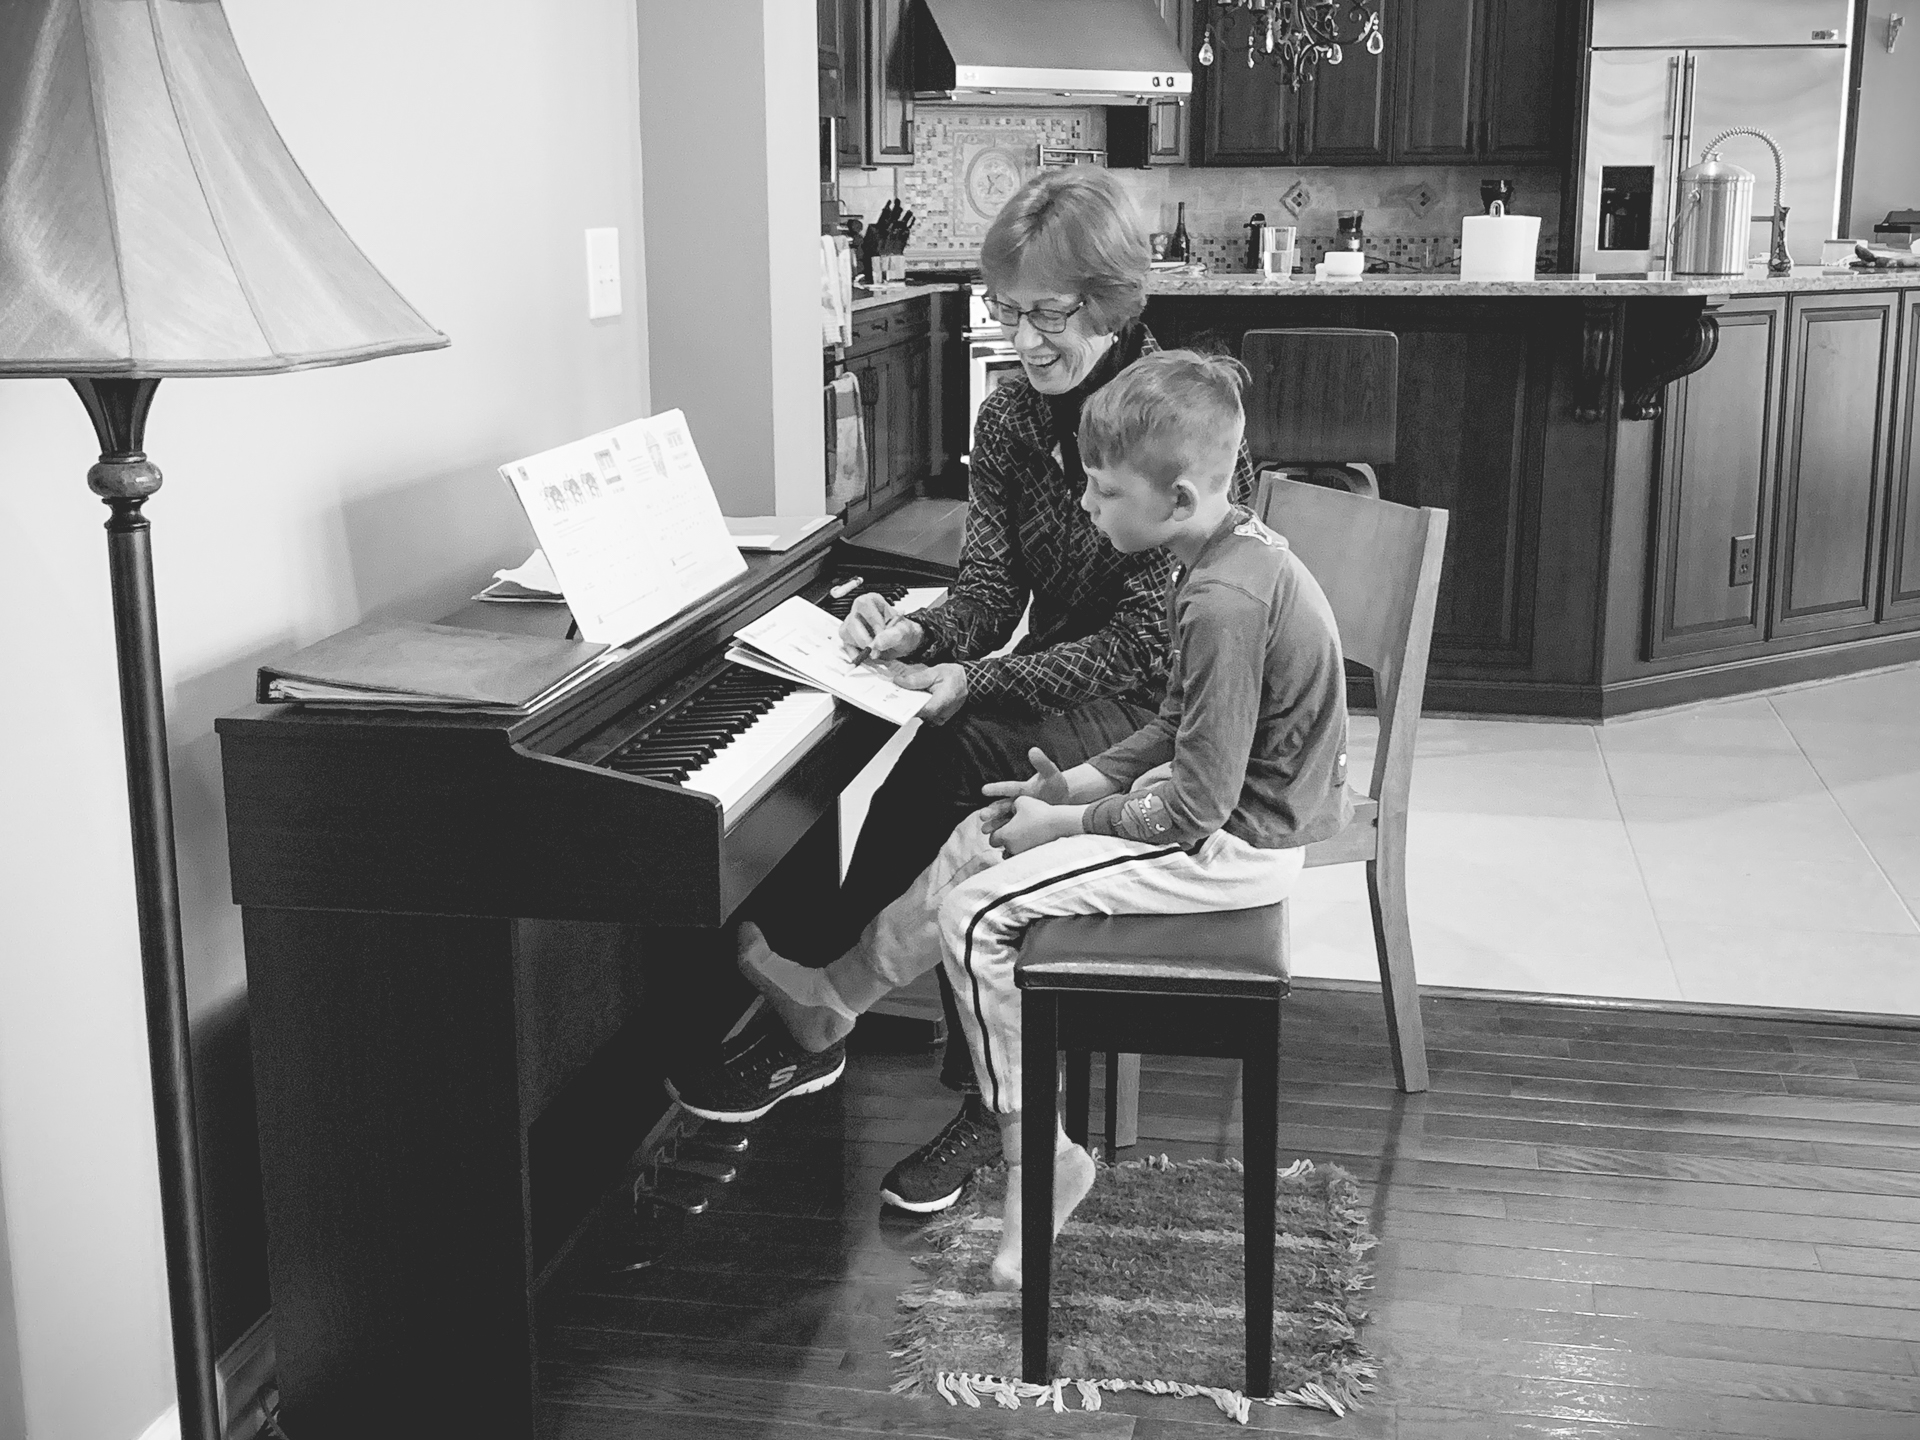
Piano lesson from Grandma for my youngest
Growing up in the early 90’s, I loved exploring the world of connecting synthesizers, sound modules, and computers through the MIDI standard. And though I didn’t realize it at the time, those experiences really opened my eyes to the power of data standards as a foundation for innovation that I’ve pursed now for my entire career in health informatics.
When it came time to replace the Yamaha digital piano, I was especially drawn to the Nord Stage 3 as both a step forward in capabilities and beauty, but also offering a return to the world of patches and soundscapes. I’m excited to rediscover this world.
As evidenced by my home office setup, I love technology but hate cord clutter. So the design of this setup really focused these key themes:
- Aesthetics that matched the Nord’s beauty
- Lots of tech components but keep a tidy appearance
- Compact form factor
An off-the-shelf option?
There are innumerable keyboard stands available on the market. Frankly, most are ugly. There were a handful of interesting hand made options on Etsy. I liked some of the midcentury modern ones, but they seem to obscure the Nord’s wide array of physical controls. And I didn’t find any that adequately dealt with cable clutter. On the flip side, there are many examples of gorgeous home studio setups. But we simply don’t have enough space for those big studio desks.
My first serious consideration was the Nord Wood Keyboard Stand V4.
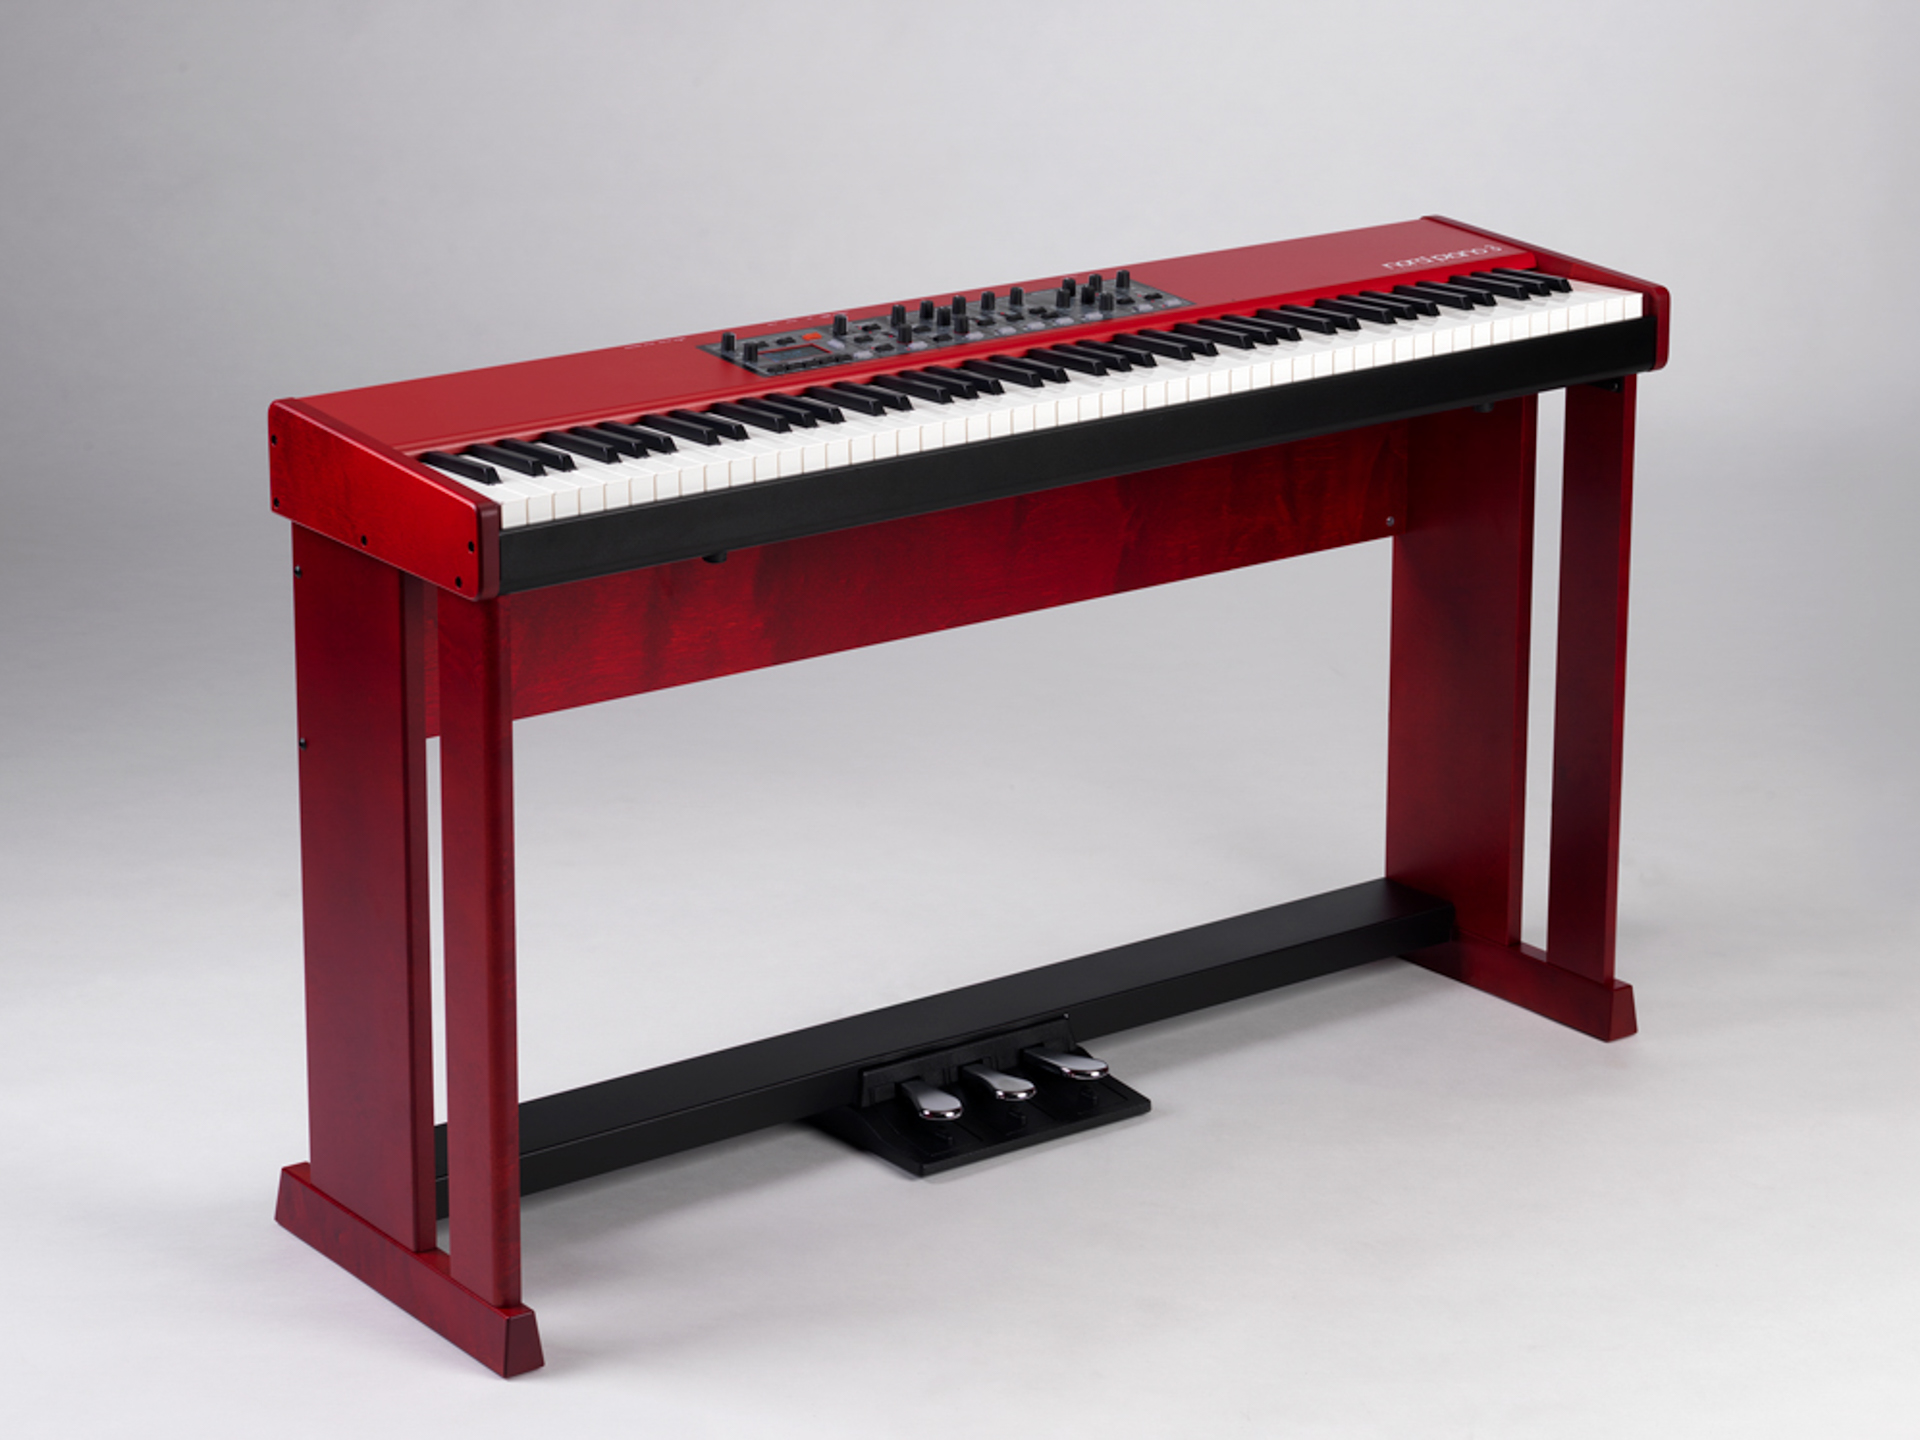
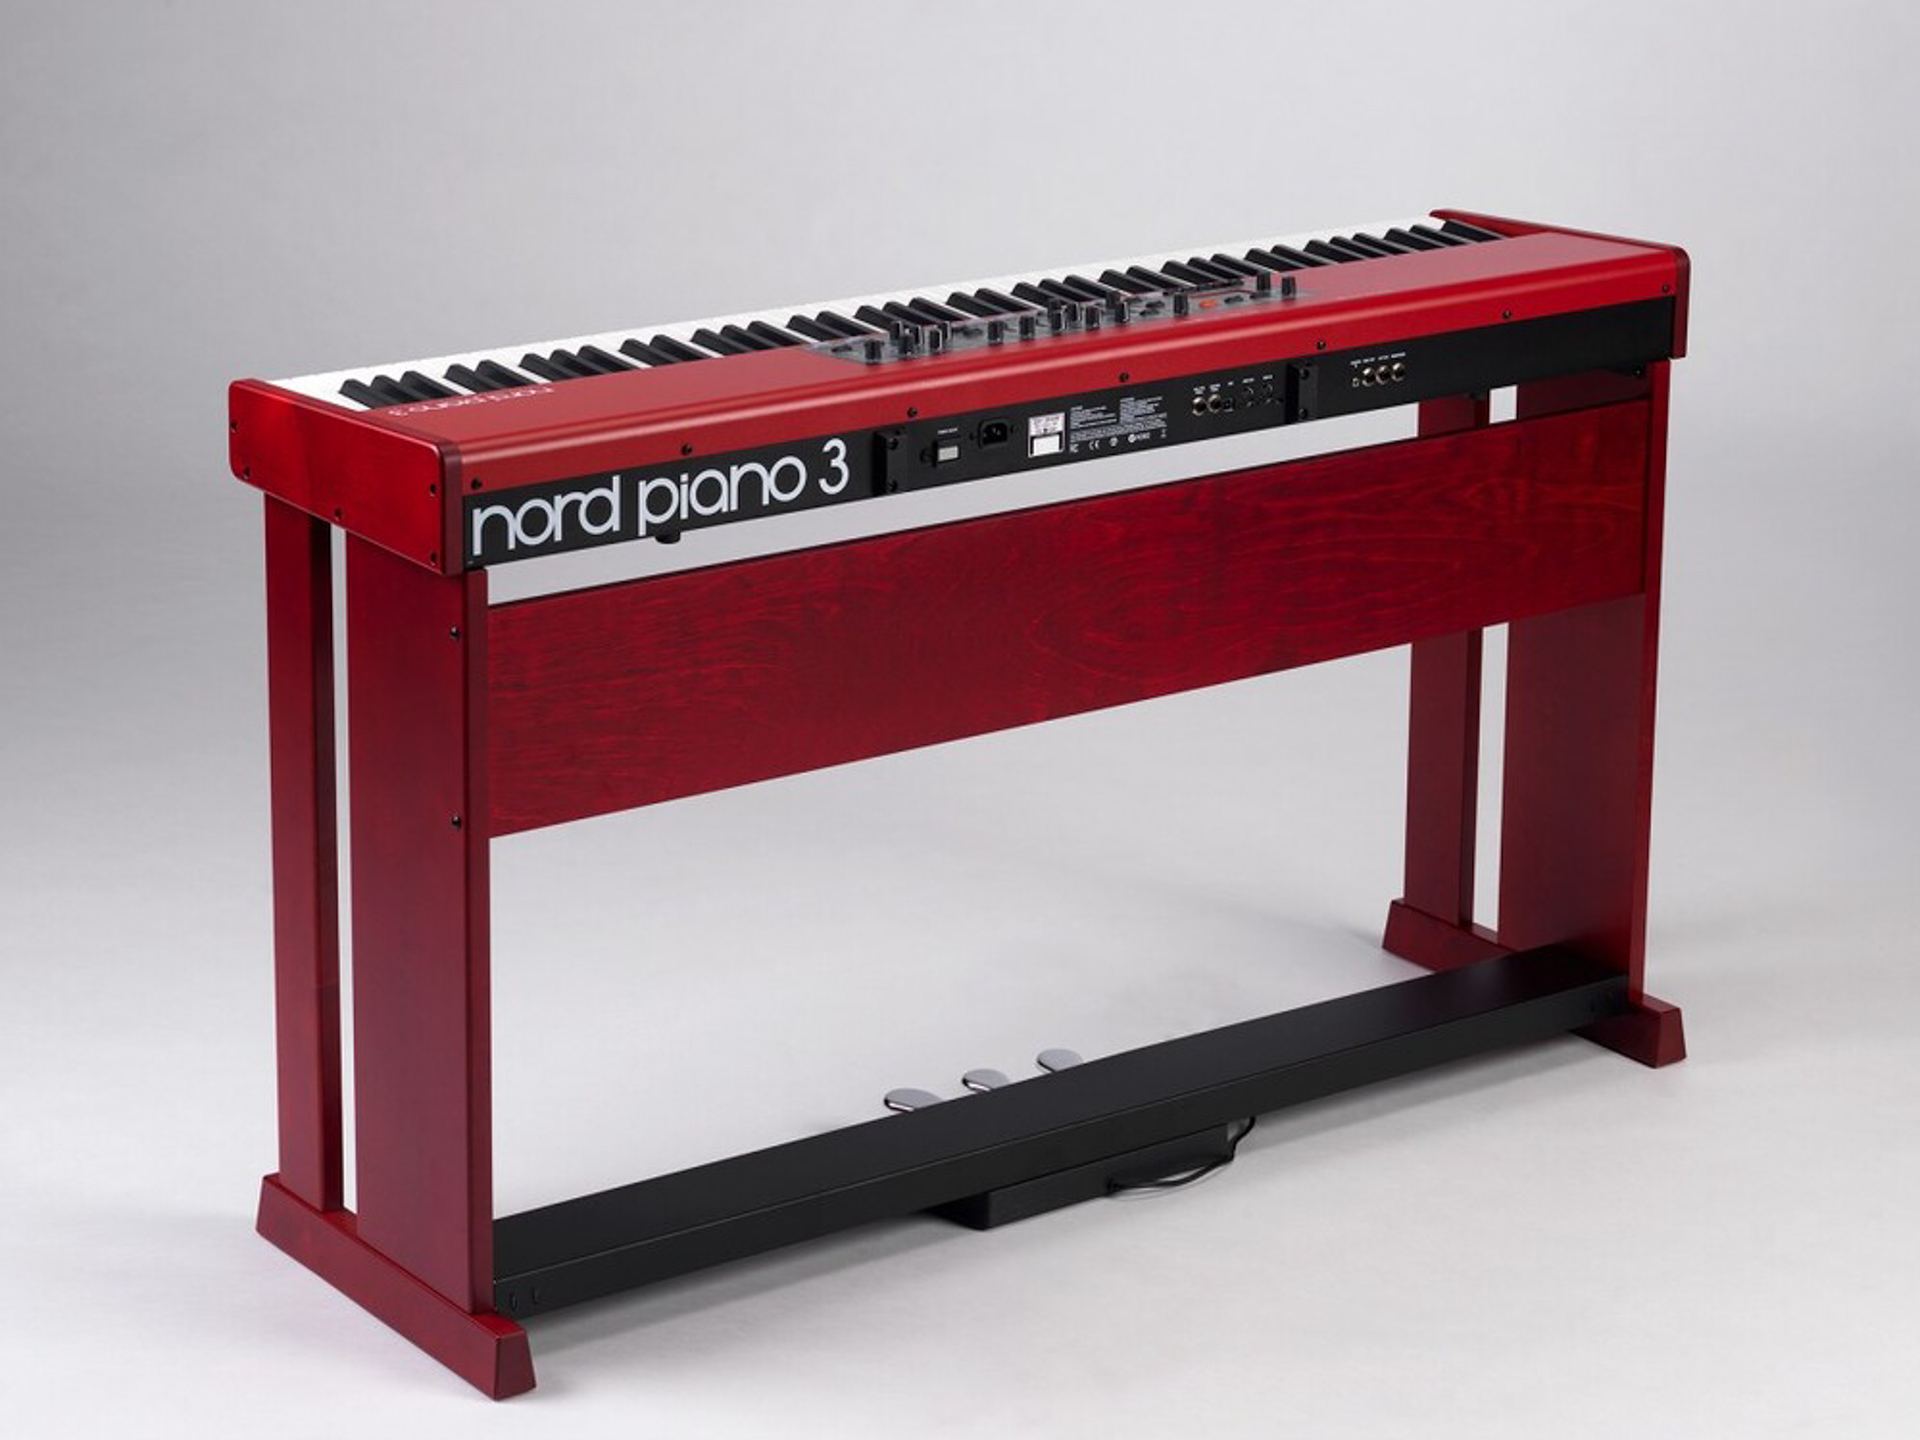
It is beautiful and highlights the signature Nord red color. We also use a deep red as an accent color in our living room, so that was attractive. But there were three main drawbacks. First, it’s a bit pricey at $1000. Second, the back is open, which meant that I’d need some other solution to deal with all the cord clutter. And third, the options for mounting speakers and a laptop and/or music stand were limited to the mount points on the keyboard itself. But I wasn’t excited about that because you’d have to disassemble it all before moving the keyboard (e.g. to take it to a gig).
Despite these drawbacks, the Nord wood stand gave me a vision for a new design — using parts from the Yamaha YDP as a starting point.
Custom stand design
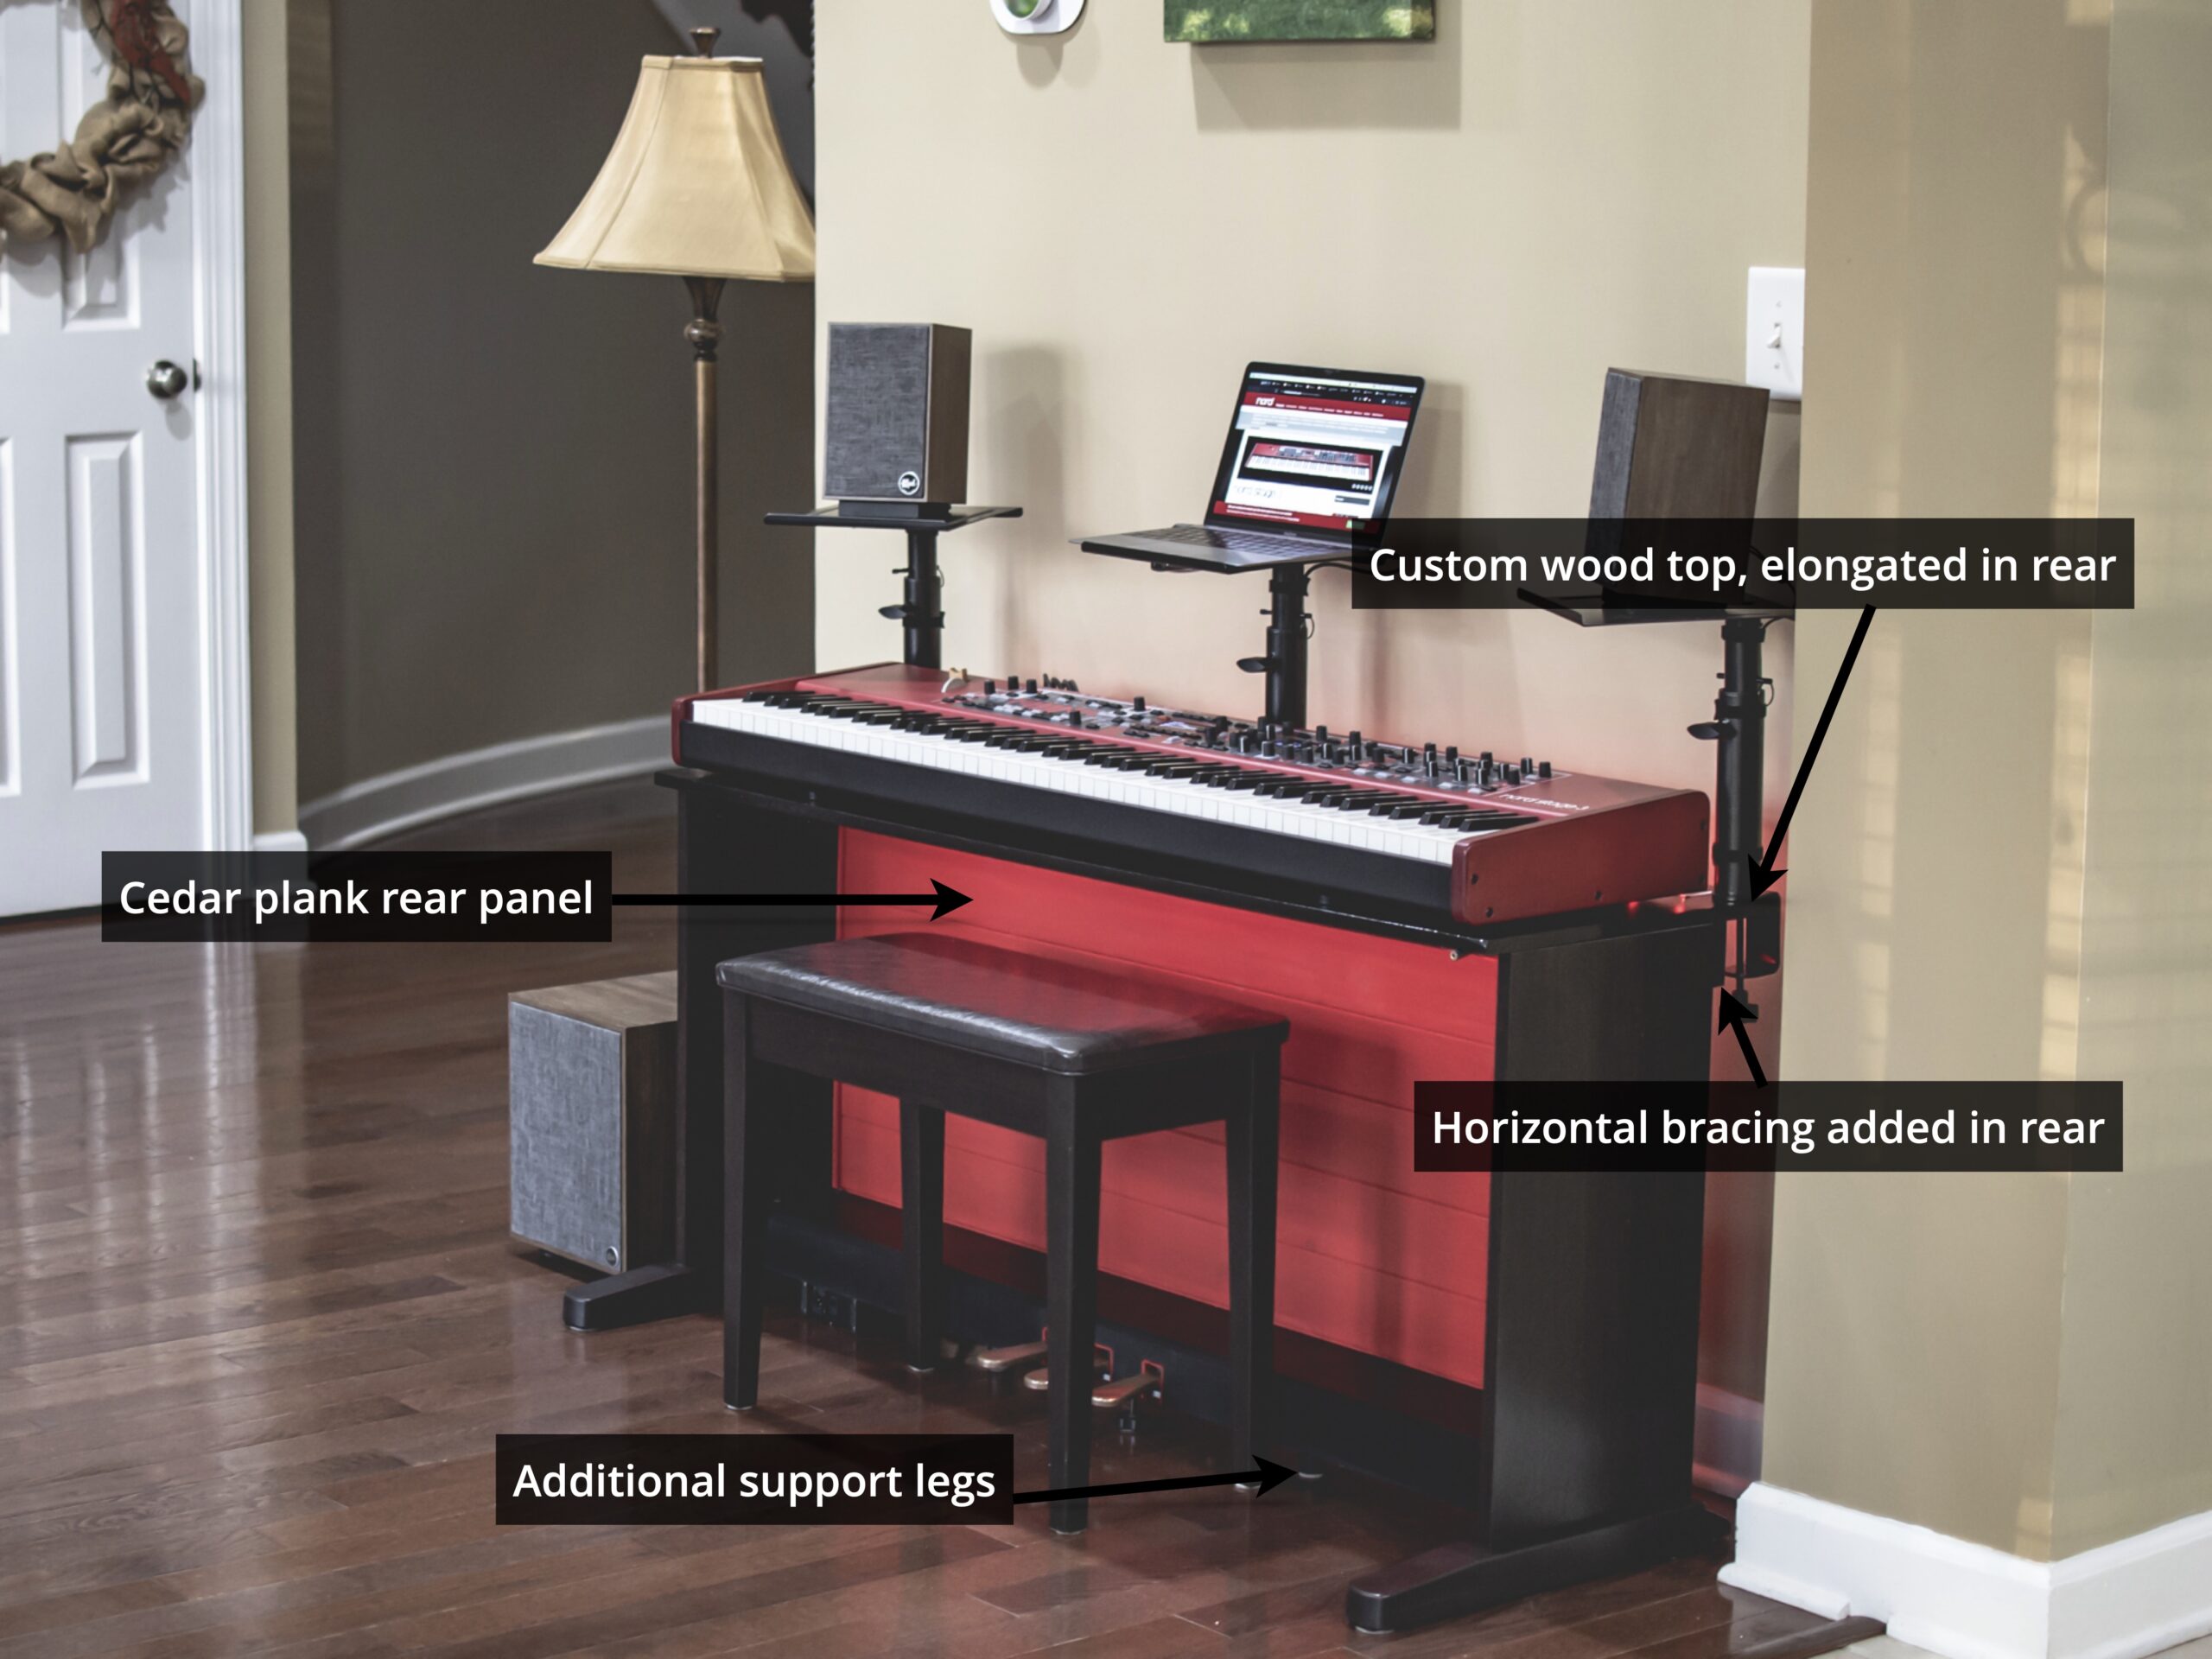
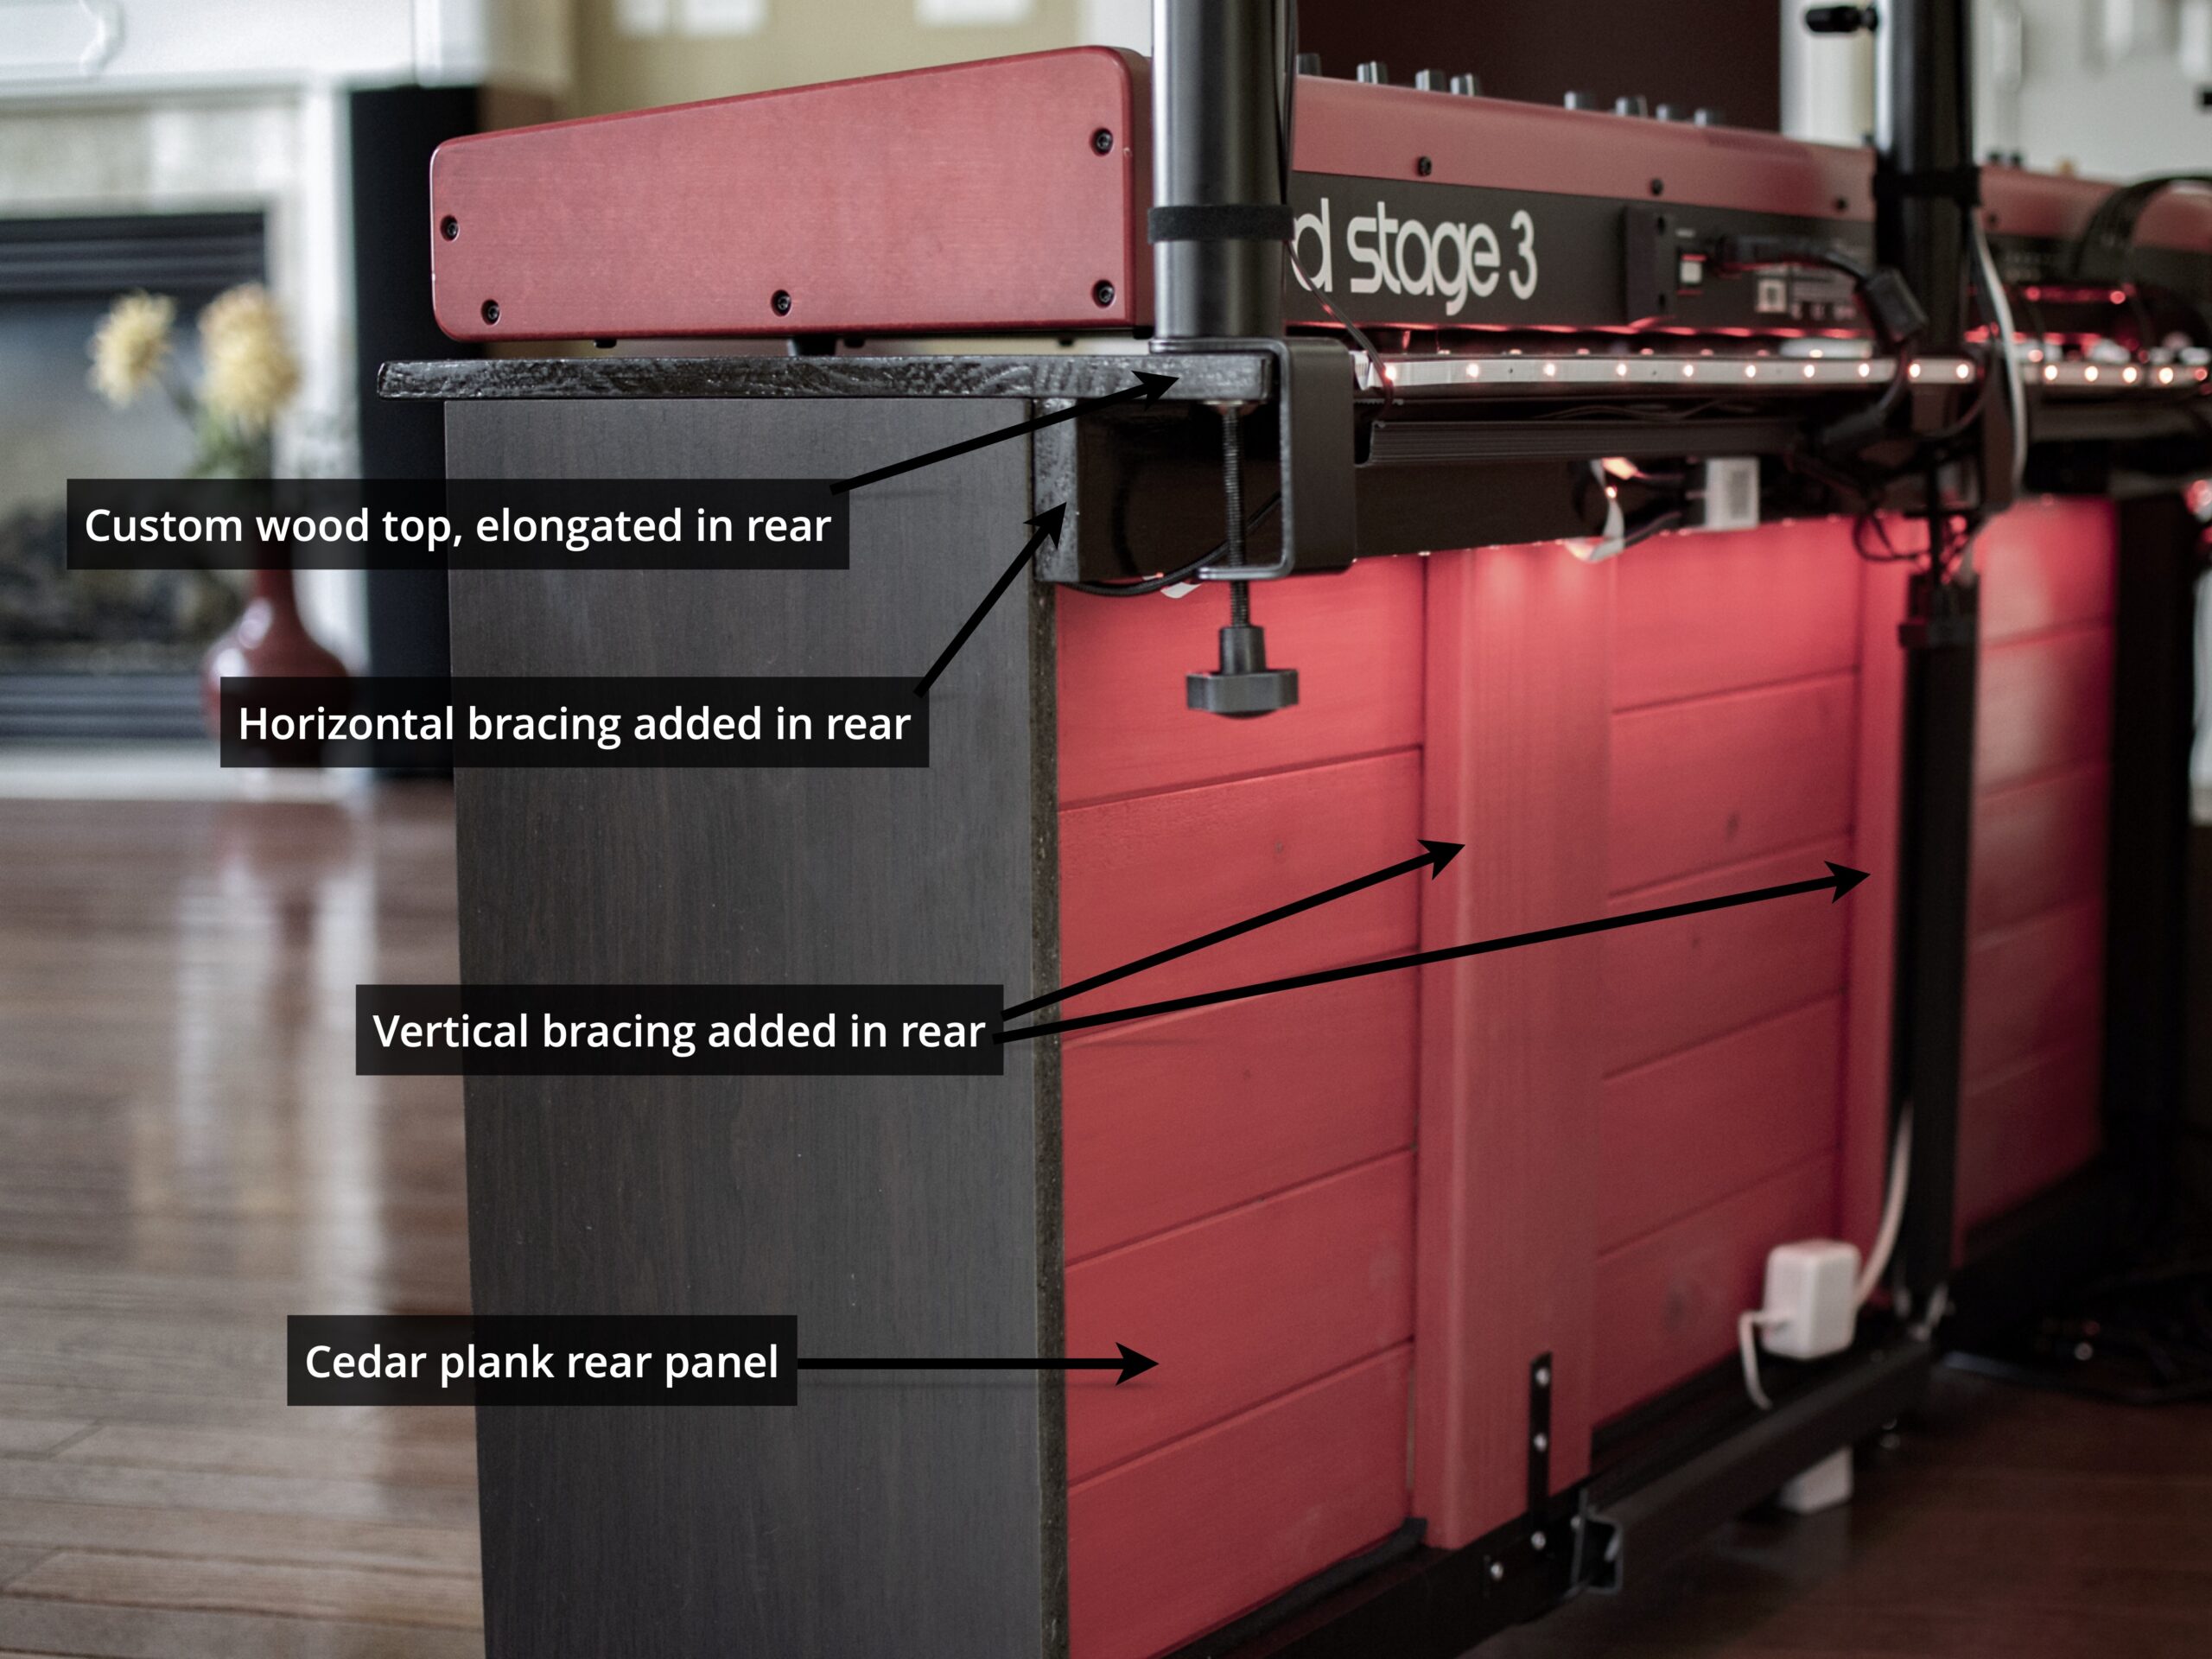
The Nord is pretty heavy…weighing in at 42lbs. After testing with some wood I had on hand, I was worried the wood would bow over time and bounce with heavy playing. So the final design included bracing components across the width to reinforce for stability. The depth of the top was extended about 3 inches past the rear of the keyboard to provide a mounting surface and space for cable routing (more on that later). I finished the wood top with several coats of oil-based satin stain and polycrylic clear topcoat.
Like the Nord wood stand, the YDP’s rear panel did not fully cover the space between the top and bottom. Although you can’t see it in the photos above, the YDP had a gap of about 6” from the top. If you are sitting on our couches in the living room, this gap, and any cords in the back, were visible. To solve this problem I fashioned a new rear panel from tongue and groove cedar planks. Painted red for the Nord vibe and a nice accent, the cedar planks are quite lightweight. A fully covered back panel also enabled me to add some vertical bracing underneath the top.
To further bolster the support, I added two adjustable furniture leg braces under the lower support beam.
Electronic enhancements
Pedals
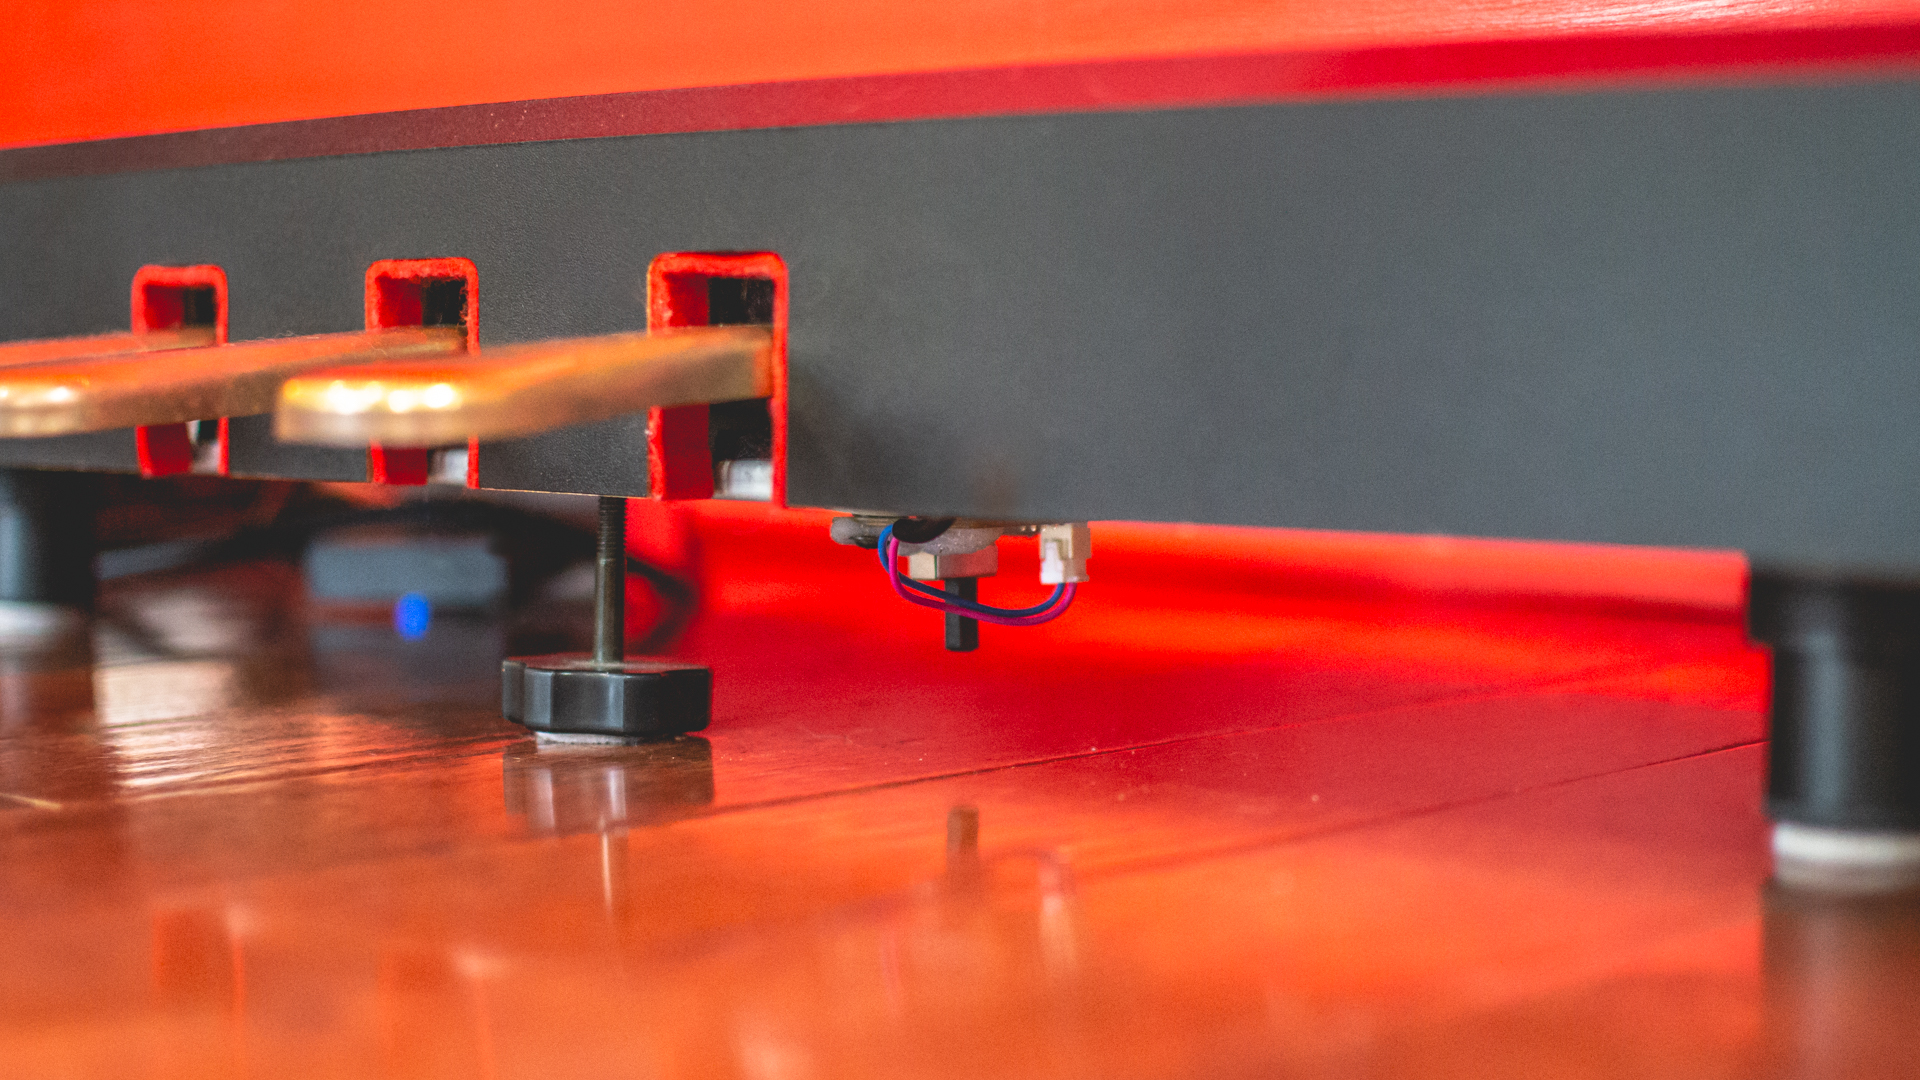
If you’re a Nord nerd, you are probably wondering if that is a Nord Triple Pedal the base. It is not. These are the actual pedals from the Yamaha YDP. Mounting the Nord Triple Pedal on the lower support beam was going to be problematic and I liked the mechanical action of the Yamaha pedals. (They feel like a real piano).
There was one big problem — the Yamaha’s sustain (damper), sostenuto, and soft pedal are wired through a proprietary 6-pin DIN cable that would not work with the Nord. So I purchased a cheap, but well-reviewed universal sustain pedal. I removed all the electronics and custom mounted the sensor in such a way that it is triggered by the Yamaha pedal hardware and plugs into the Nord via a standard 1/4” cable.
At the moment, the middle and left pedals aren’t being used because I am still debating which of the other pedal options for the Stage 3 I’d find most useful. At this point, I’m leaning towards a similar rewiring or custom mounting for a Program pedal (for changing between programs in the Program or Song bank) and Control/expression pedal (for controlling volume/swell). However, the expression pedal in particular would be a complicated endeavor.
LED lighting
Headphone extension
When I play with headphones I typically use my trusty MEE Audio in-ear monitors. The headphone extension converts the Nord’s 1/4” jack to the 1/8” size needed for the in-ear monitors, and places the headphone cable out of the way (rather than draping across the top of the keyboard if you plug into the back of the Nord ). This position also ensures there’s plenty of slack in the cable.
Klipsch powered speakers
Since the Nord is meant to play through a sound system, I turned to Klipsch, my favorite speaker brand, for a compact powered speaker setup. I’ve been a huge fan of Klipsch speakers for a long time, even before moving to Indianapolis — the home of Klipsch’s headquarters. Basically all of the speakers around my house are from Klipsch.
To make the Nord sound its best, I wanted speakers that would work well from a near field position — without jumping in cost to elite level studio monitors. The Klipsch Promedia Heritage 2.1 Multimedia System (in walnut) definitely fits the bill. This set features beautiful midcentury modern styling, and the Klipsch classic soft dome tweeters on Tractrix horns. Those horns are a proprietary technology that have been the driving force behind the stunningly precise Klipsch acoustics. This set also features a best-in-class 8″ subwoofer with a 100-watt amplifier, which produces deep, musical bass. Overall, I am really happy with the room-filling sound of this 3 piece amplified speaker set.
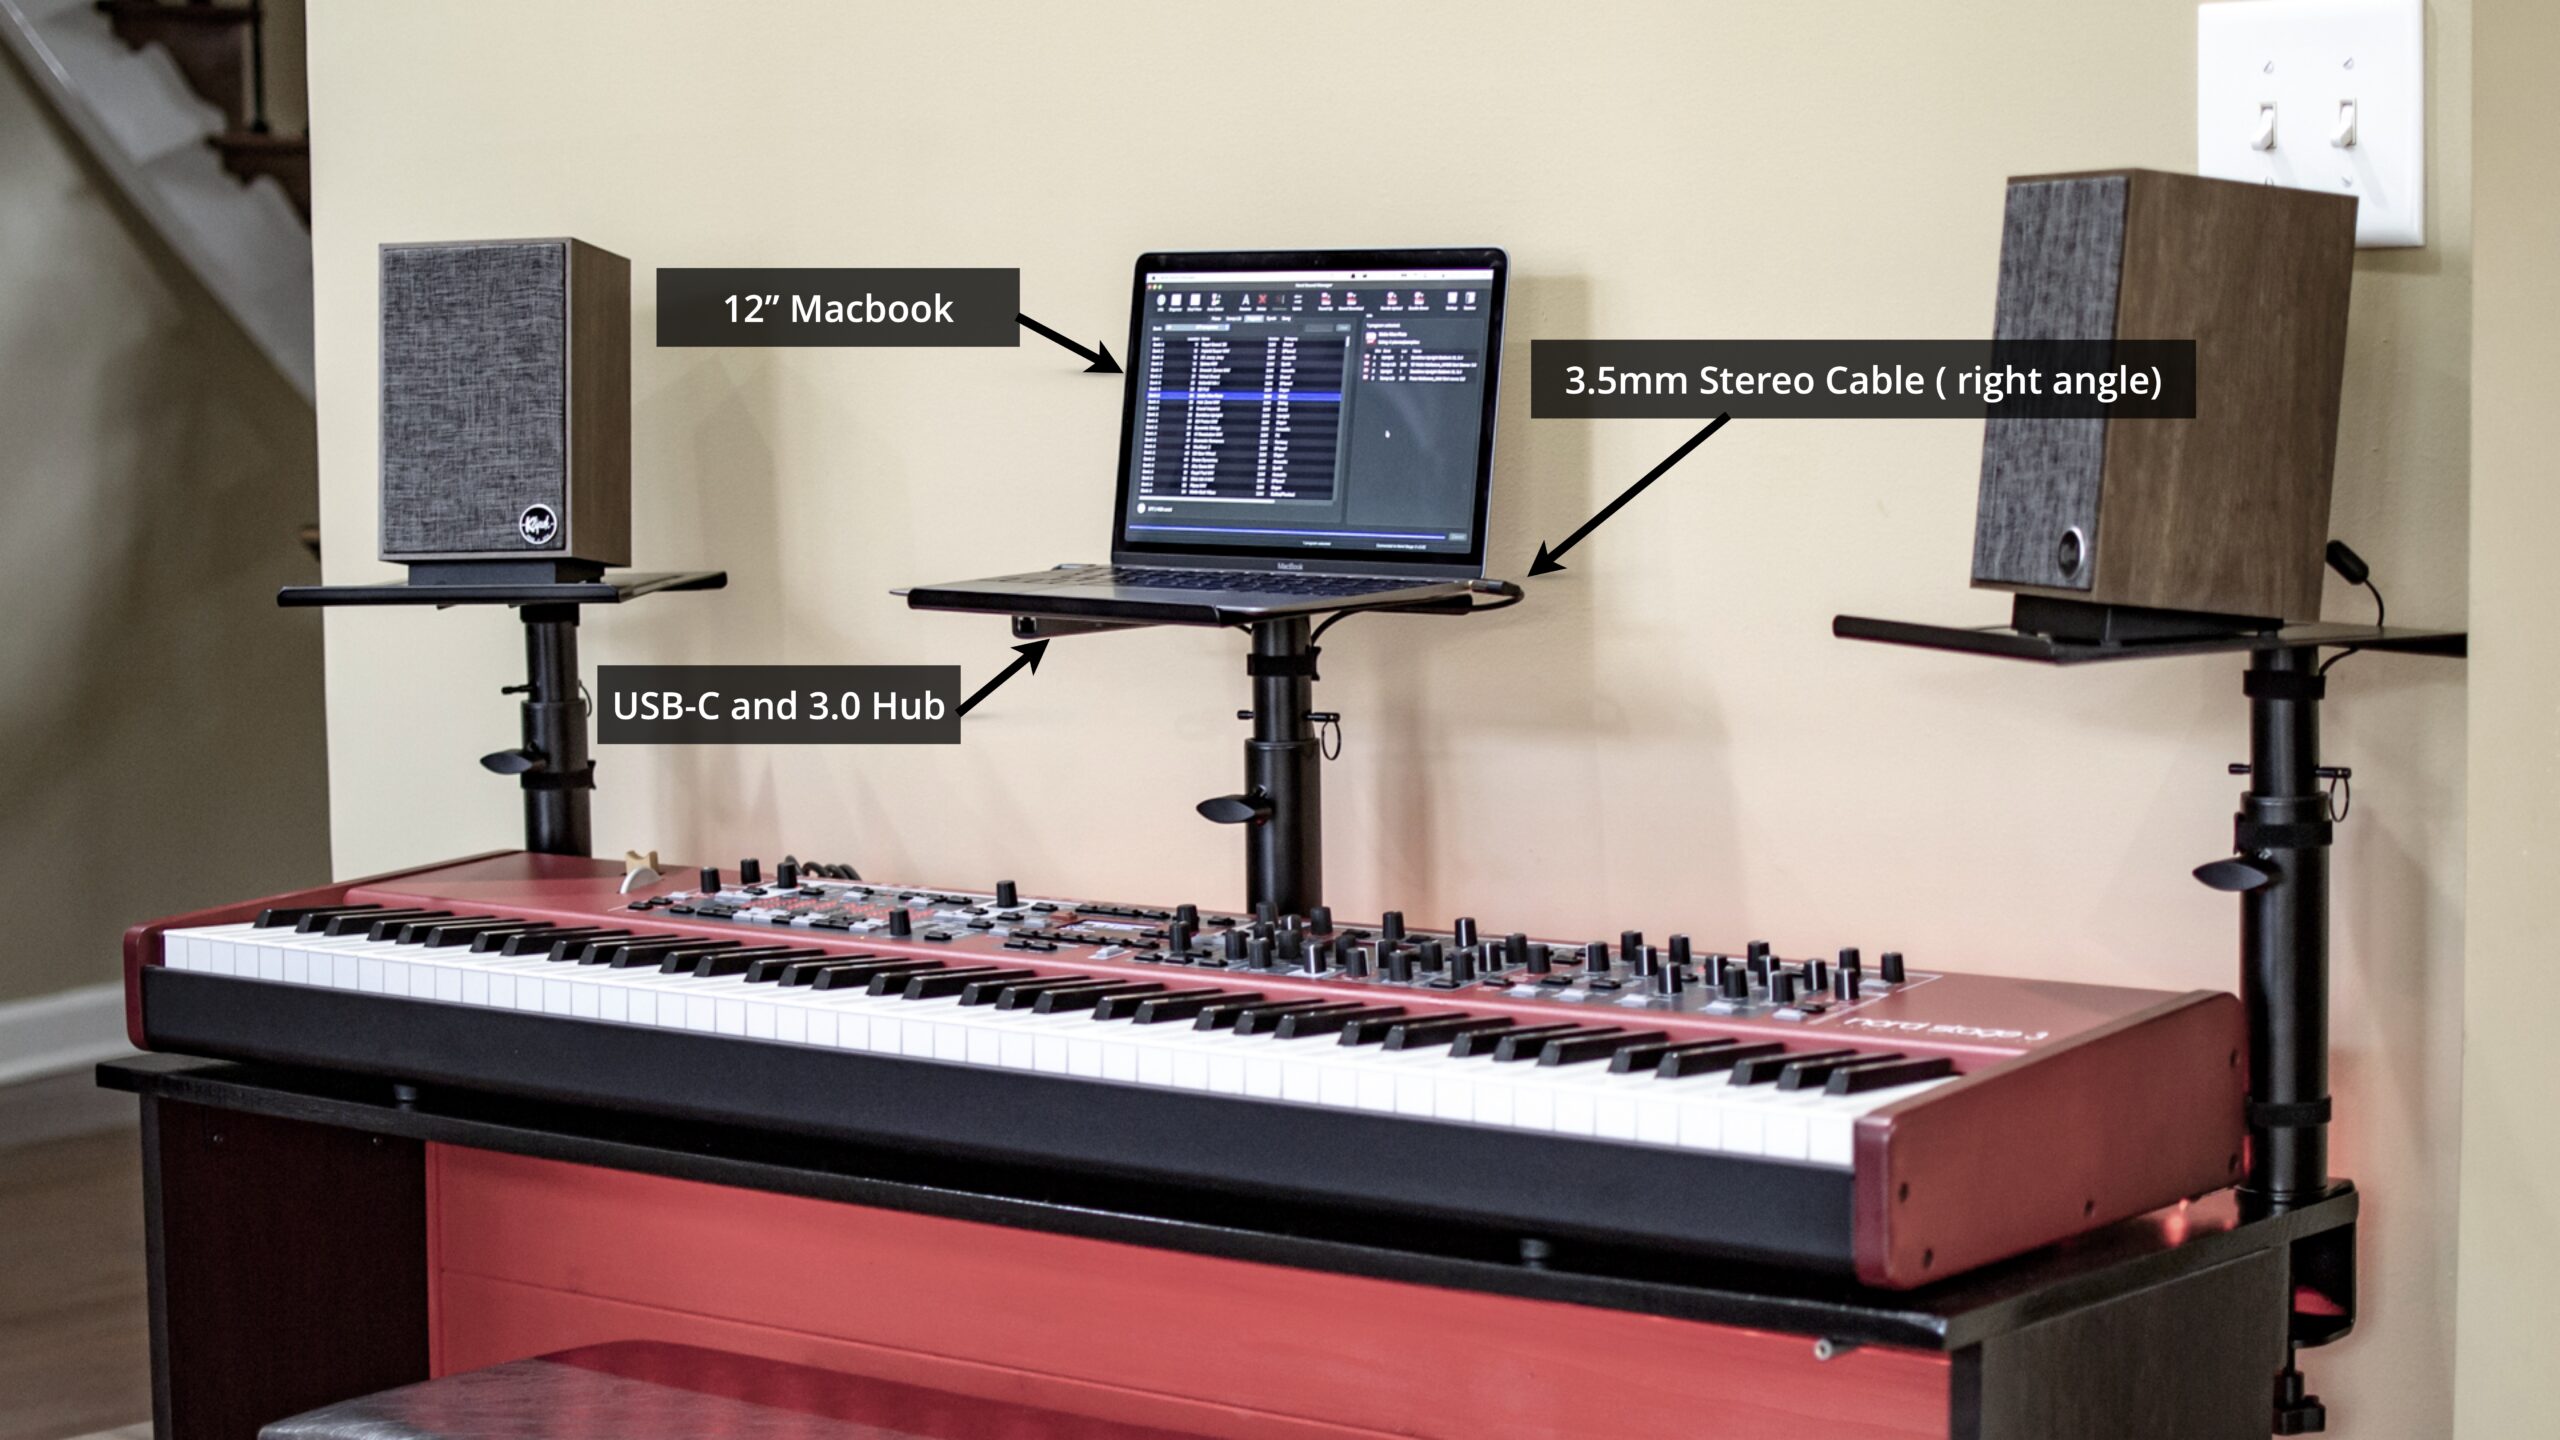
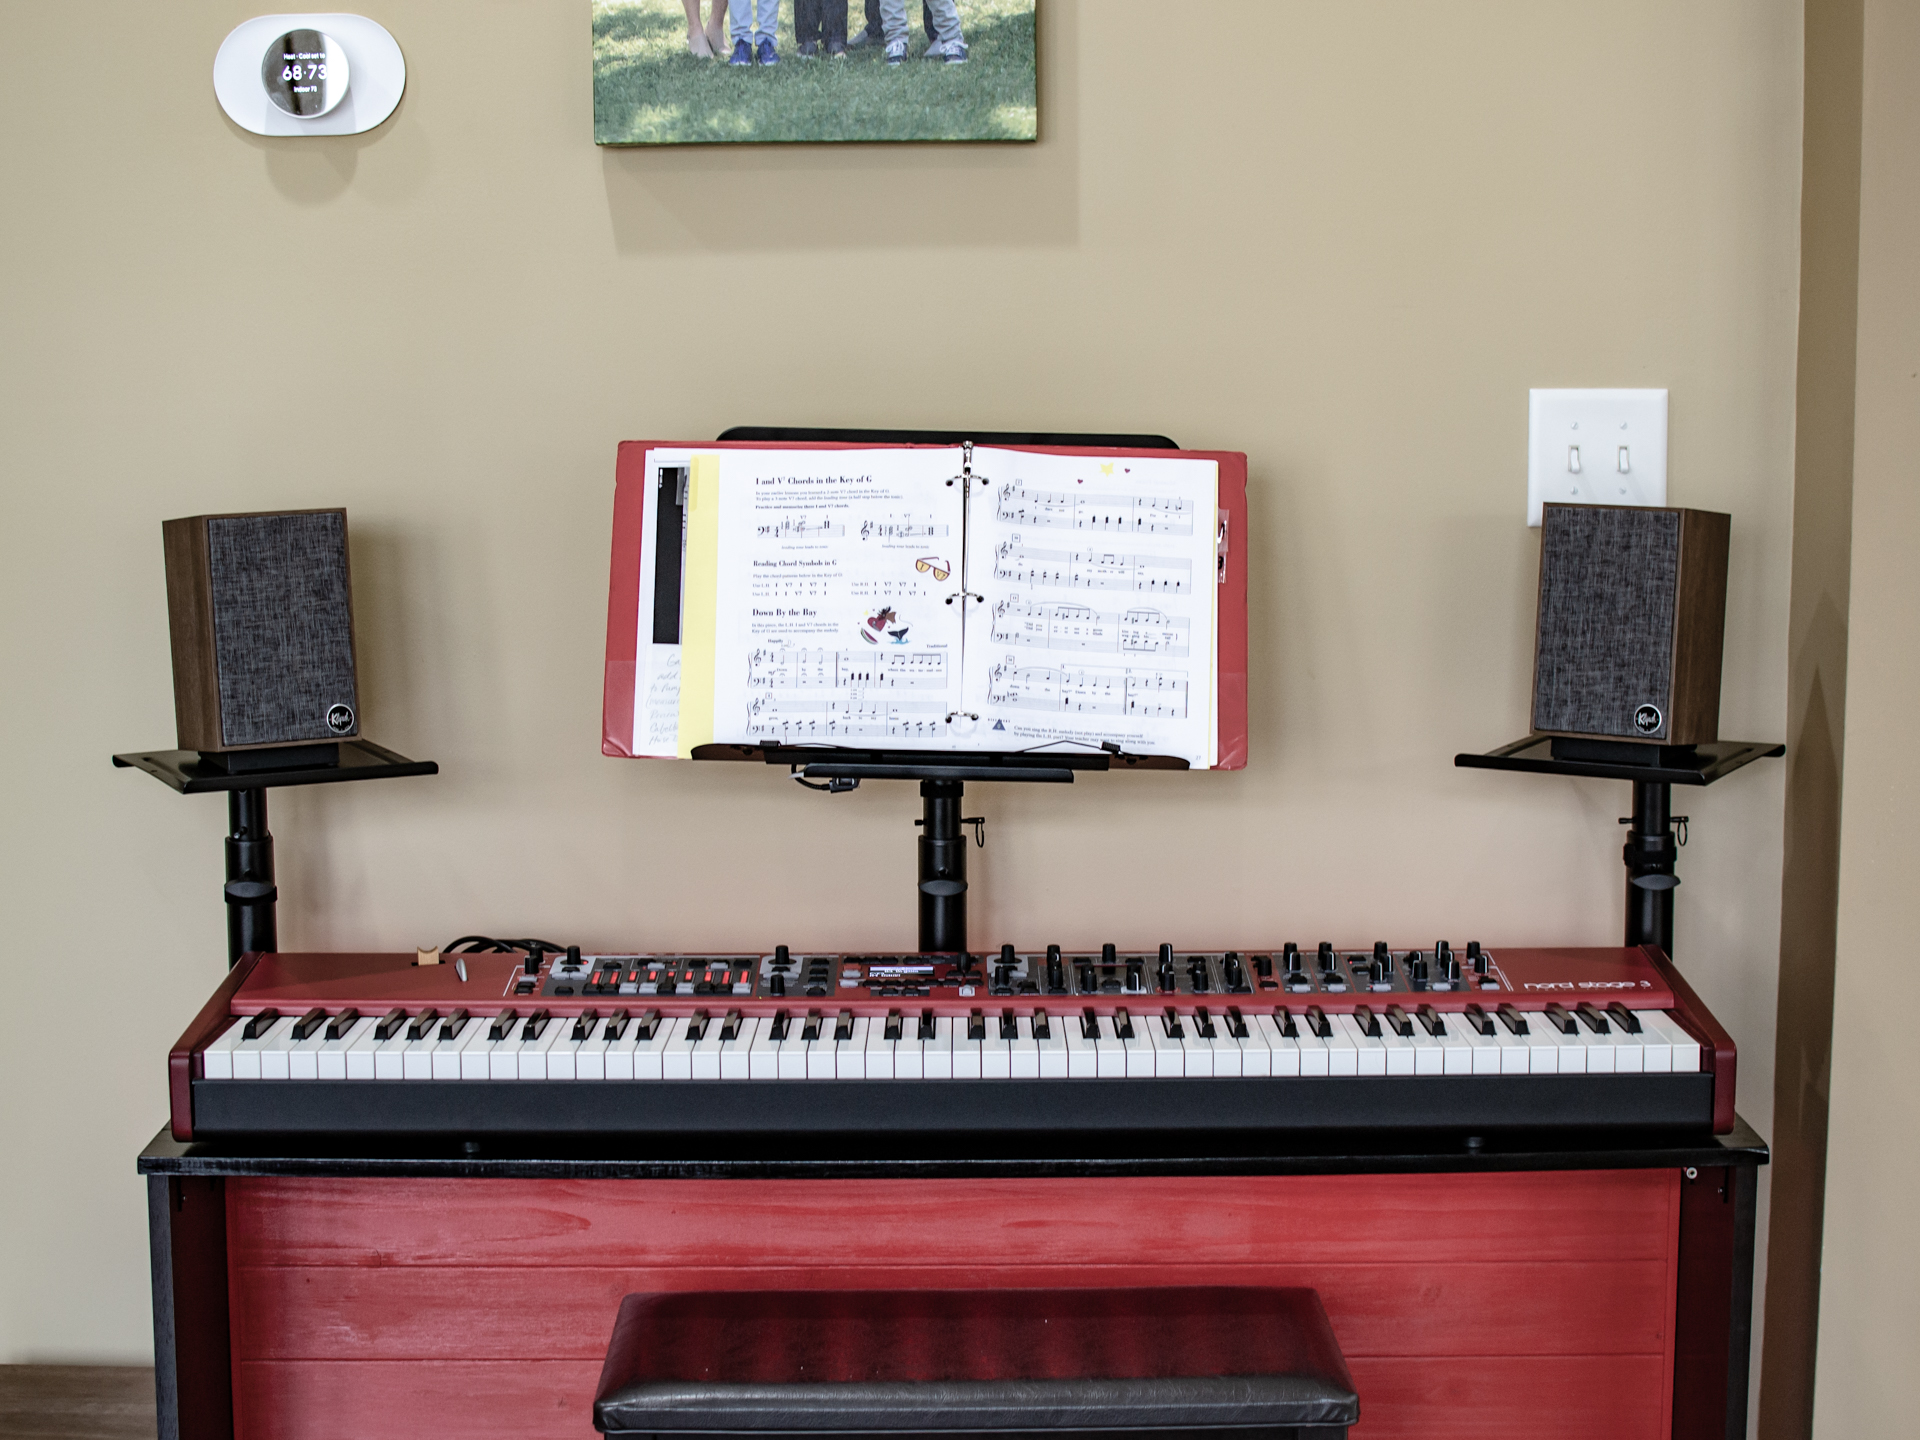
You see the setup here with the main speakers positioned near ear level by desk mount studio monitor risers. The key feature of these stands is a mounting position that lets you have the desk very close to the wall. (Most monitor riser platforms mount centered over the support post, so they stick out further in the back).
12″ Macbook
I use a 12″ MacBook as the main workstation for the Nord. It’s a great size for pulling up lead sheets, playing back tracks through the Nord’s monitor input, and managing the Stage 3’s internal sound banks via the Nord Sound Manager application. I’ve already had fun downloading and exploring Nord’s new White Grand and Soft Grand piano samples, as well as Nord’s Signature Sound Banks from featured artists like Mike Patrick.
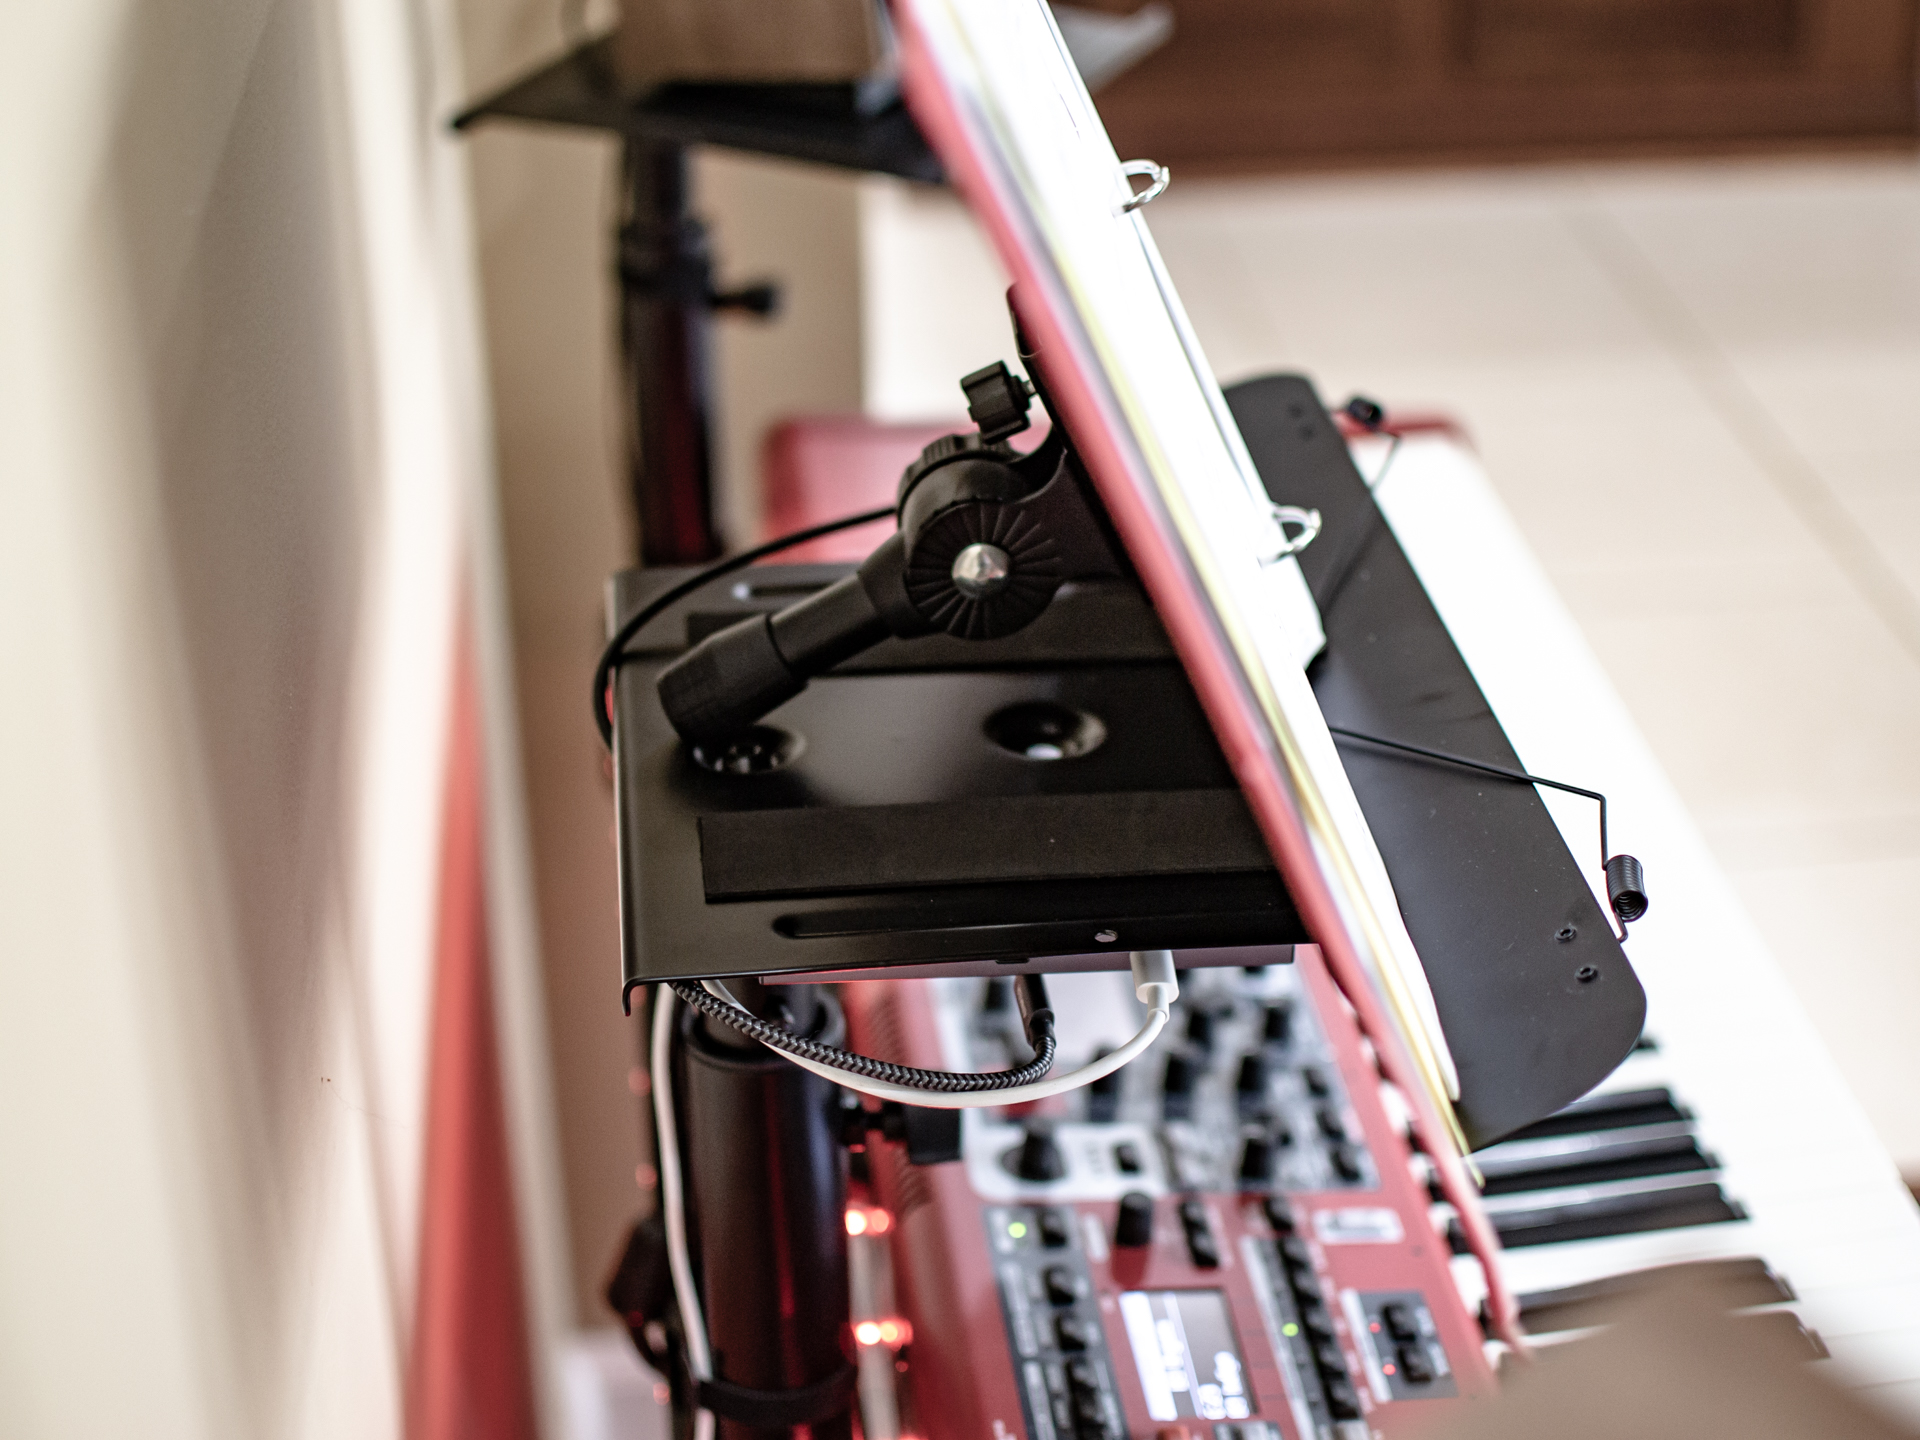
To get the MacBook connected, I mounted an Anker USB-C hub underneath the studio monitor riser with adhesive velcro. The hub has connections to the Mac’s power supply and the USB cable to the Nord. I also connect the Mac’s audio output to the Nord’s Monitor Input with a 3.5mm audio cable for playing back music either through the speakers or through the Nord’s headphone jack.
I love using the MacBook in this setup because it’s easily removable. I can quickly disconnect the USB hub and audio cable, take the laptop, and replace it with an iPad or desktop music stand. I also love this desktop music stand that comes with a short, adjustable desktop prop that fits perfectly on monitor riser. It’s great for when my boys want to practice Christmas carols or other songs from their lessons.
4 channel audio mixer
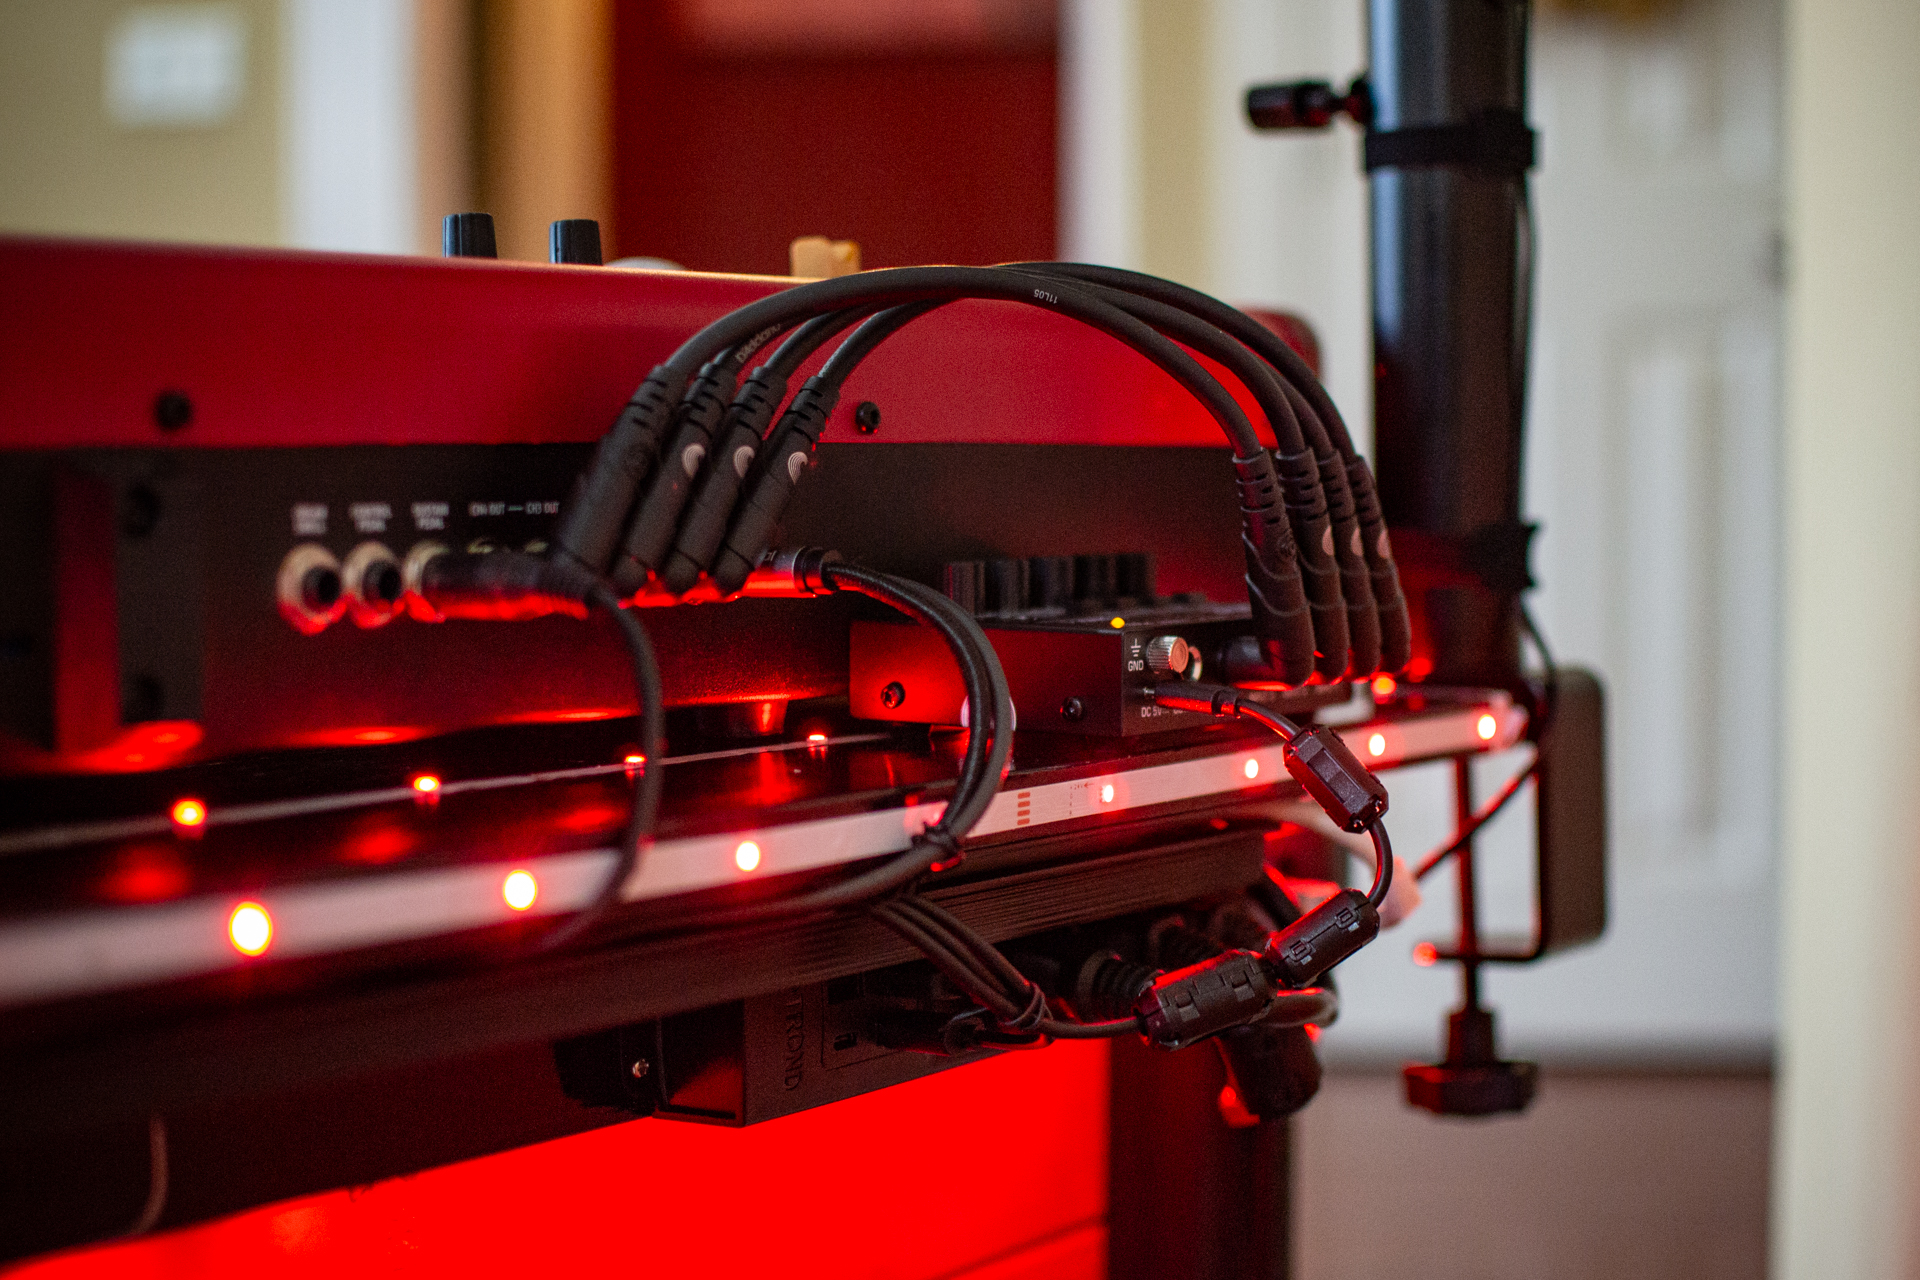
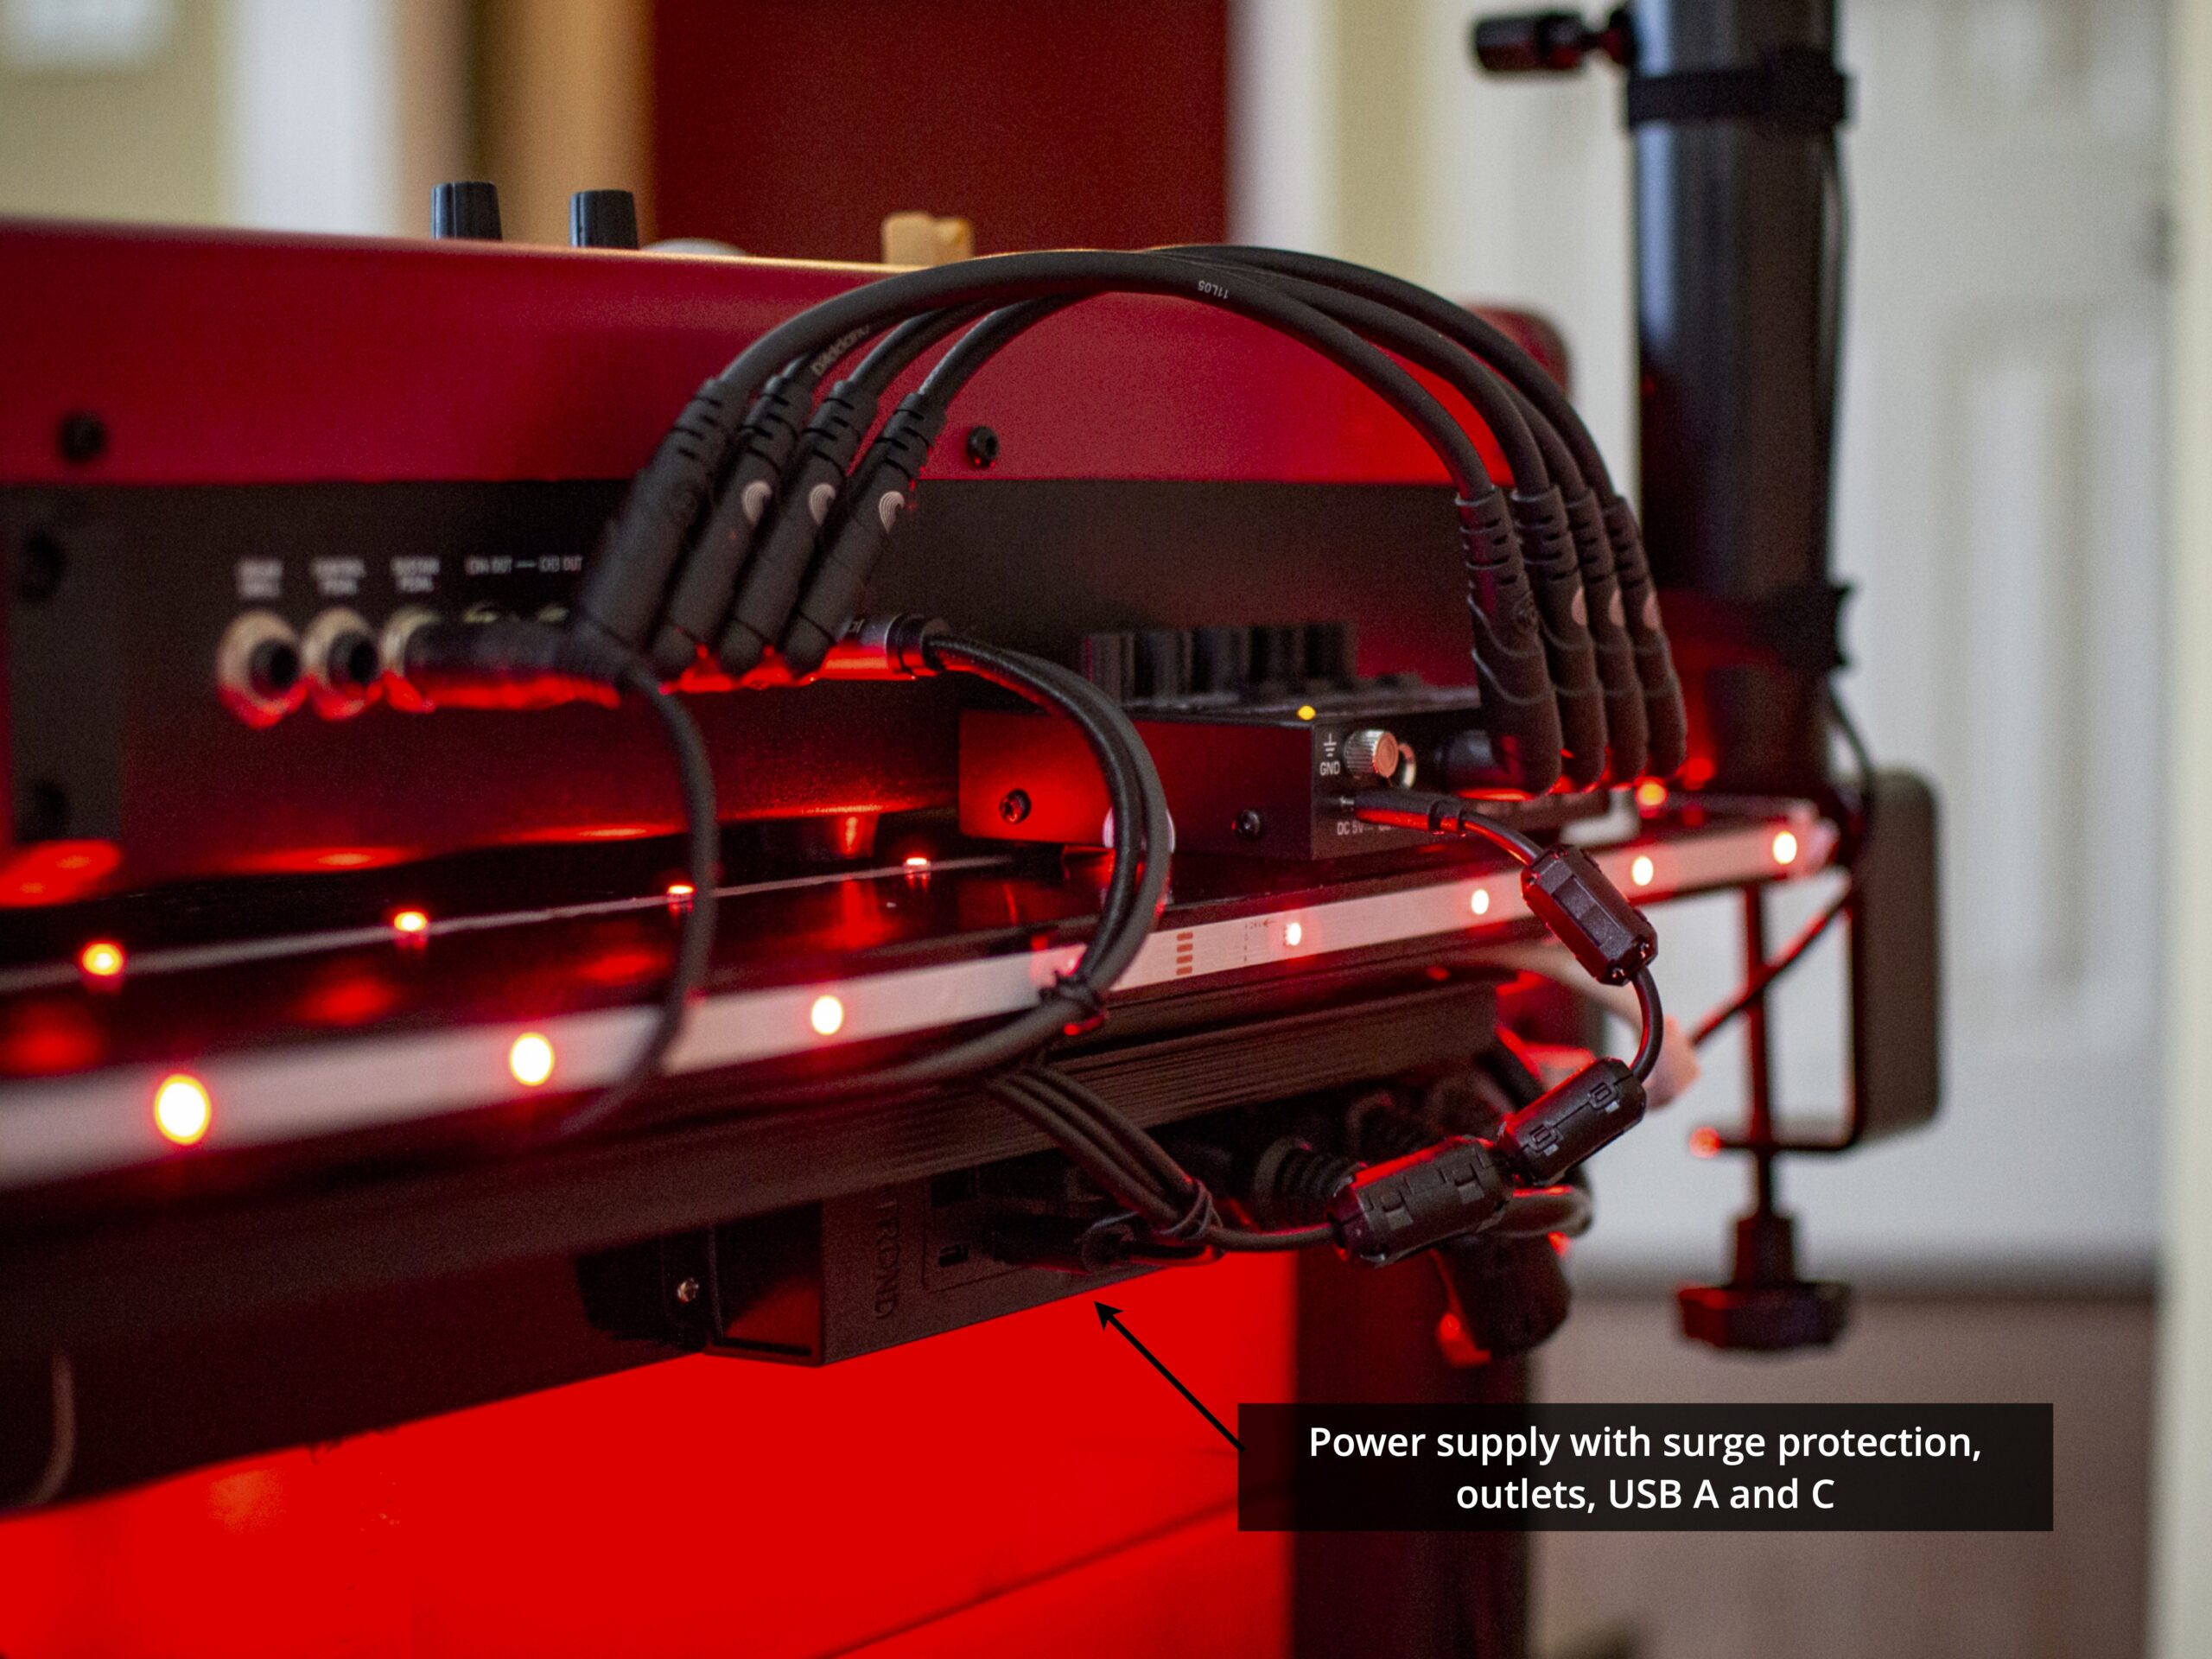
The Nord Stage 3 has four audio output channels. (Two sets of stereo outputs). To get all of those audio outputs playing through the Klipsch system, I use a small MouKey MAMX 1 mini 4-channel audio line mixer. The MAMX 1 is a great little device, and is compact enough to sit just behind the Nord.
I use a set of short D’Addario Patch Cables (same ones I use on my bass effects pedal board) from the Nord to the MAMX 1, and a 1/4″ TRS to RCA audio cable from the output of the MAMX 1 to the Klipsch Promedia inputs.
Key Solutions
M-Audio SP-2 – Universal Sustain Pedal
Nexillumi 65.6 Foot LED Strip Lights | L Shape 4-pin Connectors
Headphone extension cable (1/4″ to 3.5mm Female)
MEE Audio M6 Pro In ear Monitor Headphones
Klipsch Promedia Heritage 2.1 Multimedia System (in walnut)
Vondynote Studio Monitor Stands Desktop Clamp (Against The Wall)
Mediabridge™ 3.5mm Male to Male Right Angle Stereo Audio Cable (4 Feet)
CAHAYA 5 in 1 Dual-use Sheet Music Stand & Desktop Book Stand
MouKey MAMX 1 mini 4-channel audio line mixer
D’Addario Patch Cables (0.5 ft)
Cable management
As demonstrated in my home office setup, I pay special (obsessive?) attention to cable management so that the joy of my electronics isn’t stolen by ugly aesthetics of cables.
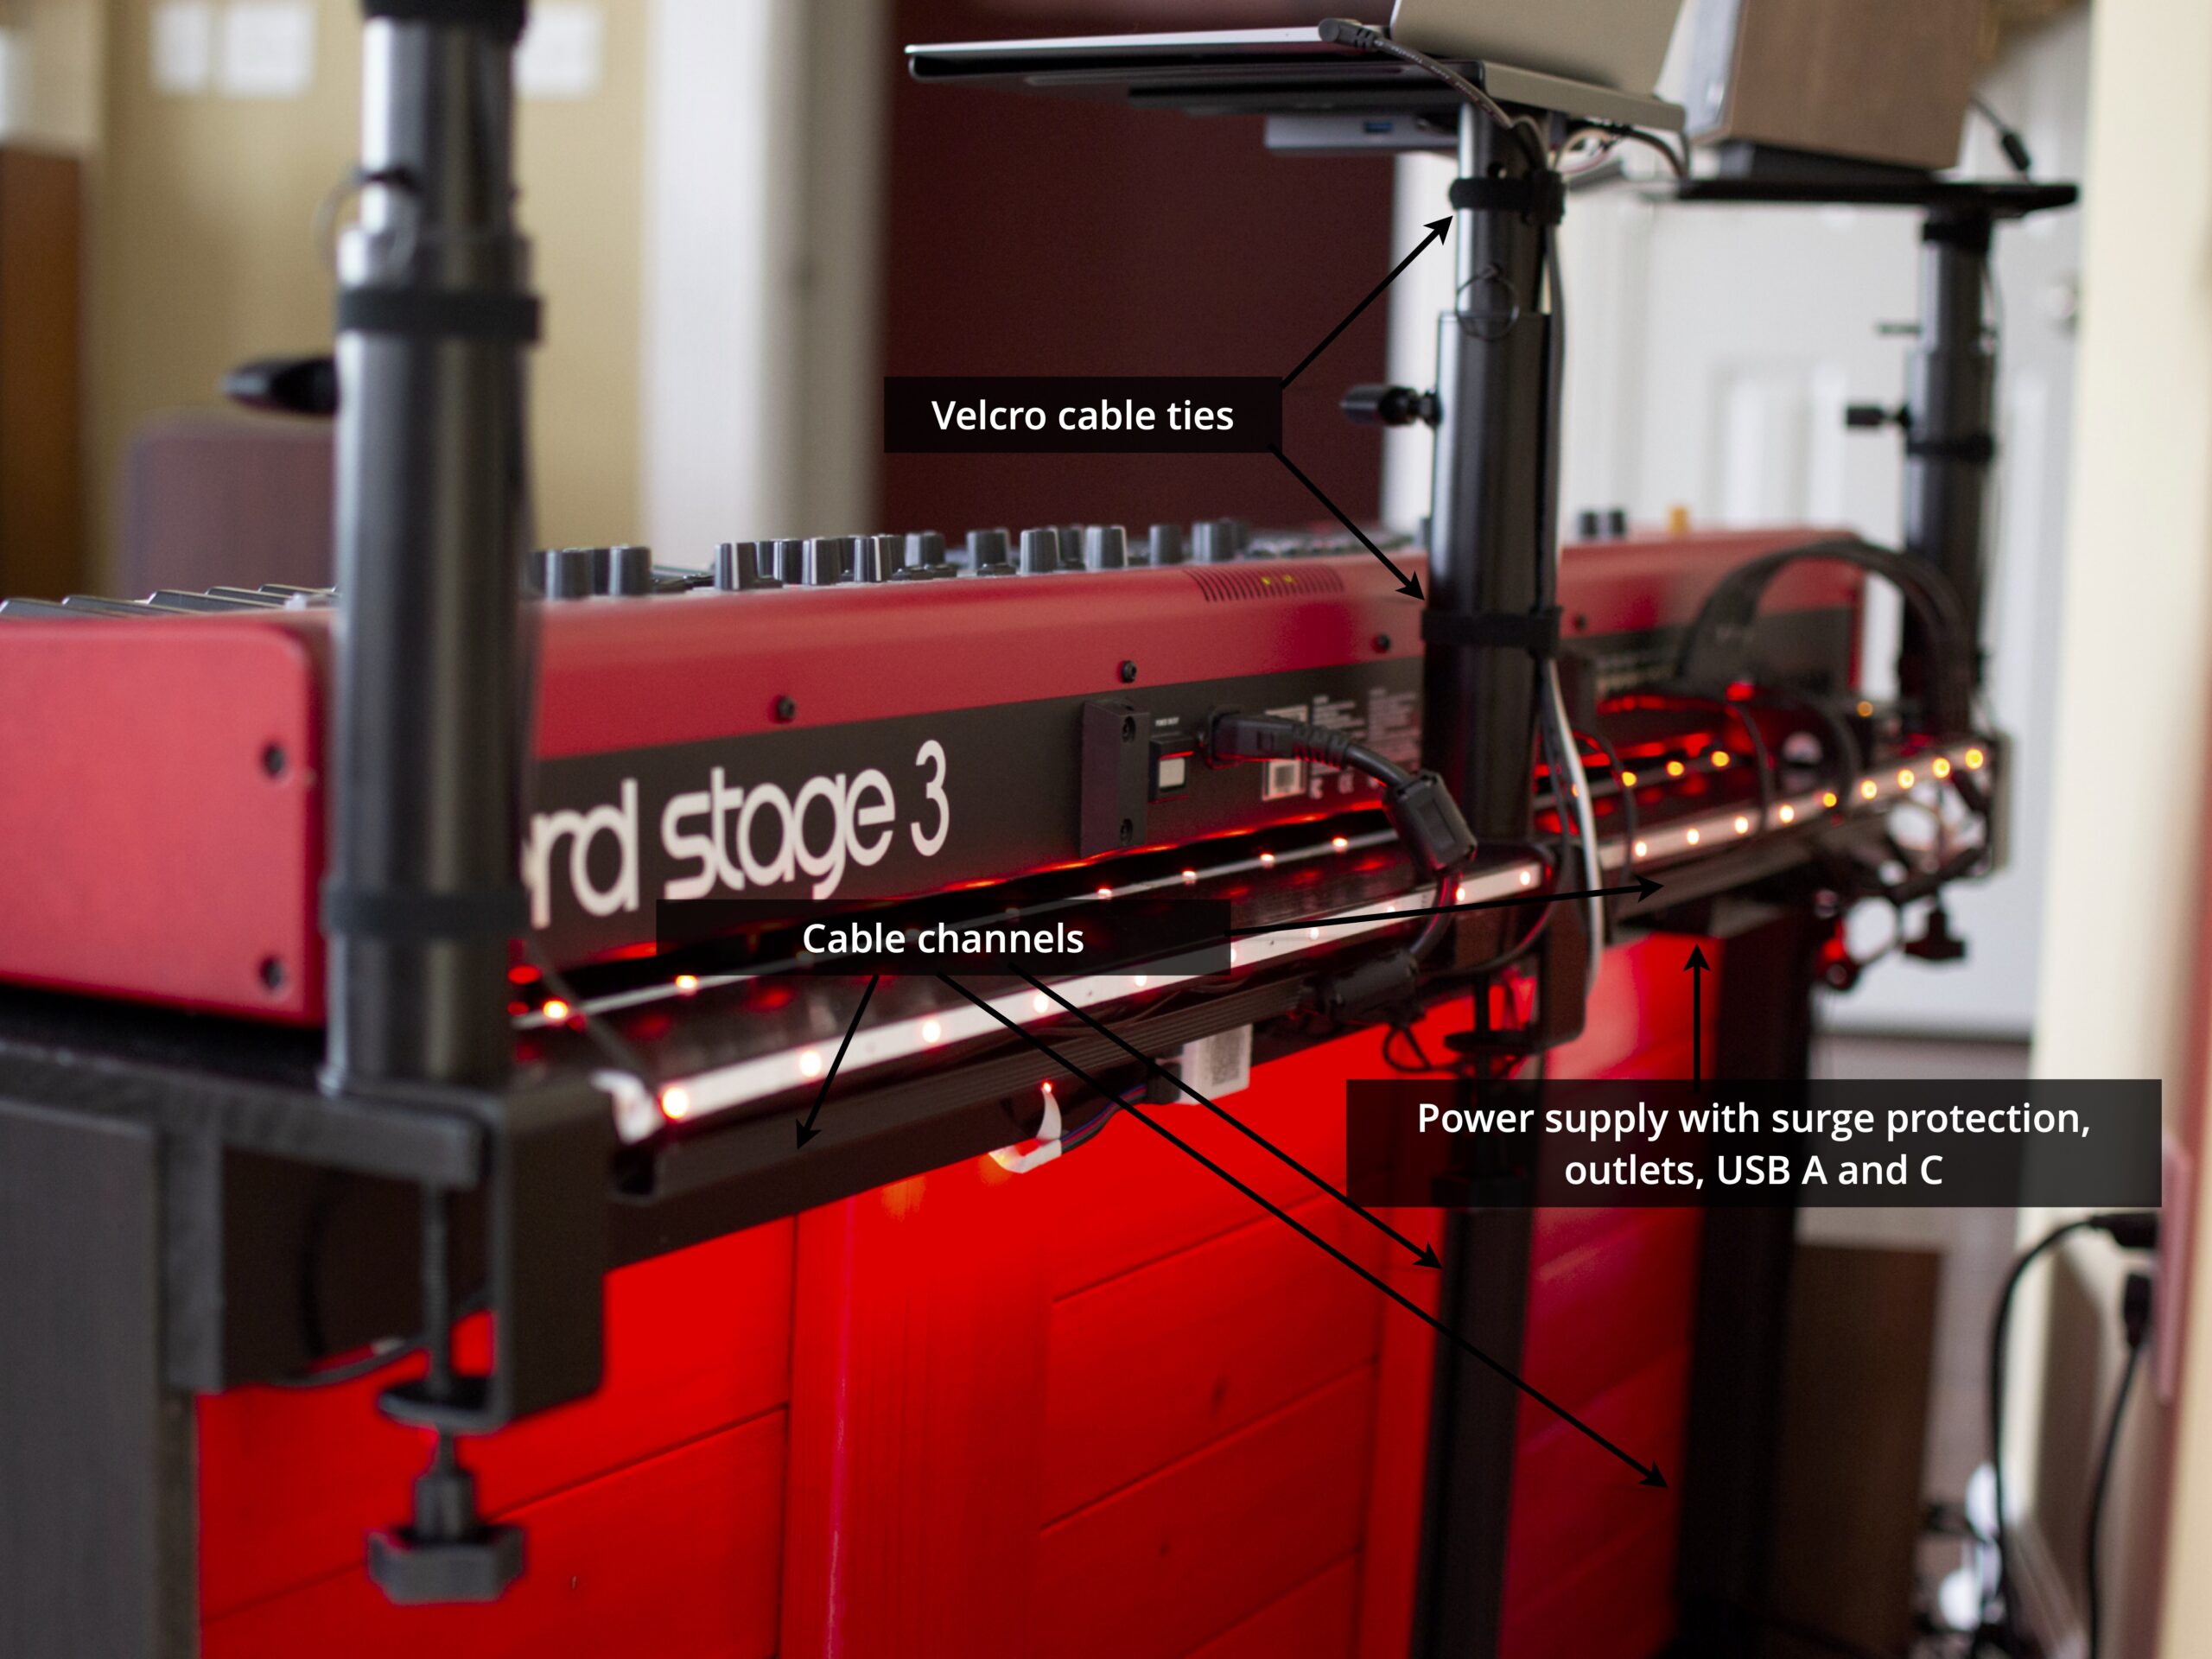
The extended rear lip was designed so that I could mount a row of cable channels underneath to provide tidy pathways for all the wires. I’ve also mounted some vertical channels to handle the power and audio lines coming to/from the Klipsch speakers. Wherever possible, I’ve tried to keep the power lines and audio lines running in separate channels, to minimize the potential for interference.
As usual, making liberal use of velcro cable ties helps keep wires close against the monitor risers and out of sight.
Last, to provide surge protection and convenient access to power, I mounted a thin, black power power strip to the rear of the stand. This model is great because it provides both AC outlets as well as USB A and USB C connections.
Wrap-up
So there’s the behind the scenes look at how I’ve created a high tech, low-clutter setup for the Nord Stage 3 that showcases its gorgeous styling in a compact, family-friendly setup.
I hope you’re inspired to take these ideas and be creative with your own electronic music projects.
Disclosure of Material Connection
Some of the links in the post above are “affiliate links.” This means if you click on the link and purchase the item, I will receive an affiliate commission. Regardless, I only recommend products or services I use personally and believe will add value to my readers. I am disclosing this in accordance with the Federal Trade Commission’s 16 CFR, Part 255: “Guides Concerning the Use of Endorsements and Testimonials in Advertising.”


