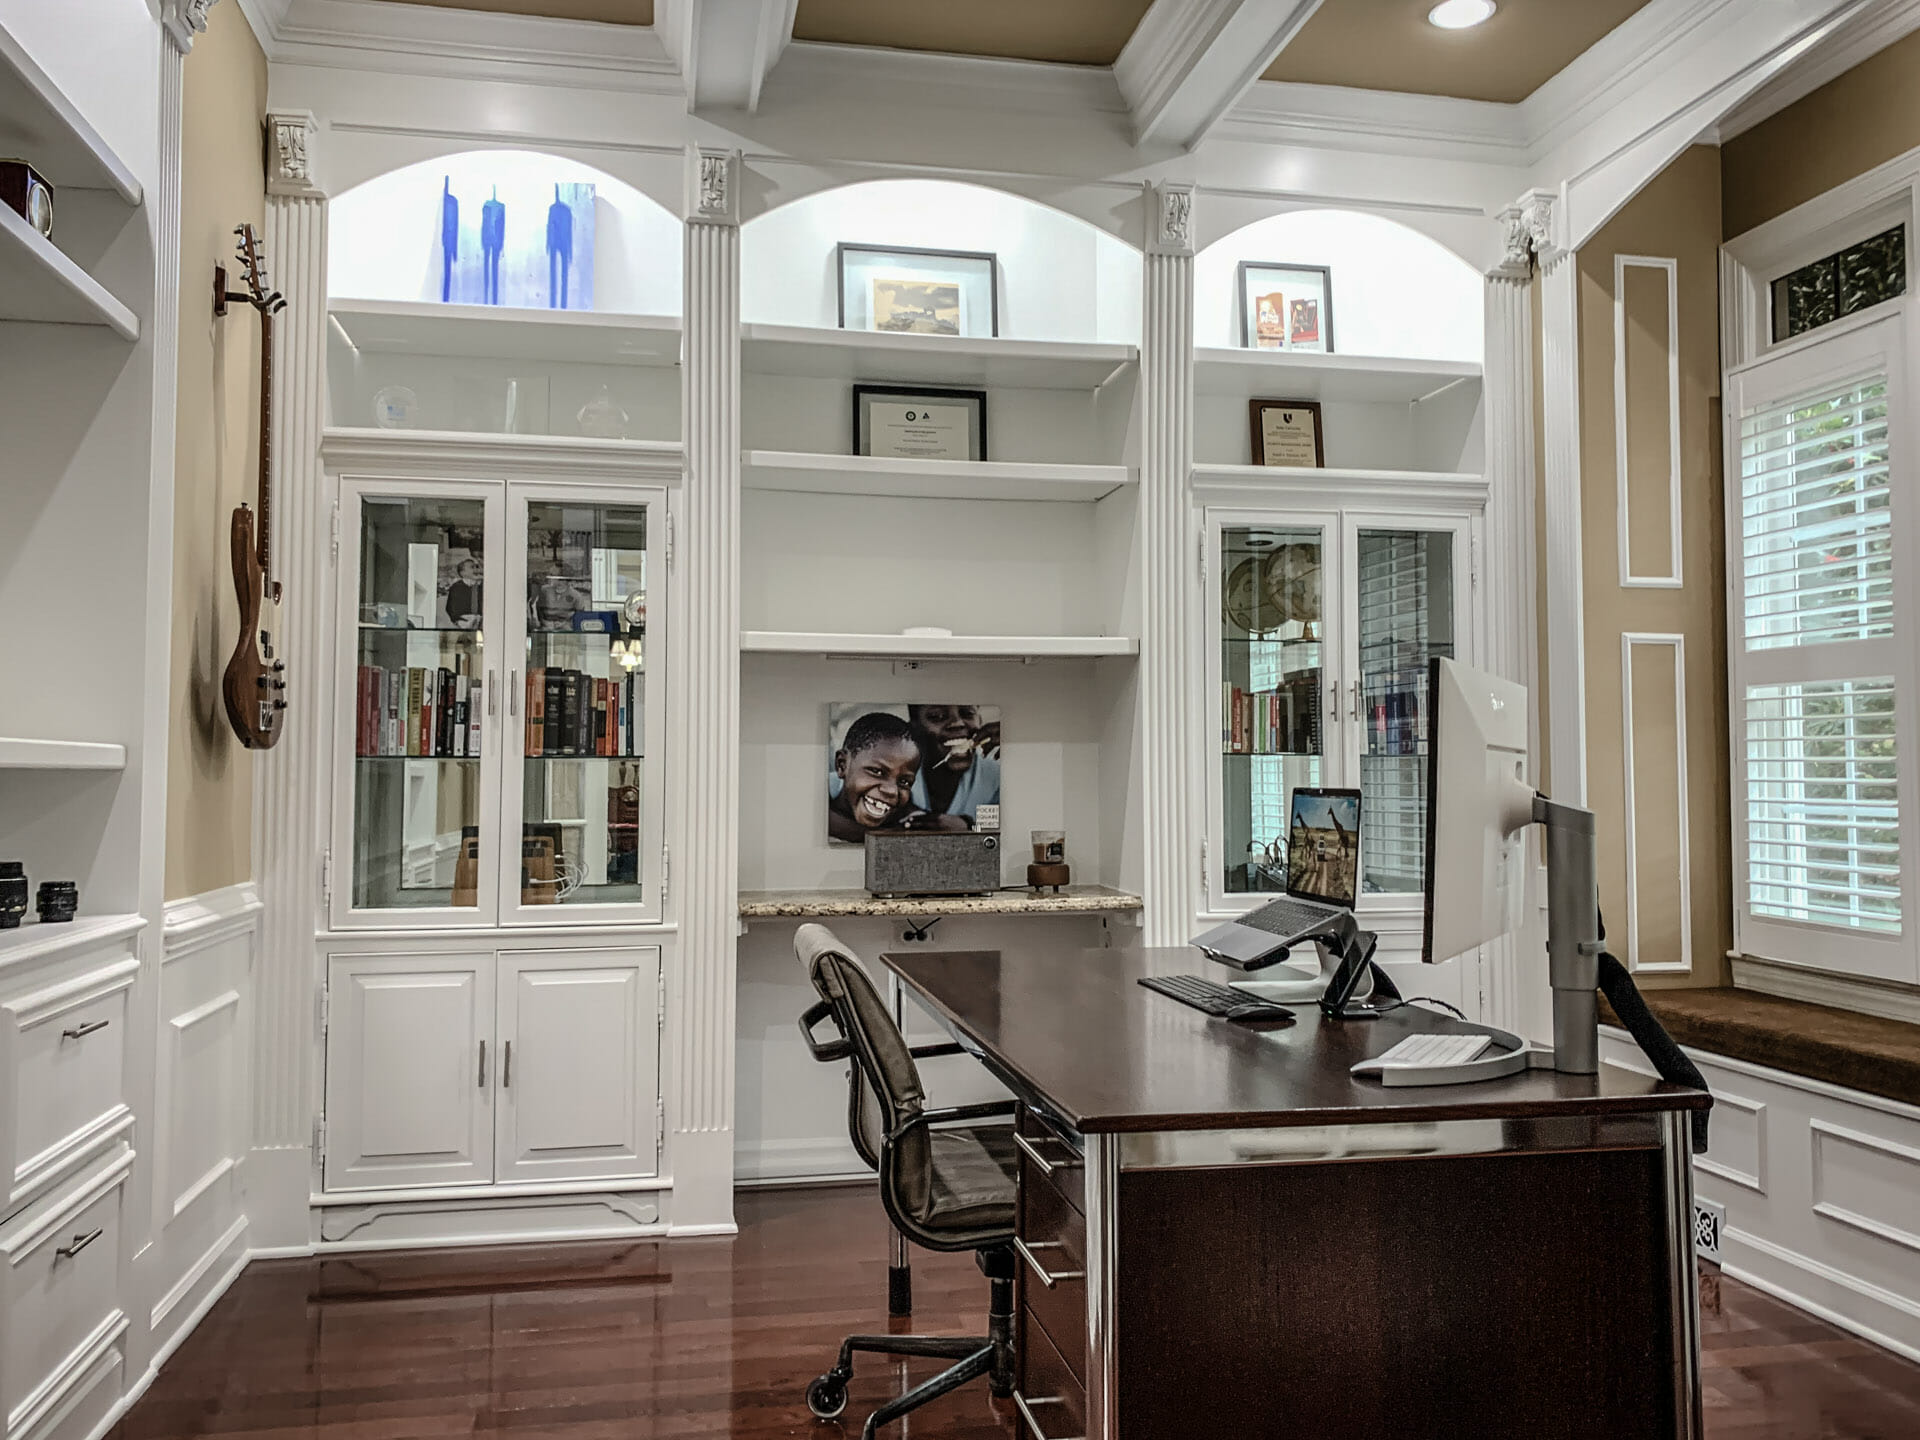
Many of us are working from home offices more than ever now. With a proper setup, your home office can stimulate your best work. Too often, our high tech digital lives create a tangled mess of cables, chargers, and adapters that distract and annoy.
Plenty of other home office setup articles will help you choose a desk, chair, a great monitor or wireless headphones. You need those. But I’m going to show you specific techniques for creating a high tech, low clutter home office setup that solves your biggest frustrations: how to keep your surfaces clear (including the floor!), your morass of cords from stealing your joy, and those nice french doors from being so thin you can hear a fly crawling on the other side.
You’ve seen posts of modern home offices and thought, that’s nice, but they must not actually work there. This post is a behind the scenes look at an office that typically has 6 computers, about 50 other devices, and a gazillion cables.
If you’re browsing for ideas, the highlights here are enough for you to run with on your own. But for those who want to nail their setup, I’ve packed this post with a ton of details.
What we'll cover
I work remotely full time, and have a wide range of personal pursuits. So I spend a lot of time in this office. This is an in-depth tour of how I setup a wired up, but clutter-free home office.
We’ll cover:
Soundproofing the french doors
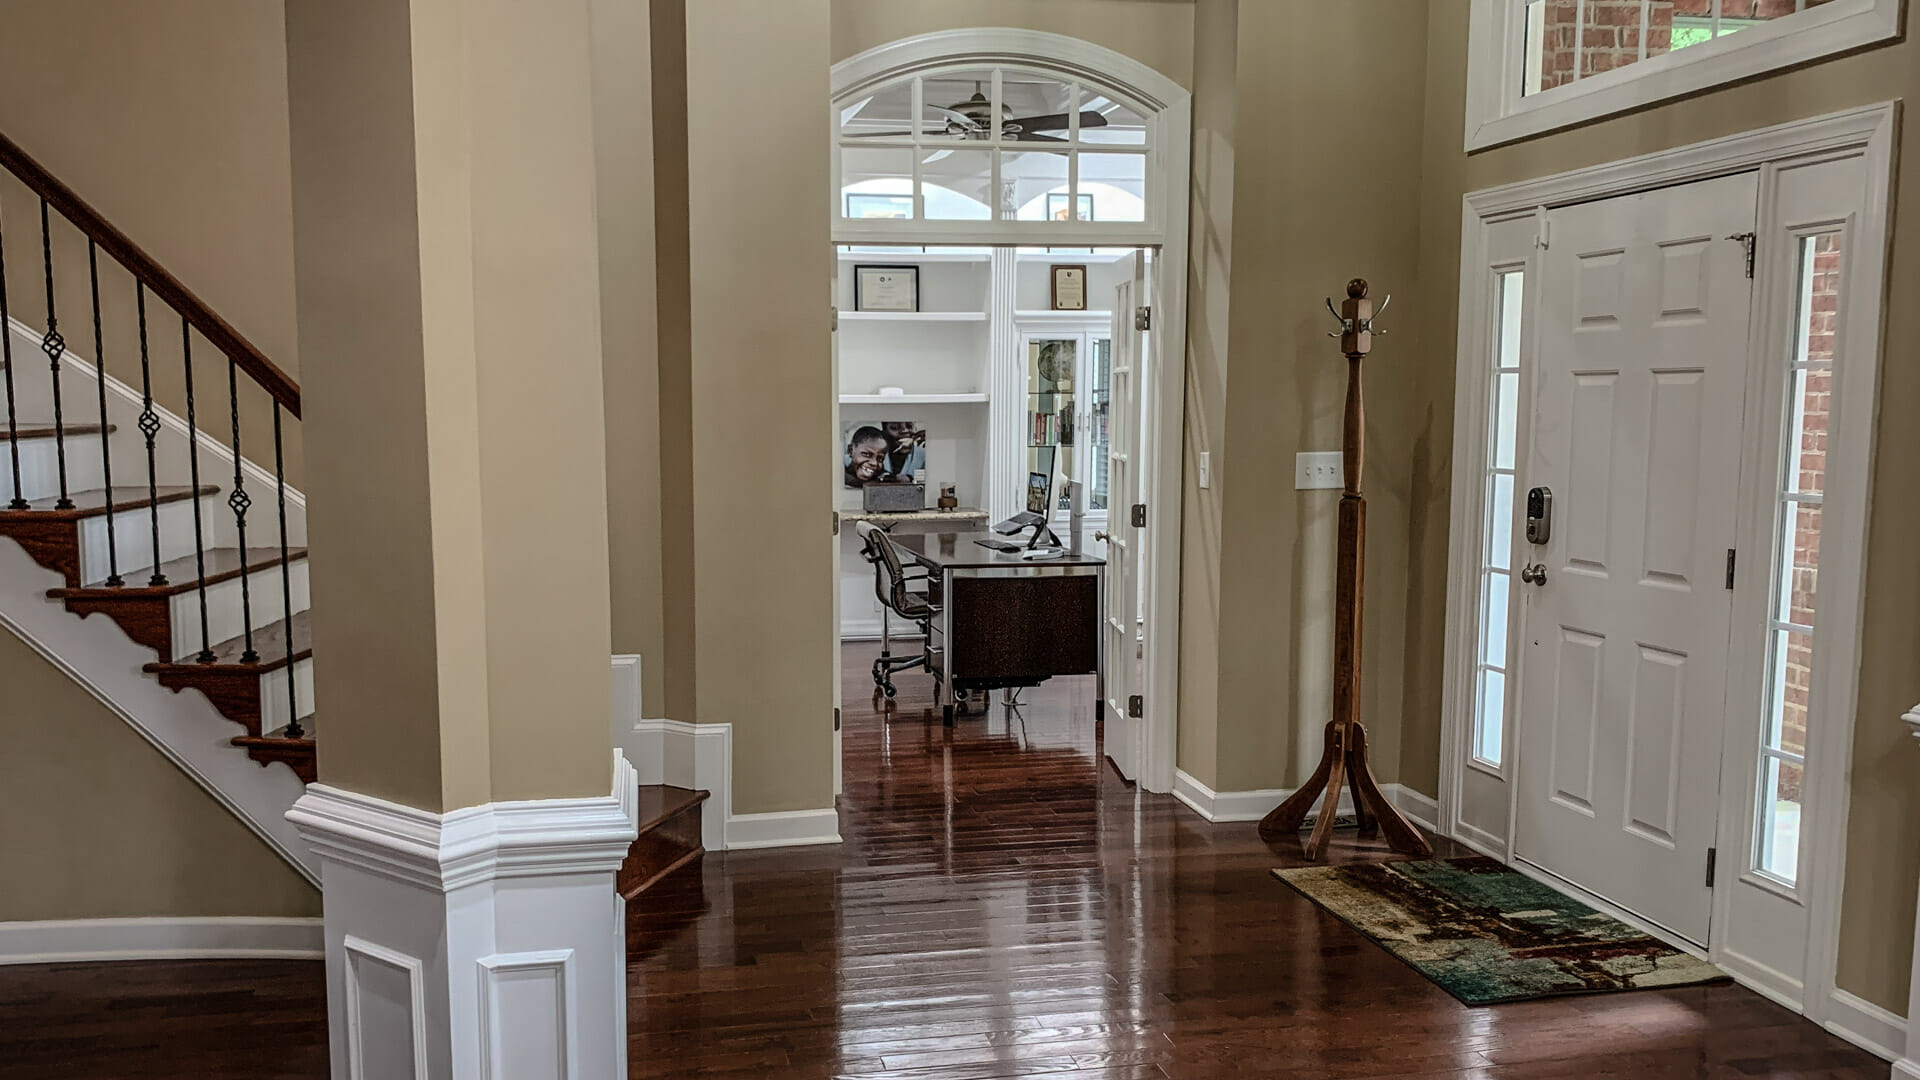
My home office is on the ground floor, right off the main foyer of our home. We have hardwood floors that are lovely in many respects, but sound dampening is not what they’re good at. French doors lead into the office. They are great at letting in light, but also great at letting sound in. With 3 rambunctious boys doing full time virtual school, I needed to find a soundproofing solution.
I considered replacing the french doors, but decided instead to add sound dampening by:
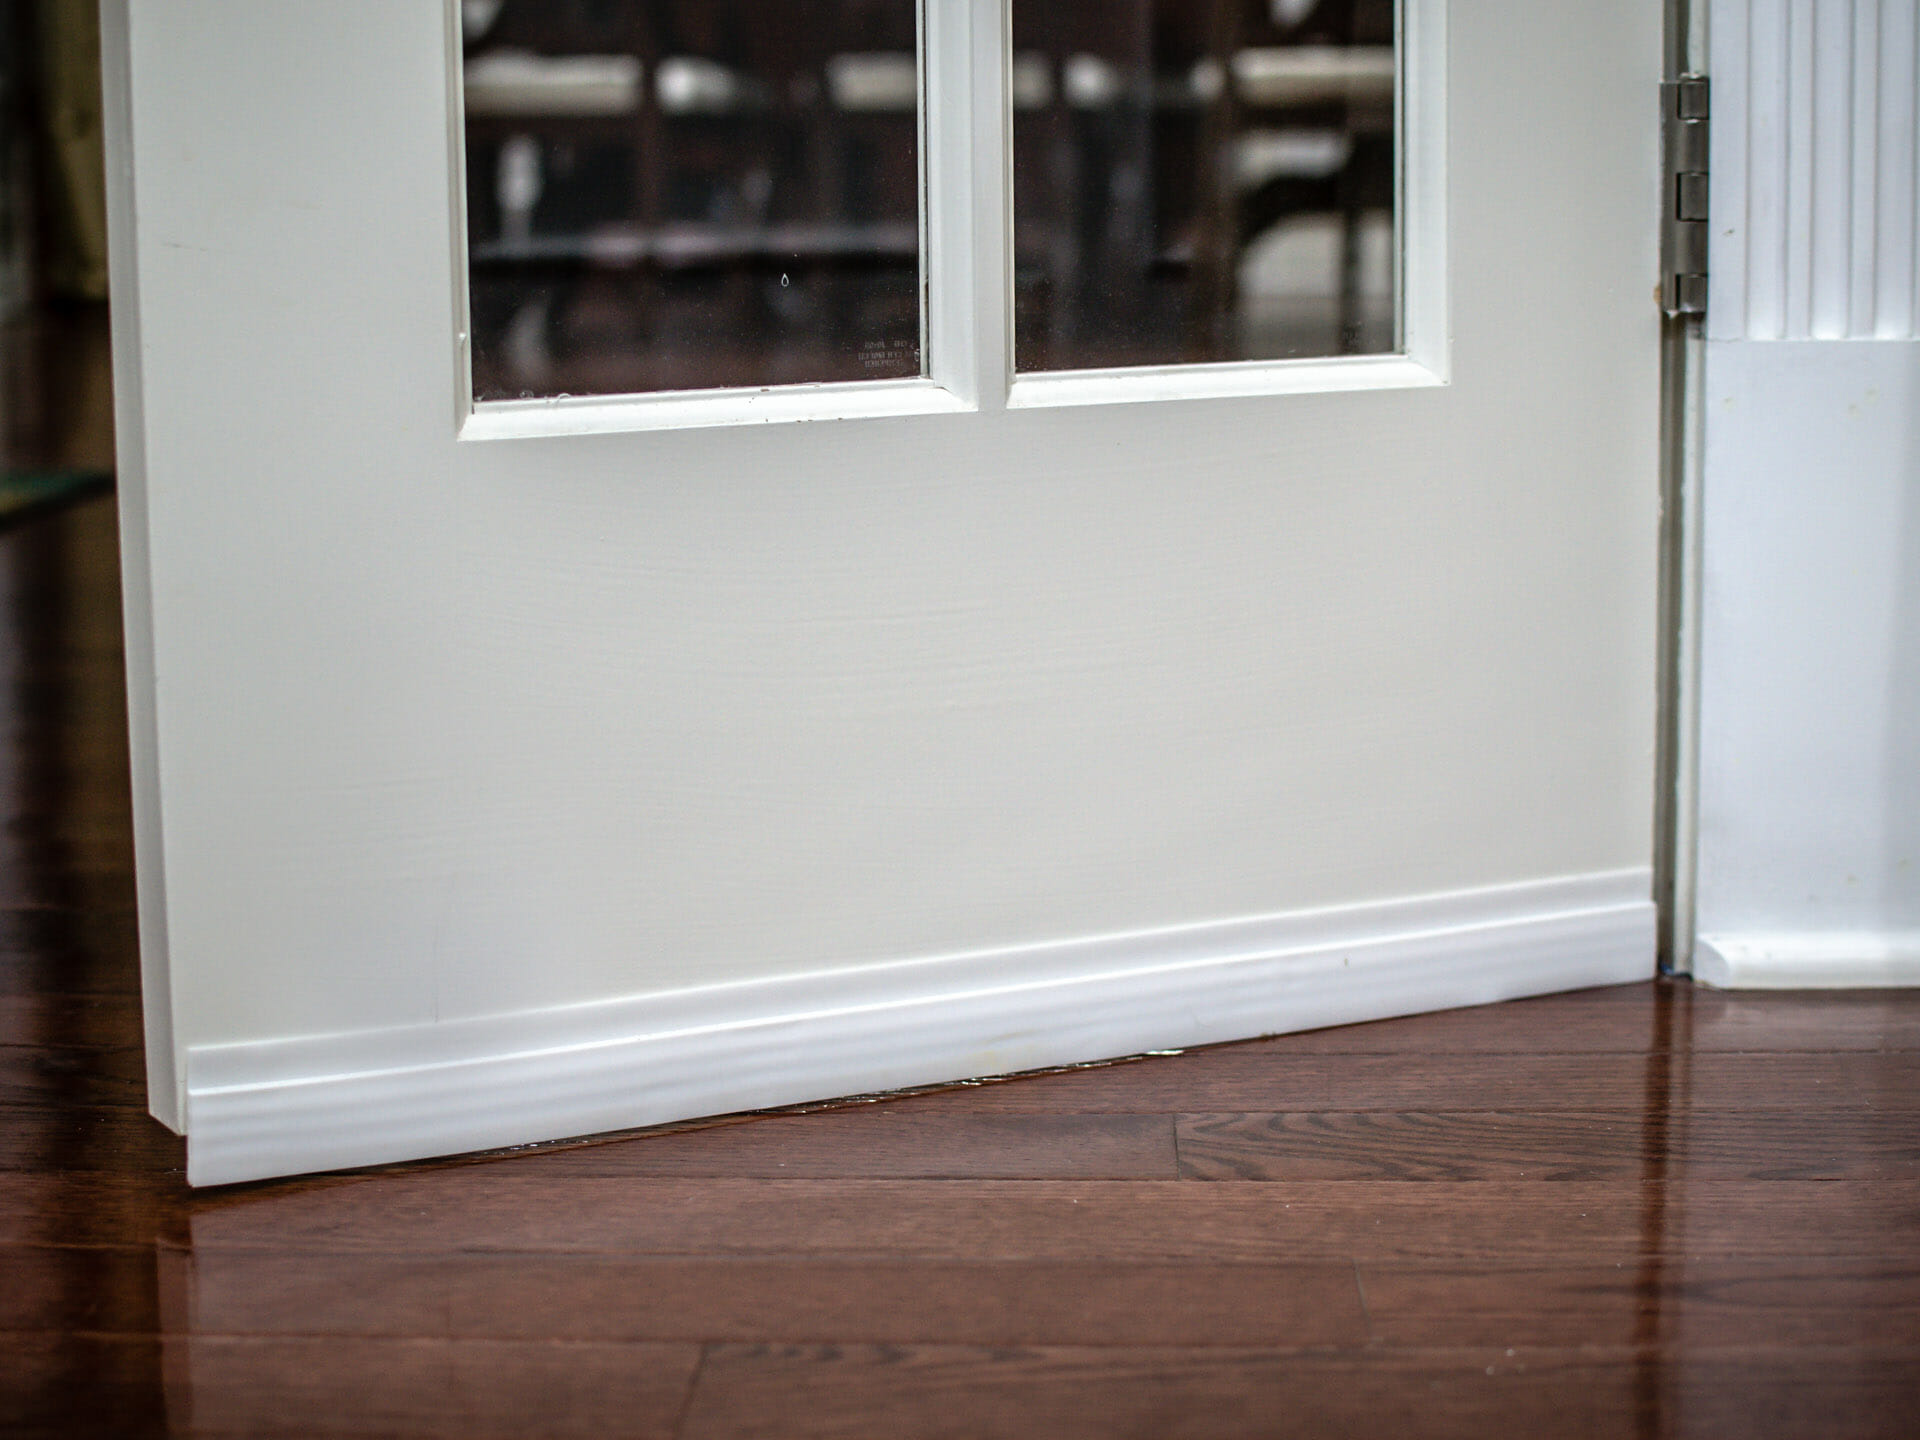
- Adding a rubber door sweep
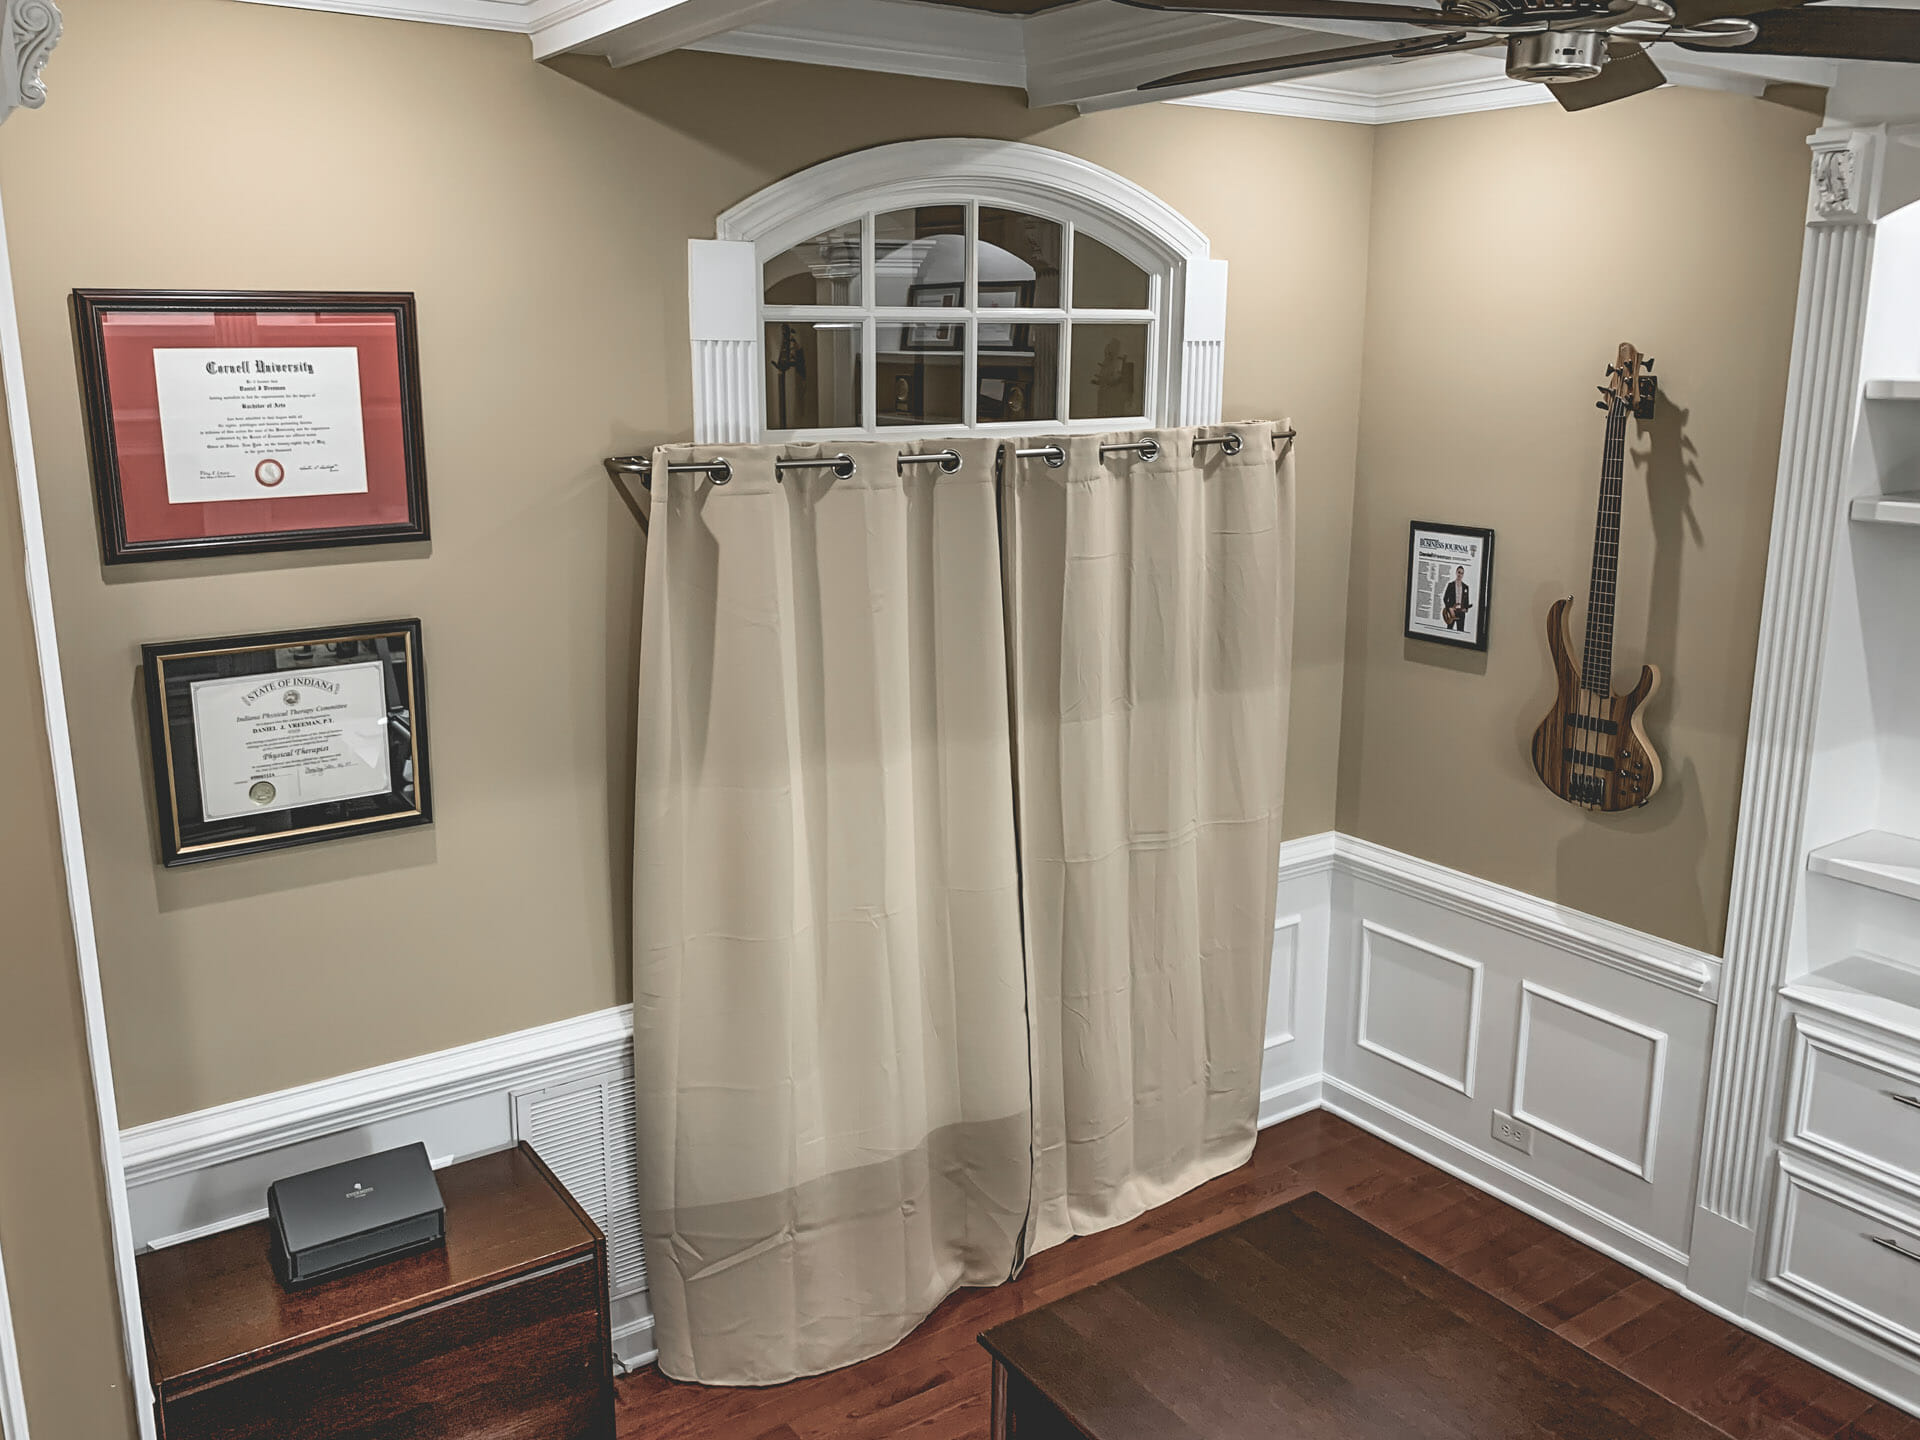
- Adding sound dampening curtains
An adhesive door sweep is a simple solution for cutting down the drafts and sound coming under the door. To make up for the thin glass, I installed a double set of sound dampening drapes. There are many styles available, but these drapes fit the color scheme and were reasonably priced. A curtain rod set with a wraparound design keeps the drapes flush with the wall on the ends to further prevent sound from escaping.
I opted to install the curtain rod on inside the office, just above the doors but below the transom window. It was a compromise that allows some light in from the foyer. The mounting position makes everything invisible from outside the office if the drapes are open. I like this for when the office is not in use.
This approach significantly cut down on the outside noise entering the office. Of course the room is not totally sound proof, but it’s enough. The thick curtains also reduce echo in the room when I’m speaking on conference calls. And the added privacy can be a bonus too.
Computer setup
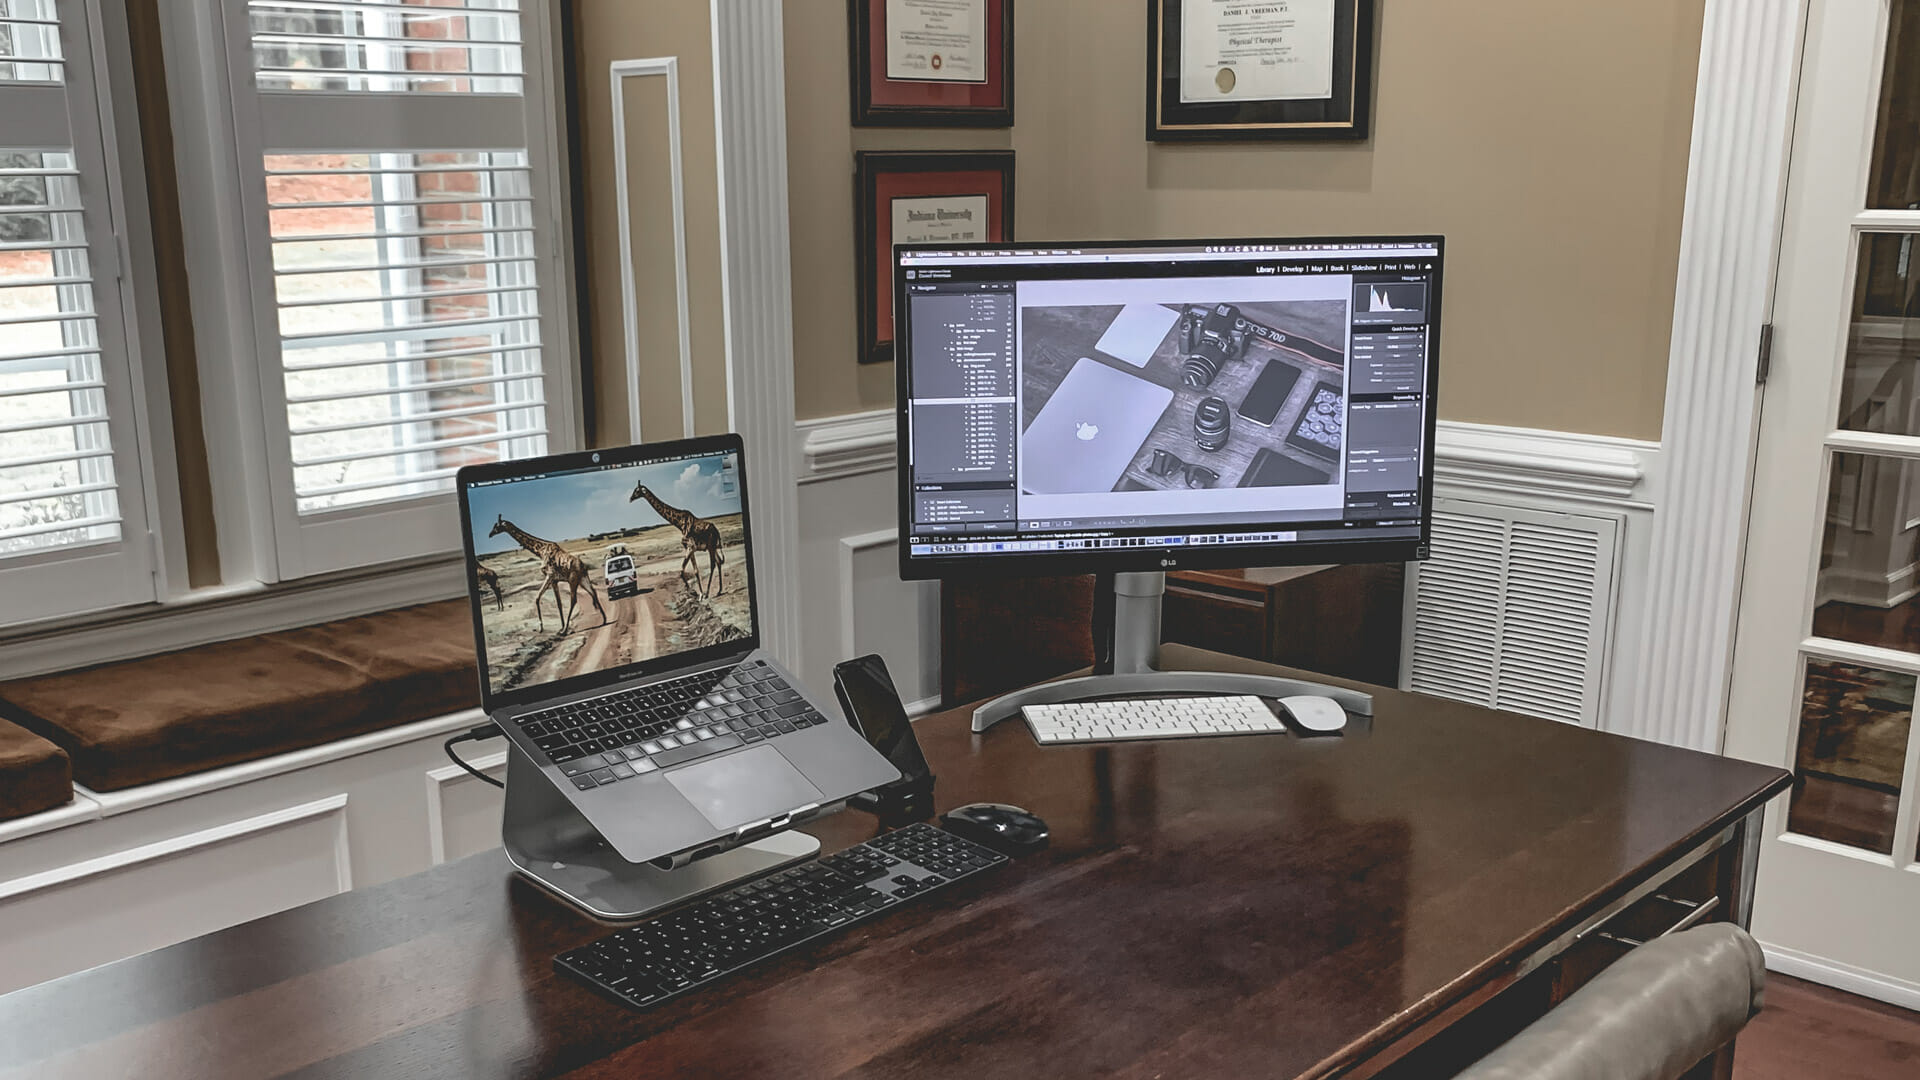
My work context requires that I keep business and personal computer things separate. To simplify my computer setup, I have one primary personal computer (a Macbook Pro) and one primary work computer (a Macbook Air). They both share the same external monitor (a 27″ LG 4K IPS), and I can easily toggle between inputs. I often want dual monitors for work-related things, so I can use both the laptop screen and the LG monitor. But, I don’t often need two monitors for personal projects.
I’m fan of Apple’s magic keyboards and mice, and use dual setups for the two computers: Space Gray for work (keyboard) | mouse); White for personal (keyboard) | mouse). I have not found a great way to switch bluetooth peripherals quickly between computers, and the different color setups help me context shift, so I’ve opted to keep the two sets.
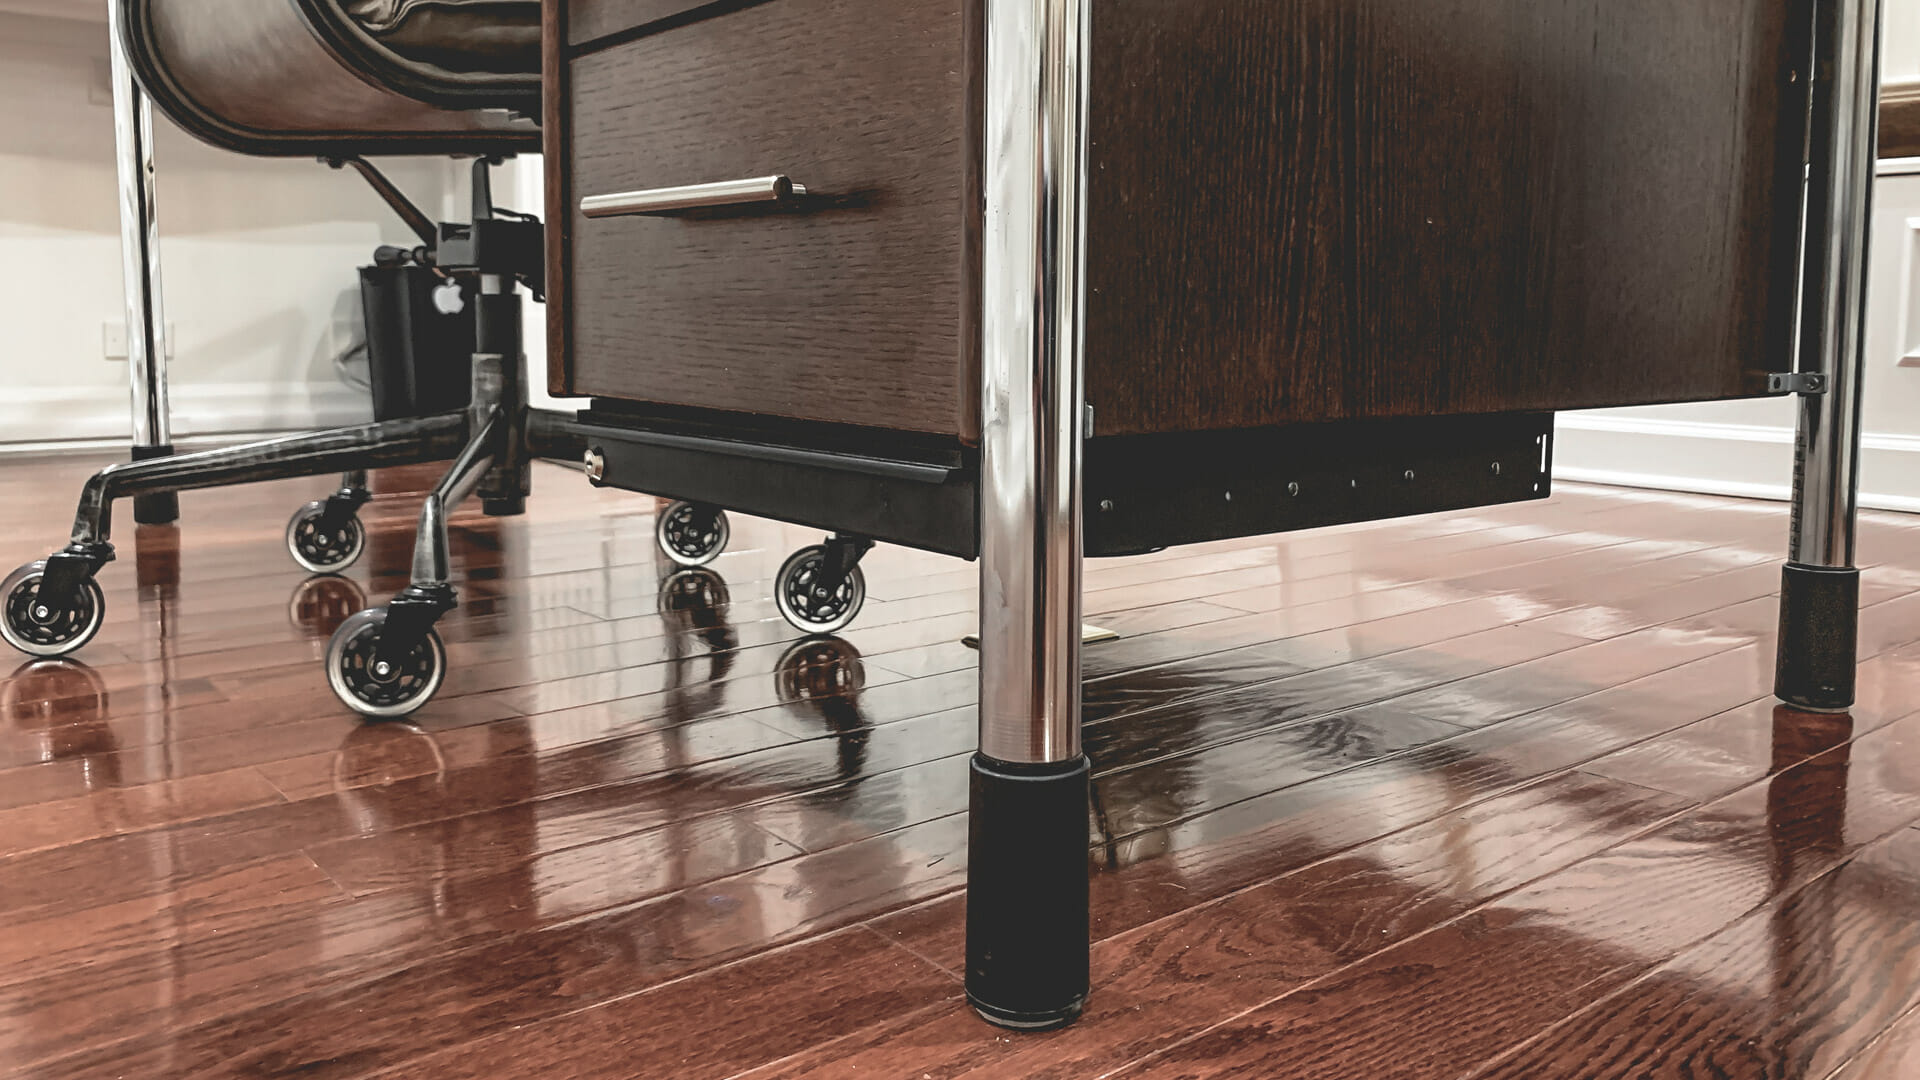
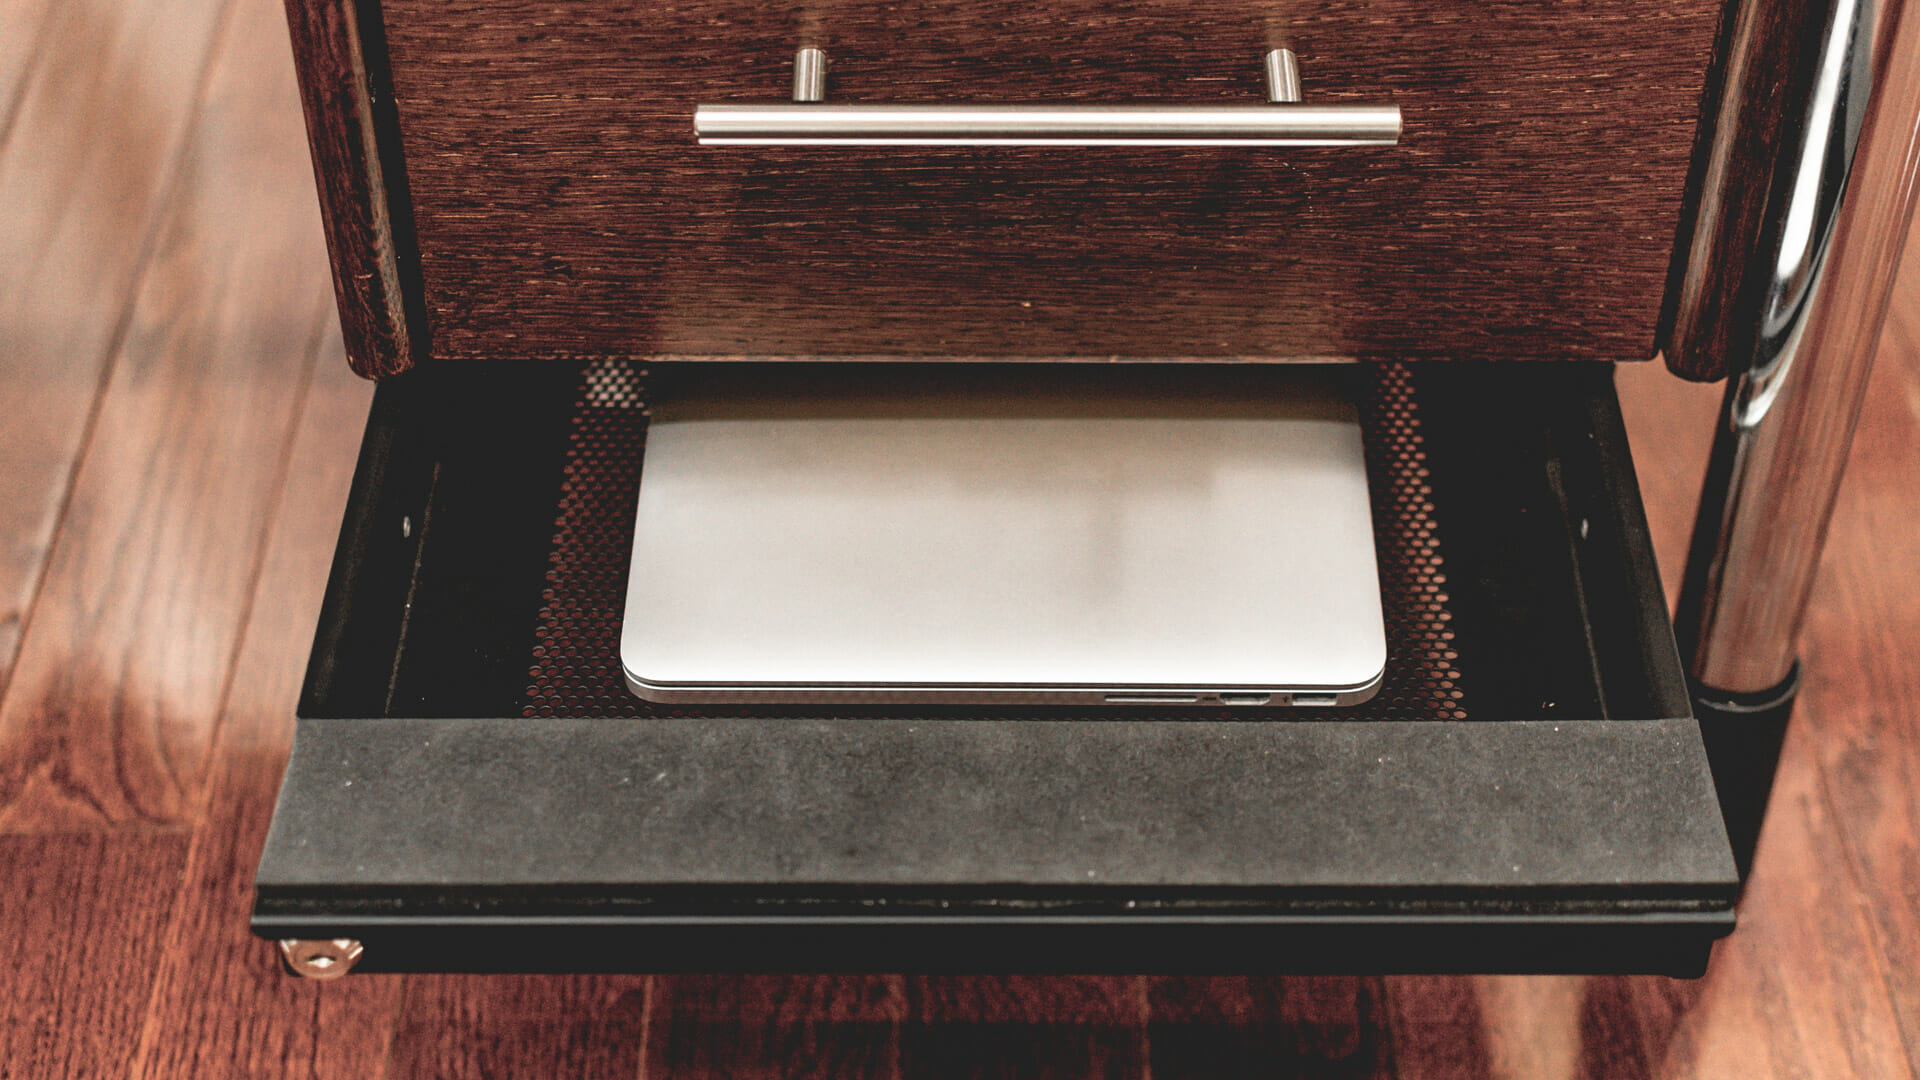
To save work surface space, I’ve mounted the MacBook Pro underneath my desk drawers.
This vented under-desk sliding drawer is super sleek. It tucks the laptop away, but still offers convenient access to the SD card slot or to remove the laptop entirely for travel, etc.
I made a few modifications to the drawer. I bent the rear lip of the drawer down to provide better access for cables (power, Cat 6 ethernet, and external video cables all plug into the laptop from the rear). I also mounted a project fan underneath the drawer to keep the computer cool and the Apple power supply is mounted there too.
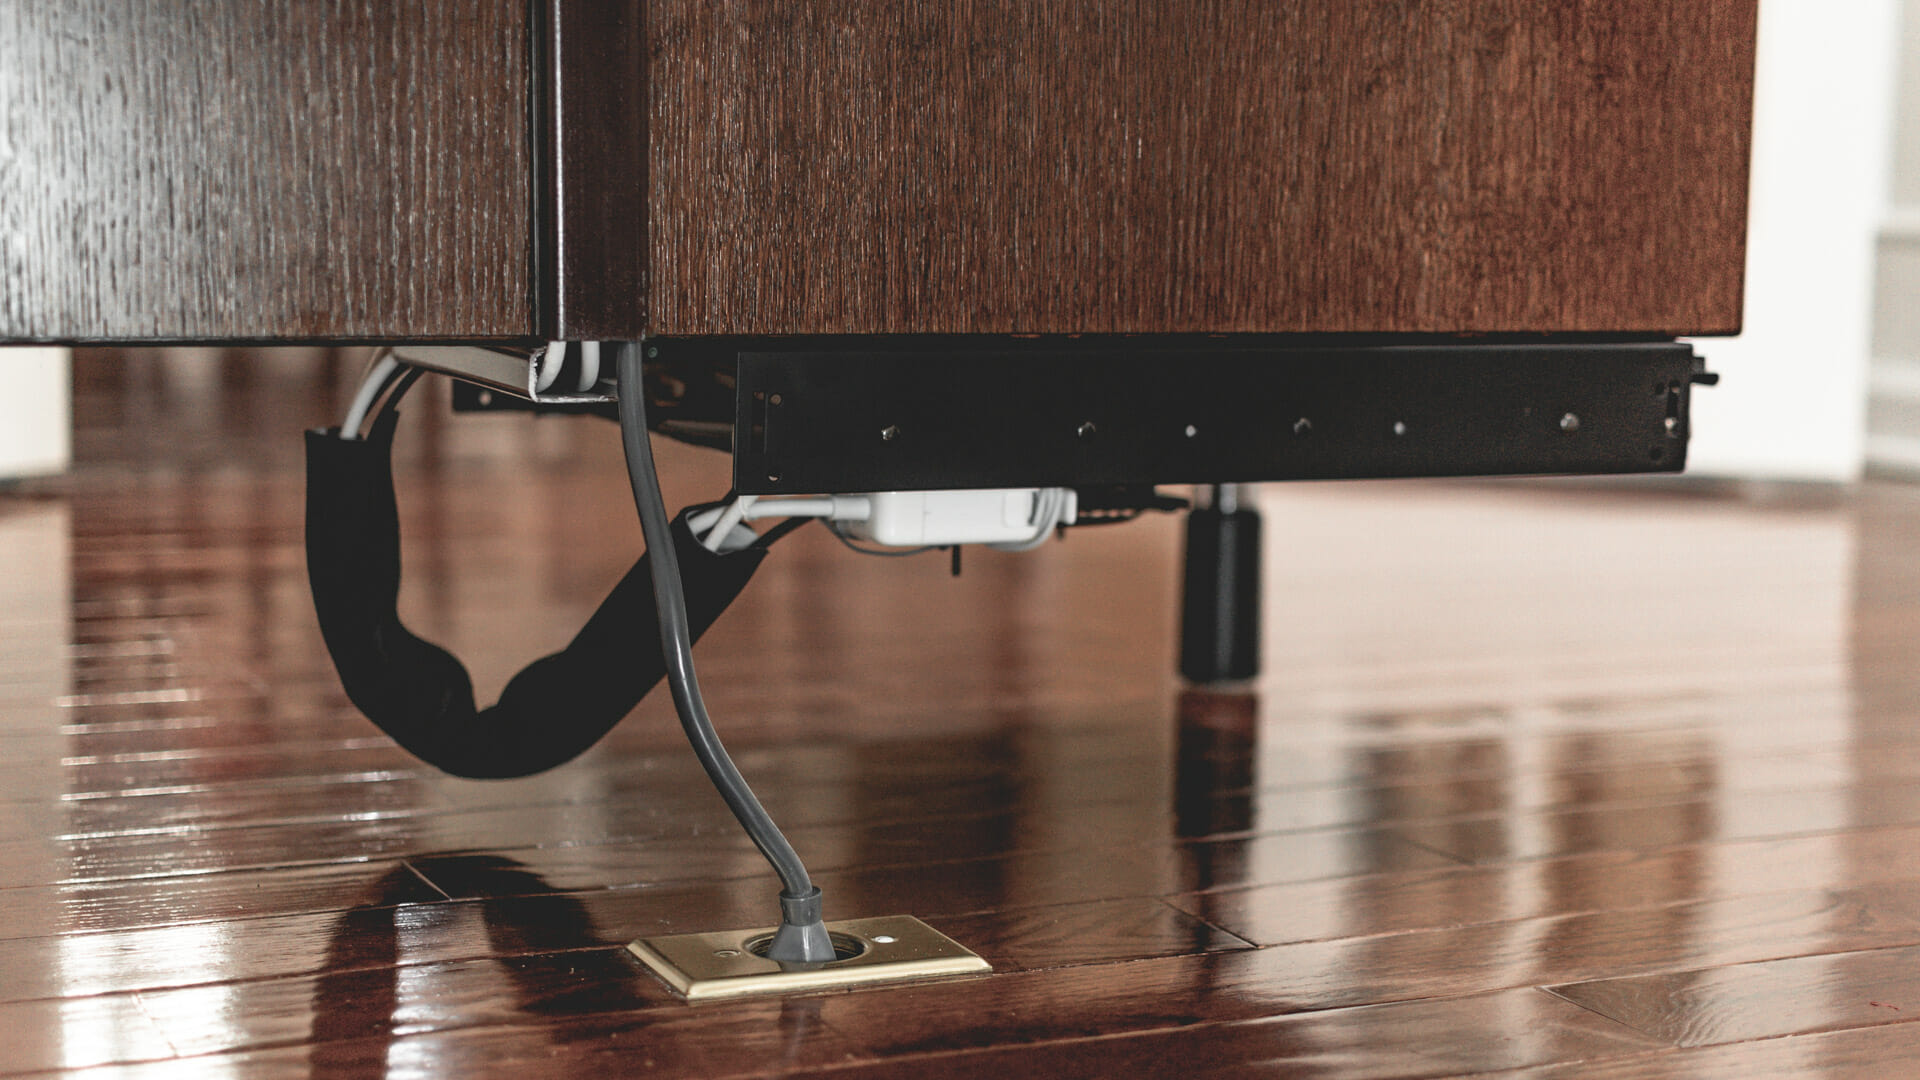
For the drawer to move in and out freely, there needs to be enough slack in the cables. To keep it all tidy, I wrap the cables in a flexible neoprene cord organizer cut to length. The cables then feed into the hard plastic cable channel. I love the CordMate III cable organizer kit, which here I’ve spray painted brown to match the desk.
I use the CordMate III everywhere in the house where I run cables and can’t get them in the wall or otherwise out of sight. The channel pieces are easy to cut with a hand saw and attach to any surface with a strong adhesive. (Or you can screw them in if you want). The kit comes with a variety of connectors to put between pieces to extend, go around corners, etc.
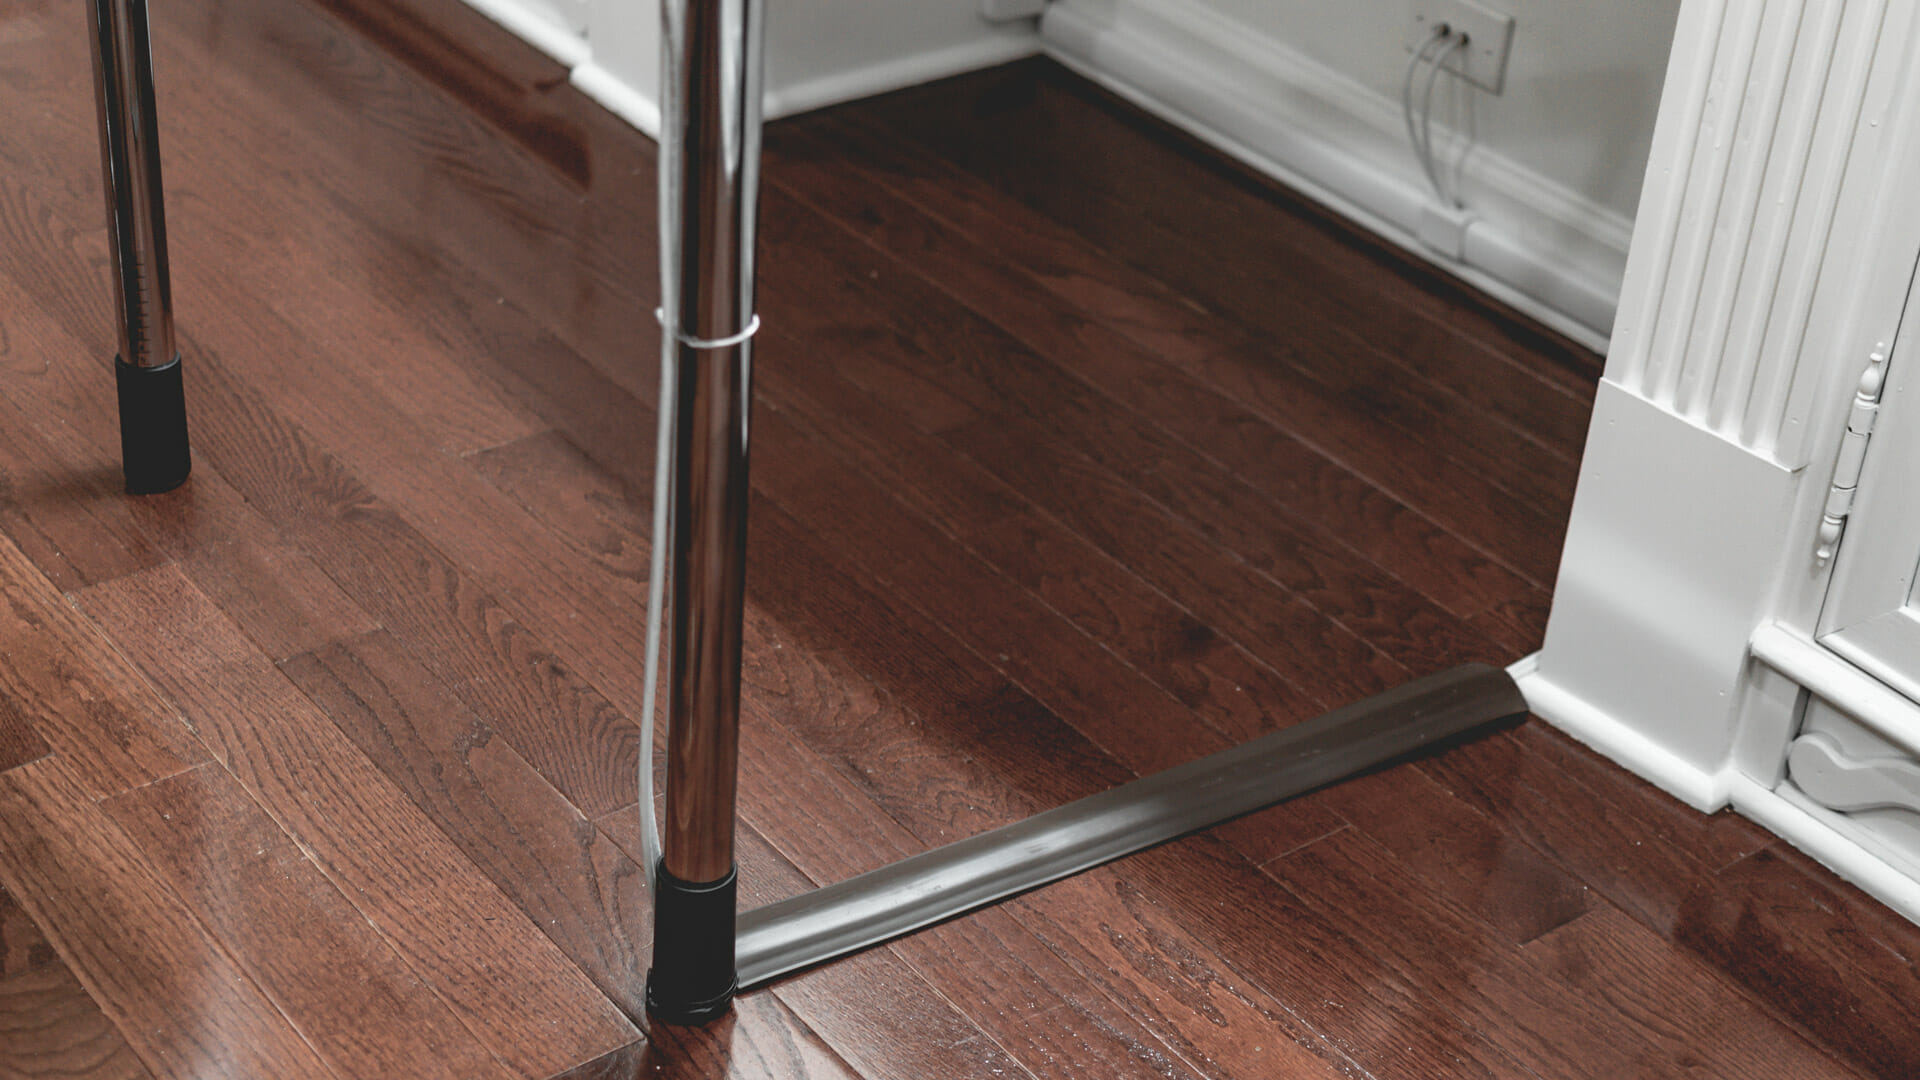
In the last photo in this section, I’ve removed the connector cap between the bottom and side pieces to show the interior size of the channel. You can also see the main power cord (gray) coming into the desk setup from the floor.
More on that in a moment…
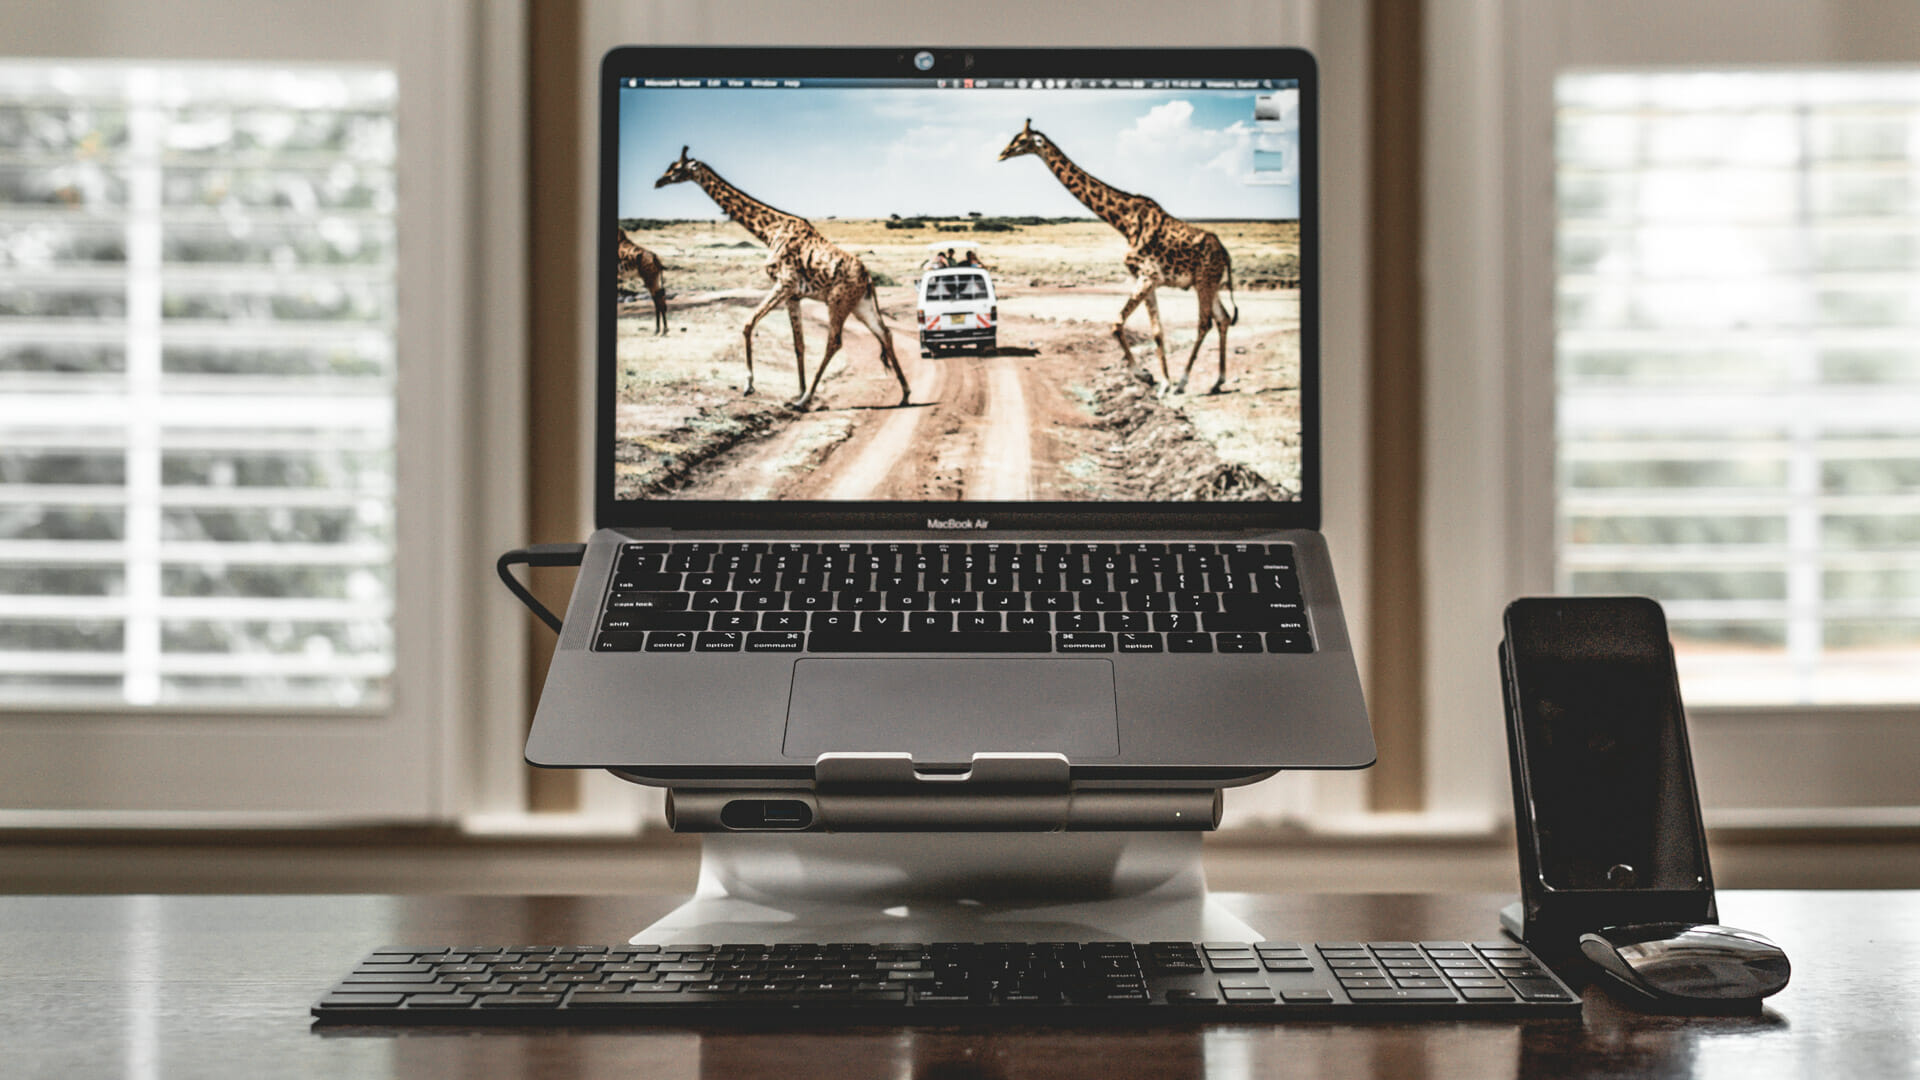
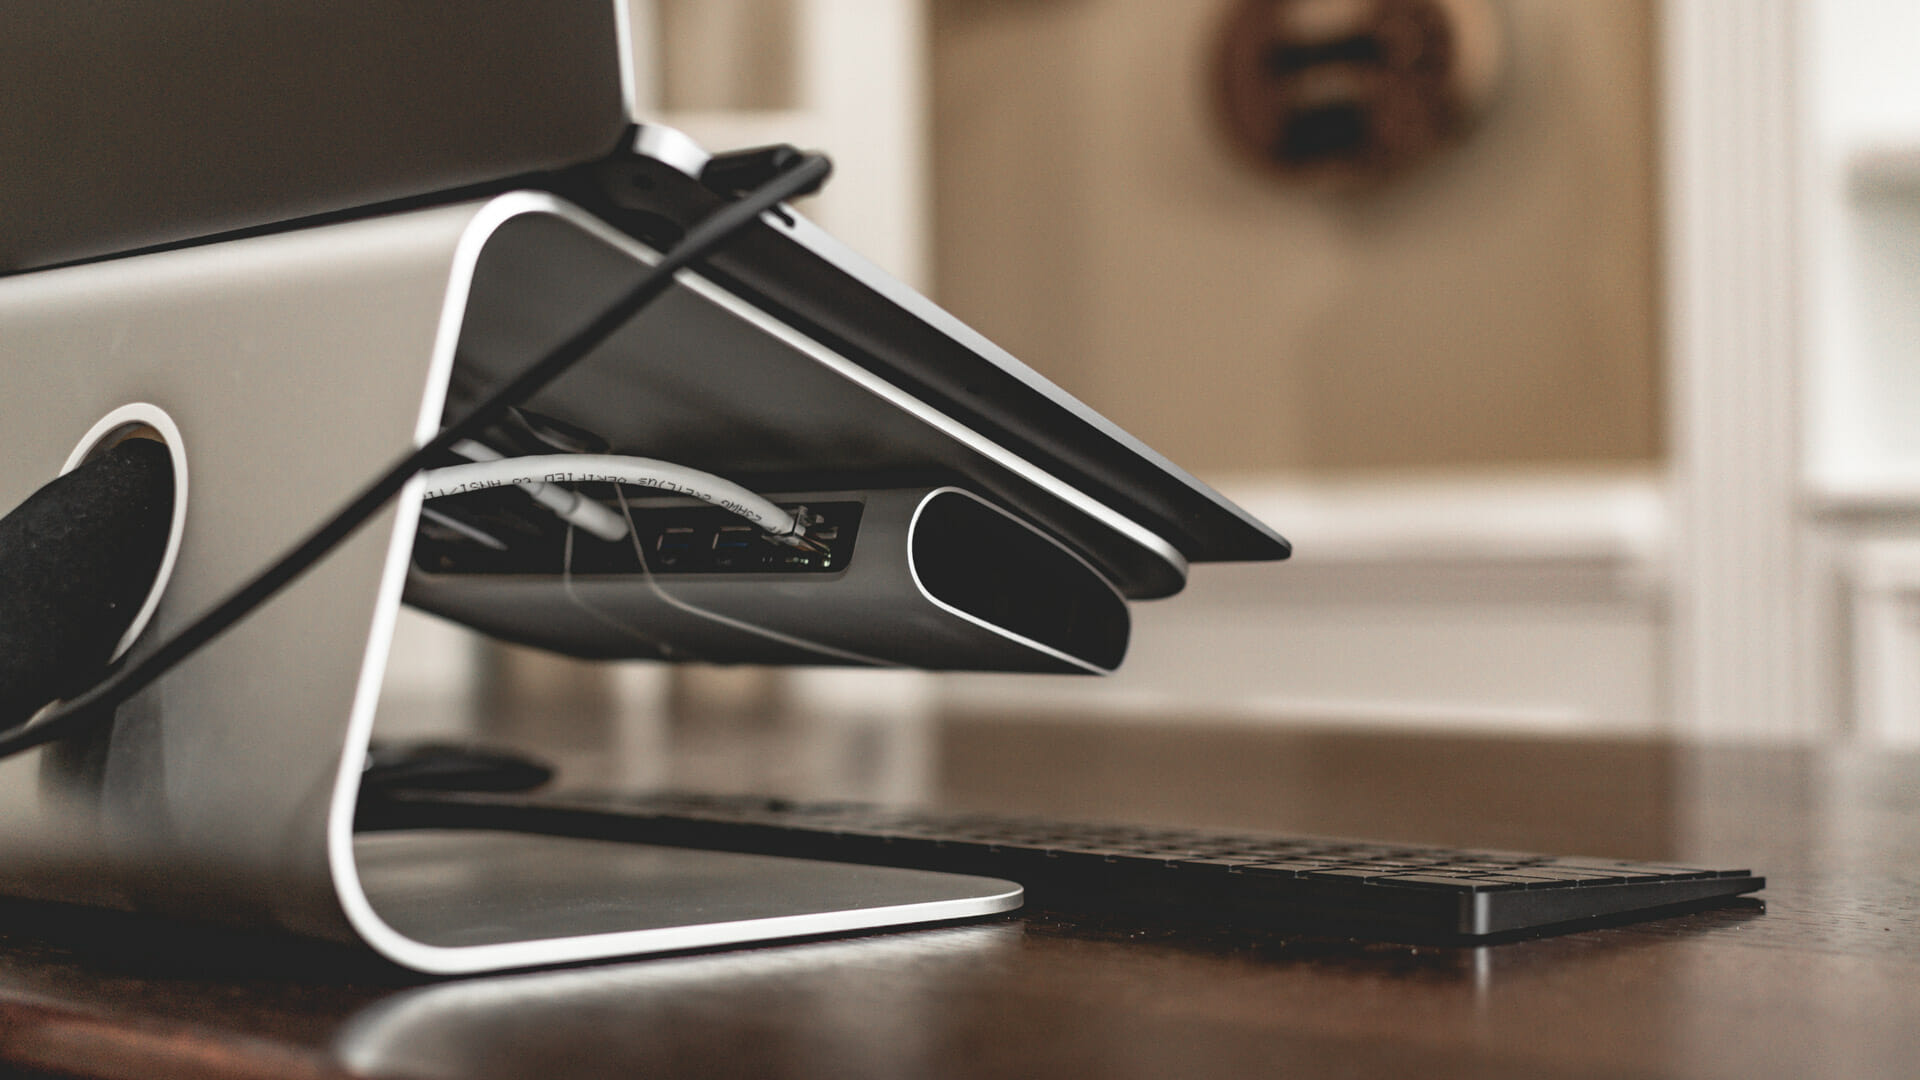
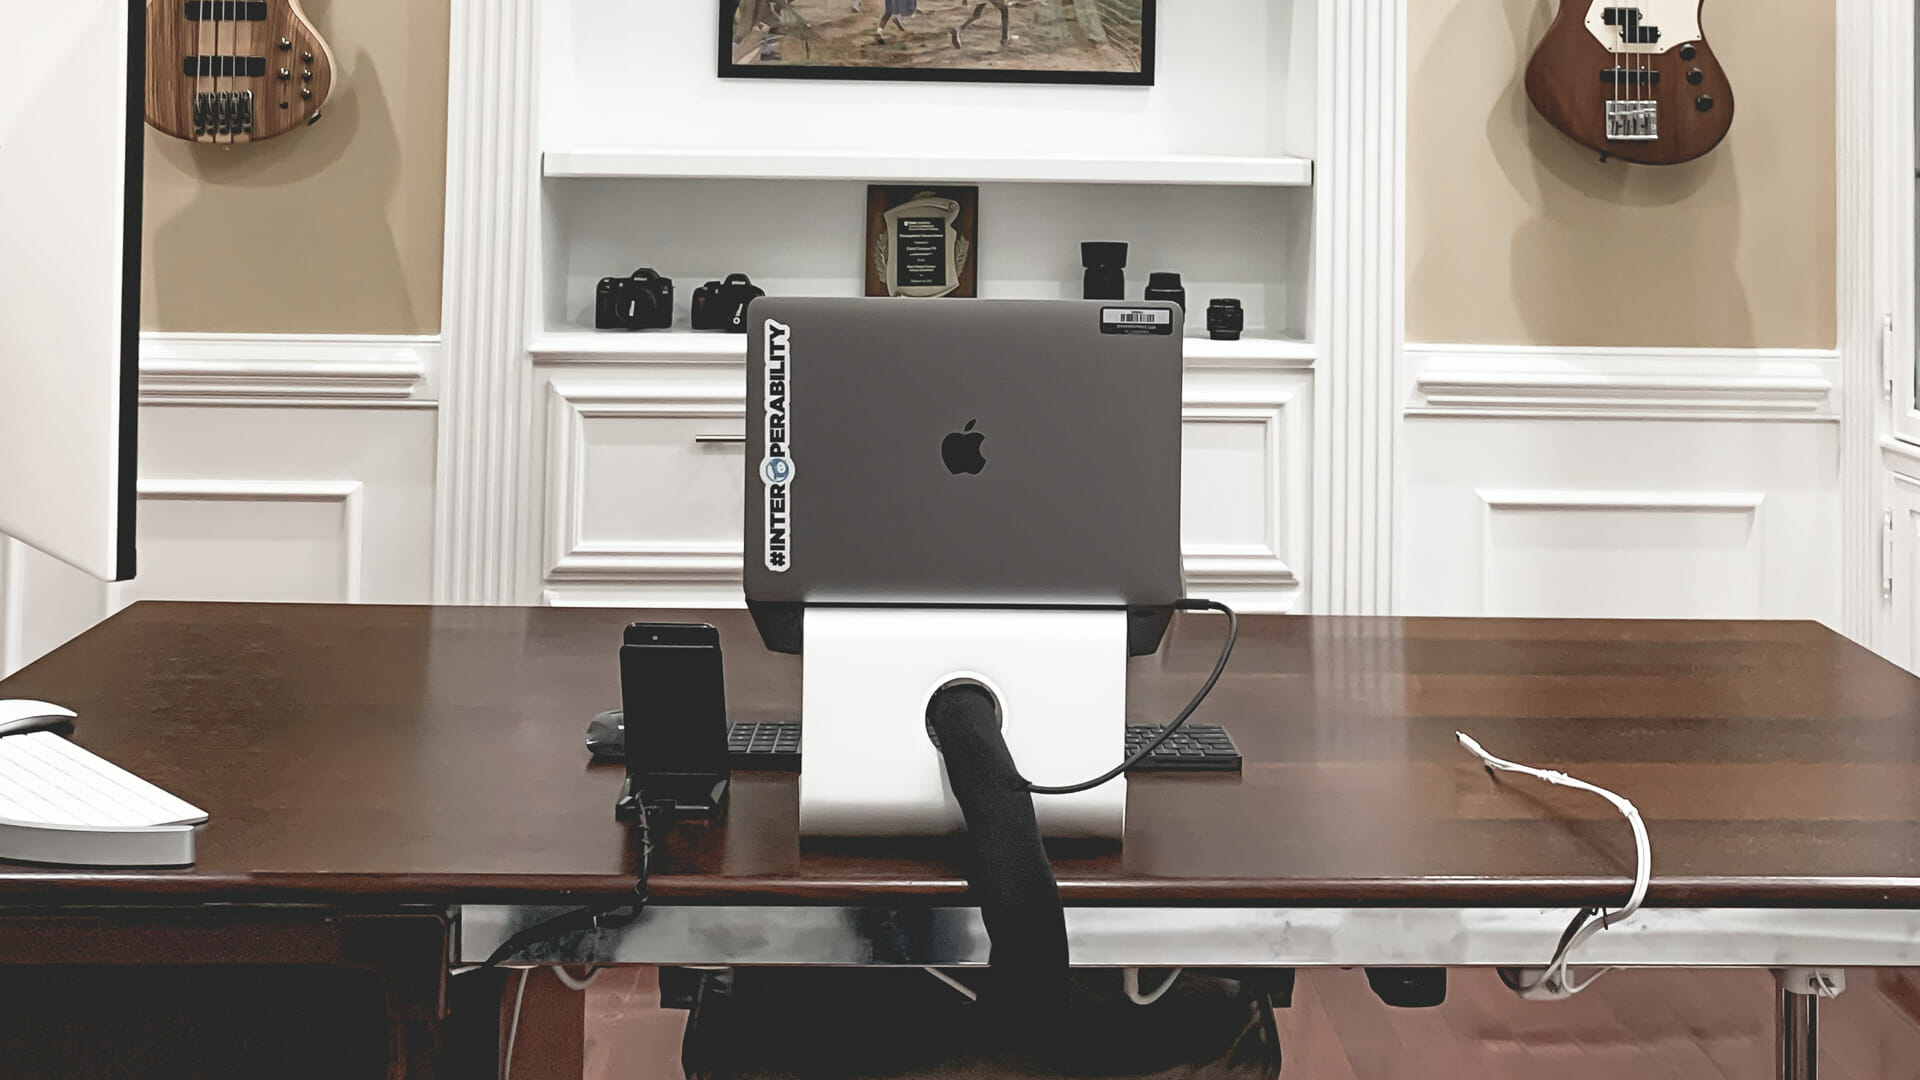
For my main work computer, I use a Macbook Air. This beautiful laptop riser from Rain Design places it at more ergonomic viewing angle. In non-pandemic times I travel frequently, so being easy to disconnect is important to me. I have this sleek Thunderbolt Dock that boasts a multitude of connections (Ethernet, Thunderbolt, DisplayPort, USB3) and that also charges the computer, all via a single Thunderbolt 3 cable.
I’ve mounted the dock underneath the riser to keep it (and all of the cables) out of the way. Since the dock was not designed to be mounted, I used fishing line to attach it: strong, clear, and inexpensive. Having the dock mounted this way also provides easy access to its front USB port (for flash drives, etc). Coming out the back of the dock, all of the cables are wrapped with another section of neoprene cable wrap.
Cable management
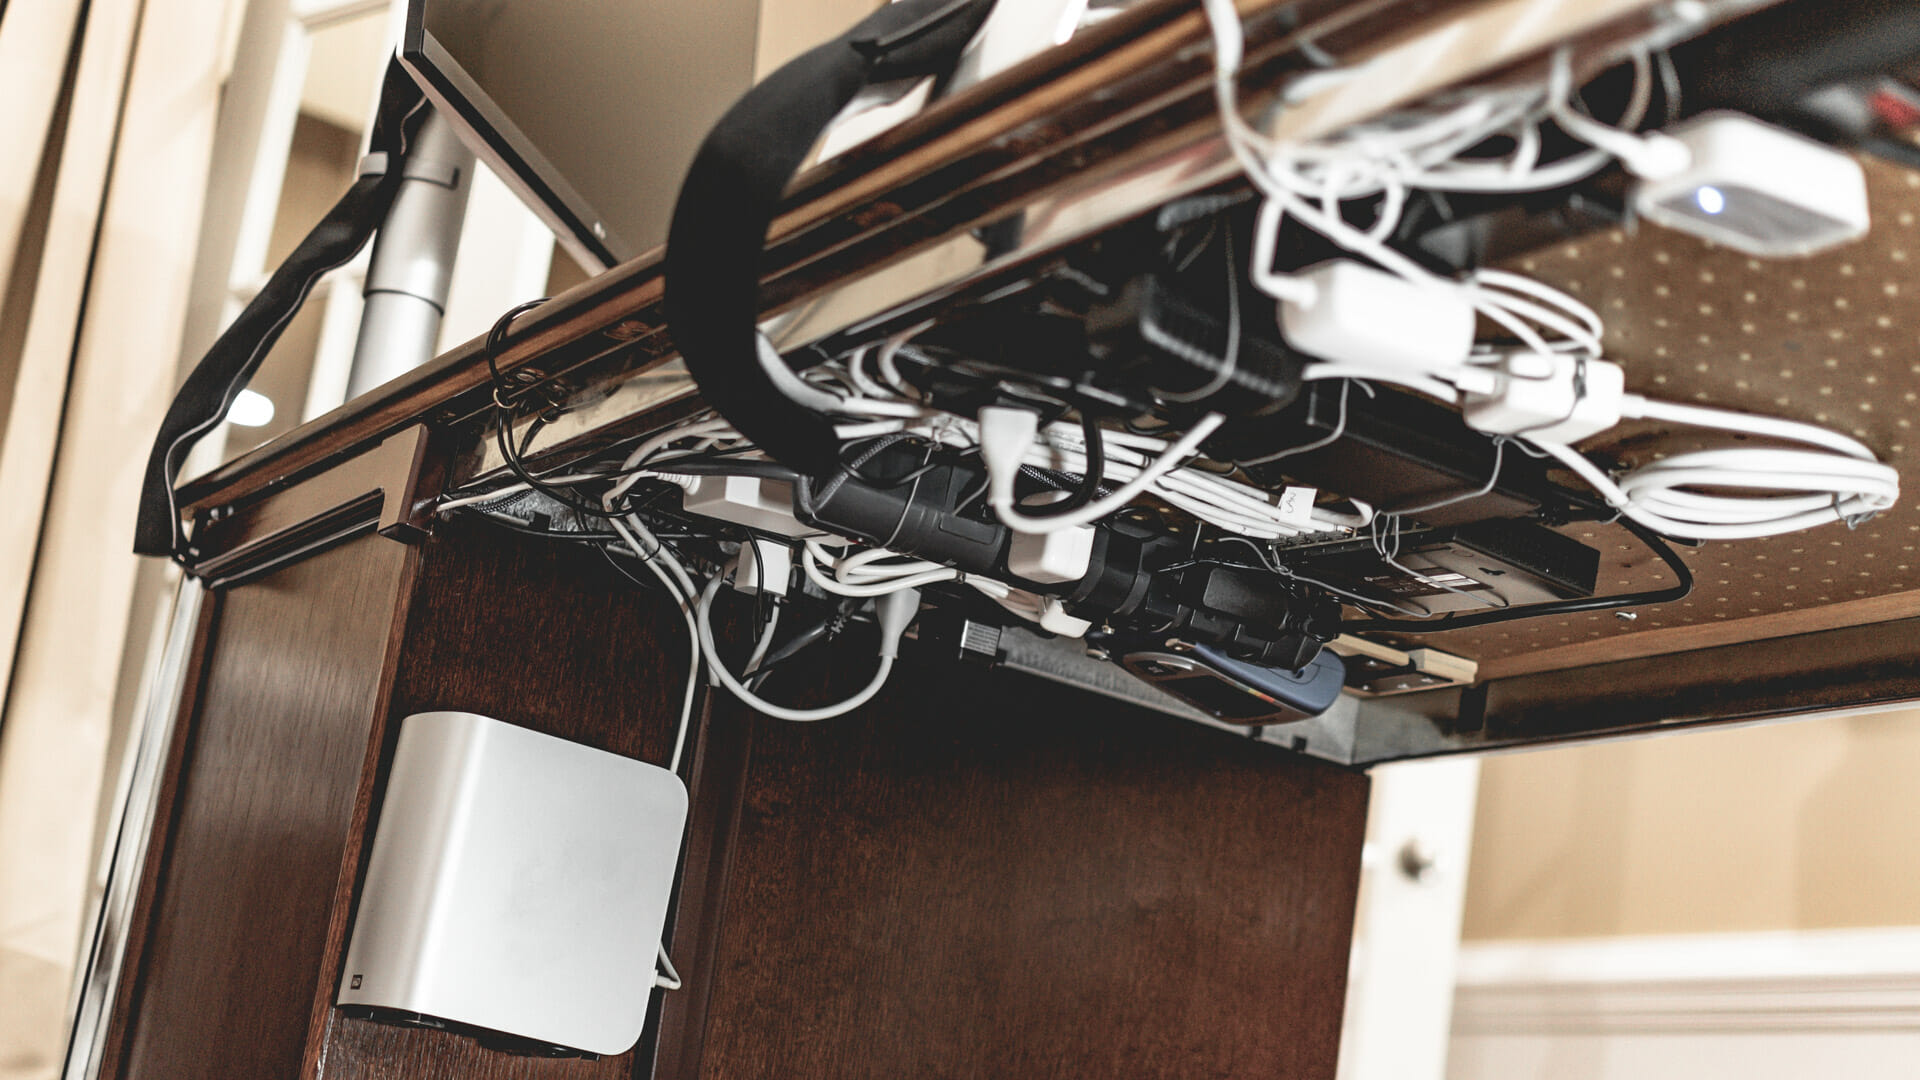
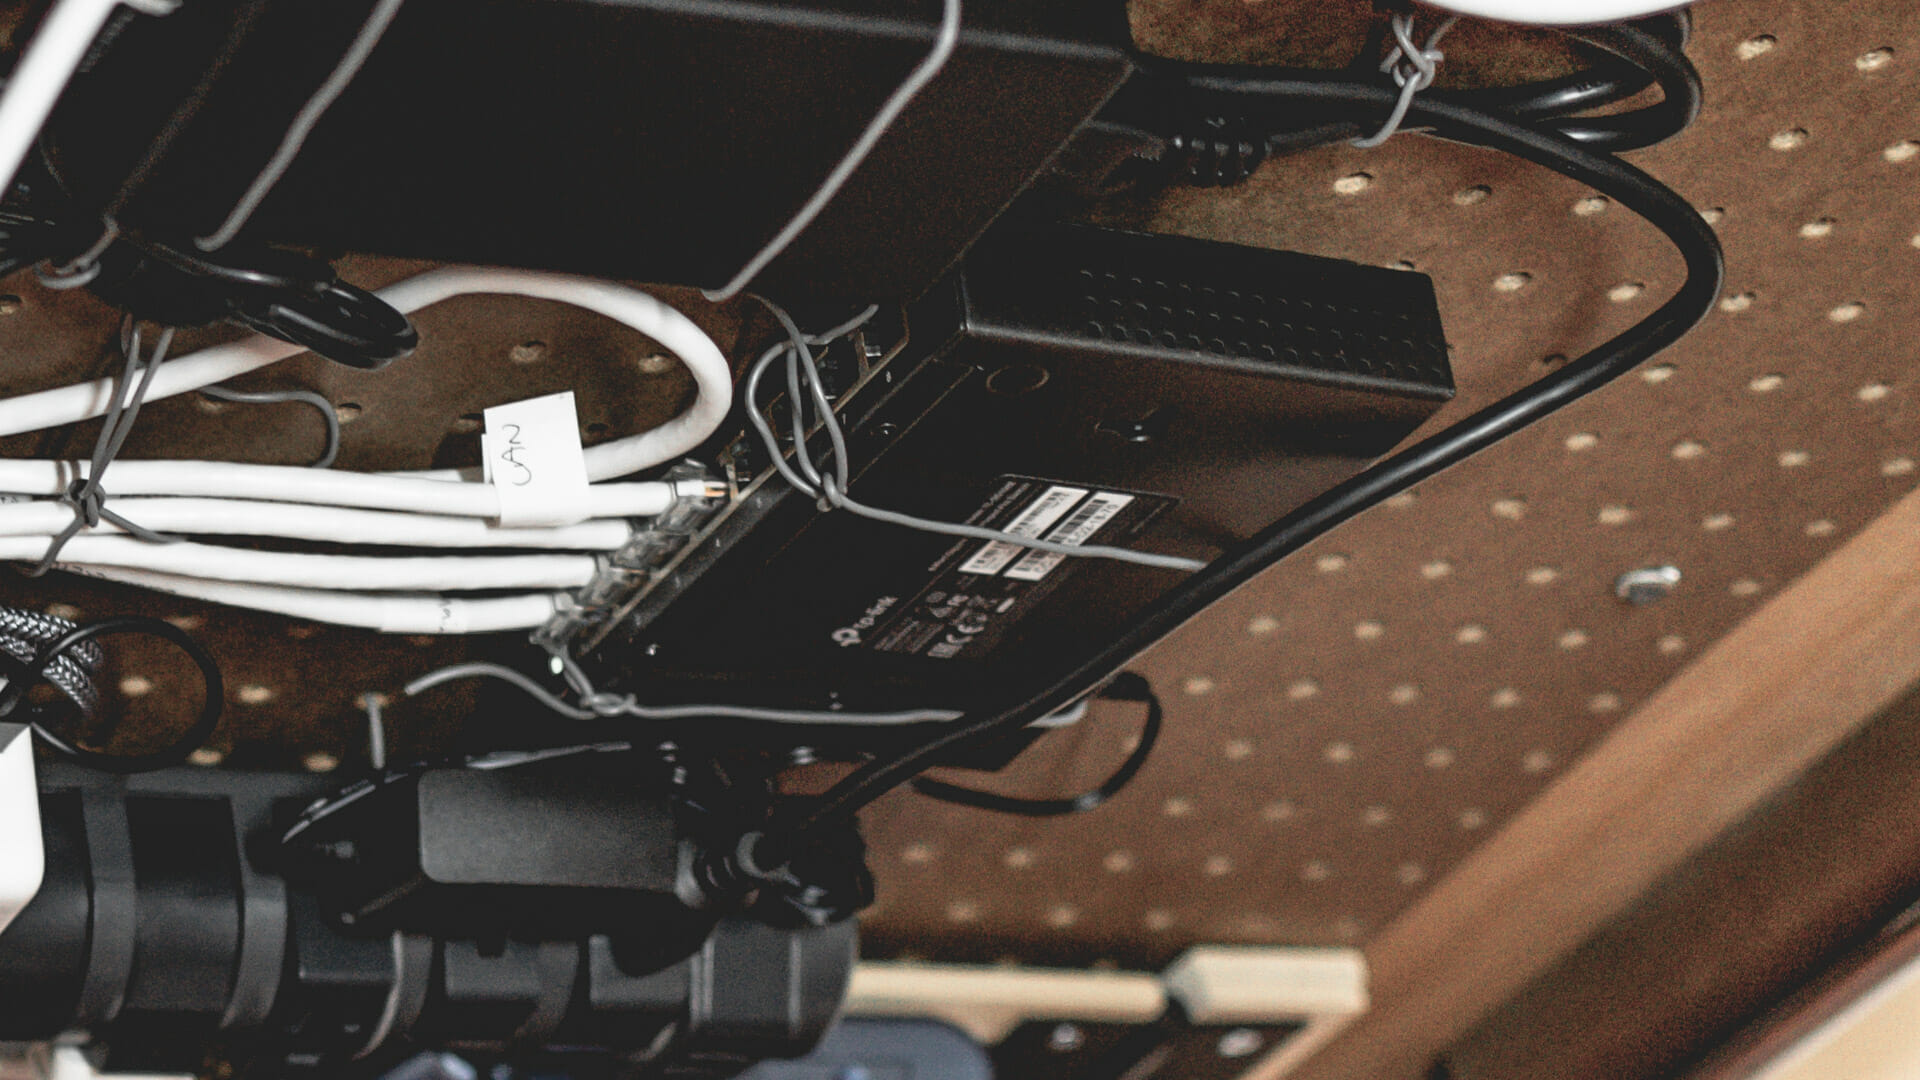
I’ve mounted a sheet of pegboard from a local hardware store underneath the desk using this spacer mounter kit. (I’m not sure why the hardware store didn’t carry a kit like that, so I had to order it online). To the pegboard I’ve attached 3 power strips, all the power adapters, and coils of wires and cables.
I’ve tried a few mounting approaches, but the best way I’ve found to attach all of this stuff and route the wires is using ground wire cable. 18 gauge works well. It’s thin and flexible, but strong enough to hold most anything. When I first built a setup like this I used zip ties. As I swap out components and add new things, I’ve found ground wire much easier to temporarily loosen, move, and add. It takes a bit of practice to thread the wire up through the pegboard holes and back down again.
Looking closely at the photo above, you may see a few other components mounted. Using some simple L-brackets, I’ve attached an external RAID hard drive that uses Thunderbolt for a fast local connection (good for photo editing).
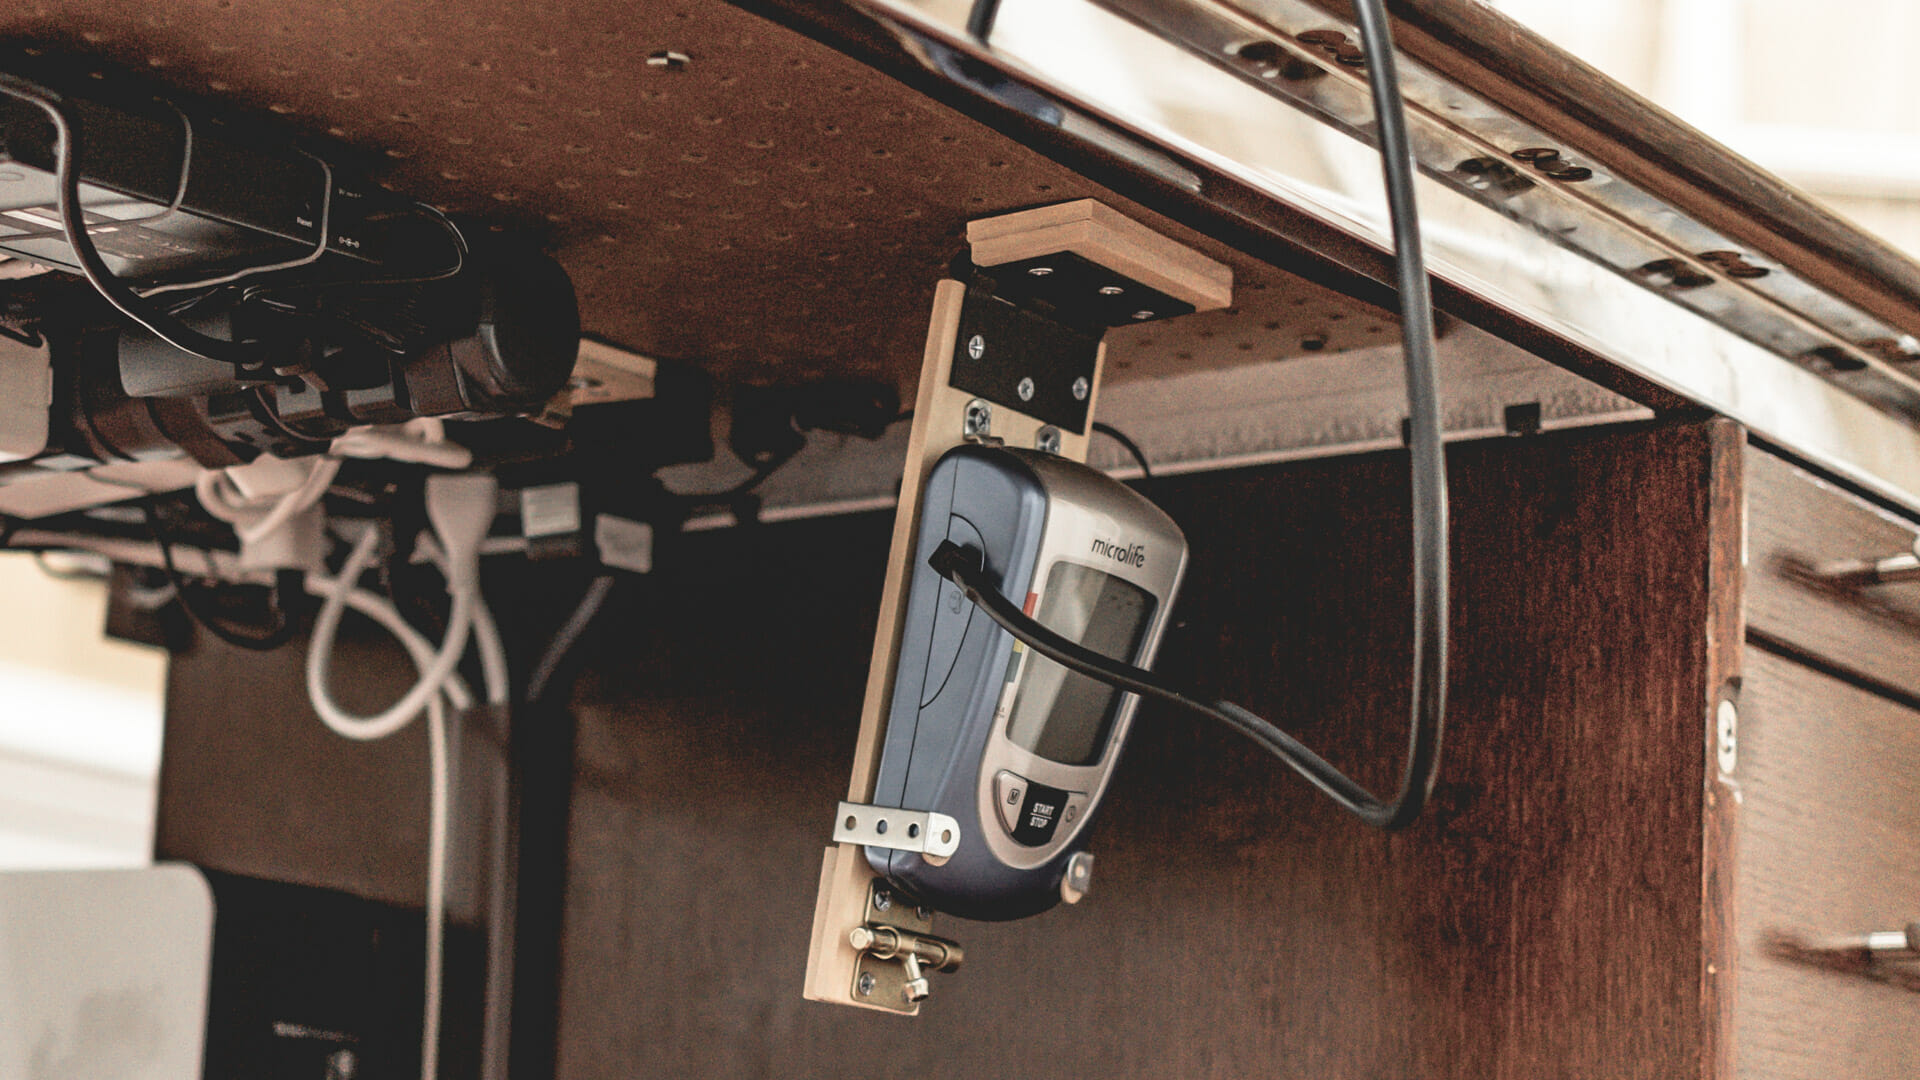
I’ve also mounted my trusty blood pressure cuff. This is an old-school Microlife device that I use regularly but is an eye sore to keep out on your desk.
So, to mount it underneath, I built a little hinge and lock mechanism that swings down when I want to use it.
This mounting makes it easy to attach the cuff, take a measurement, and then swing the device back up out of sight.
I also have an 8 port Smart Gigabit Switch which is fed from the gateway Eero Pro WiFi 6 mesh router.
I love having super strong wifi throughout the house, but nothing beats wired ethernet for speed and reliability.
I use these smart gigabit switches wherever I have a cluster of devices that I want wired to the network.
The gateway Eero Pro WiFi 6 mesh router is on a shelf (not shown in a picture here) to help extend the wifi signal. Its power and Cat 6 cable connections are kept tidy by more CordMate III cable organizers cut to length.
The one small area where I need cables on the floor, I used a low profile floor cable management channel to hide the Cat 6 cables and prevent tripping.
Charging
Desktop Essentials
I like this inexpensive wireless charging stand for keeping my phone charged, visible, and easily accessed. It’s essential for all those two-factor logins you need throughout the day.
Key Solutions
Charging stations
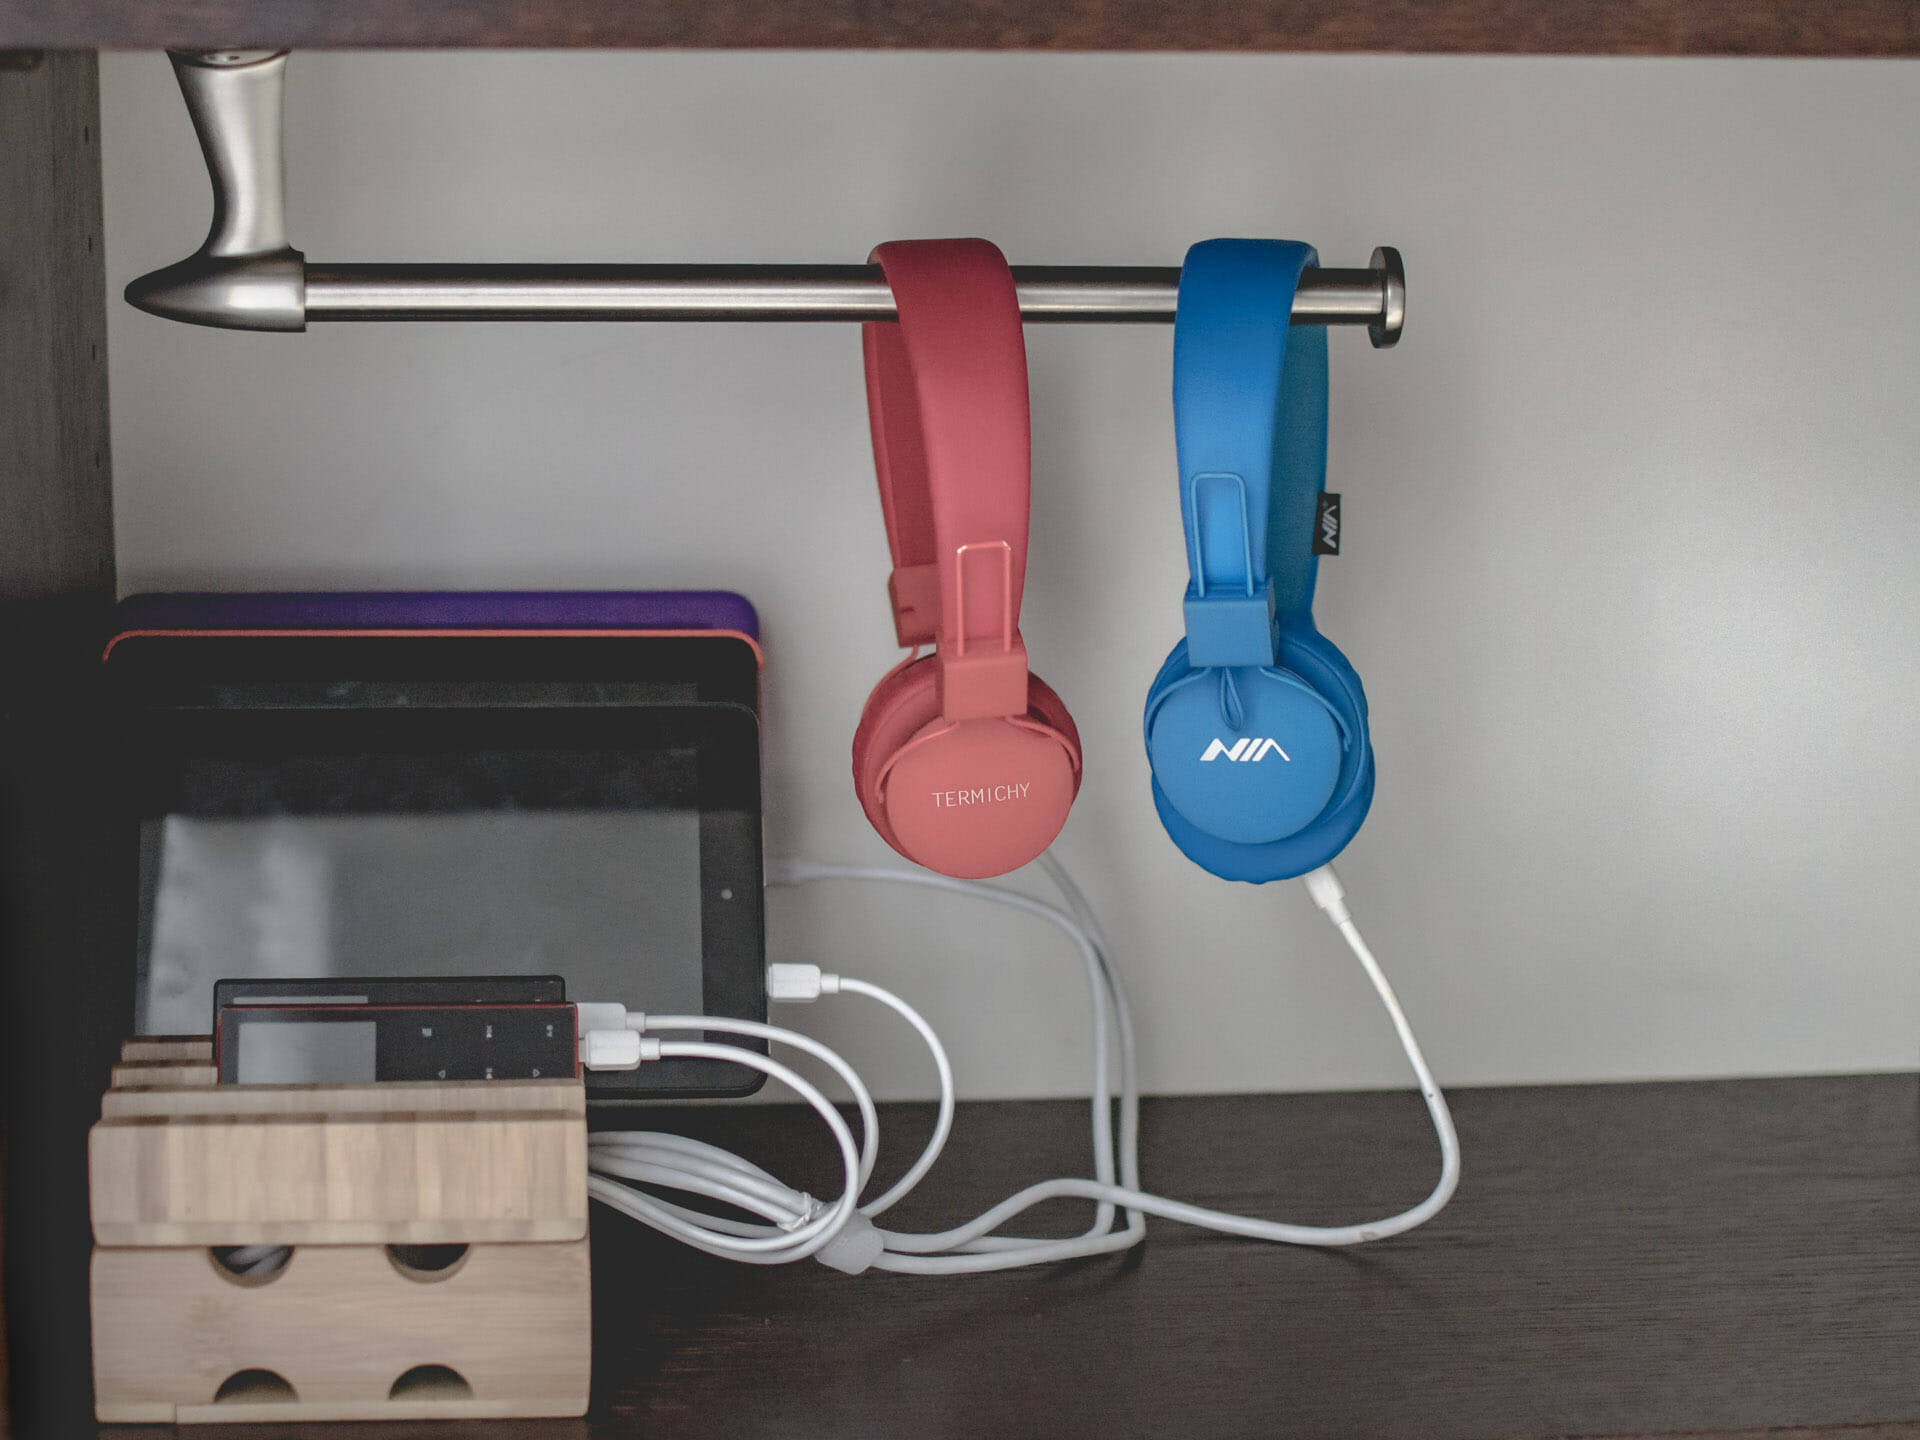
For our collection of over-the-ear wireless headphones, a fun hack is mounting an under the counter paper towel holder. The bar keeps the headphones safe, easy to plug in, and easy to slip off.
Credenza
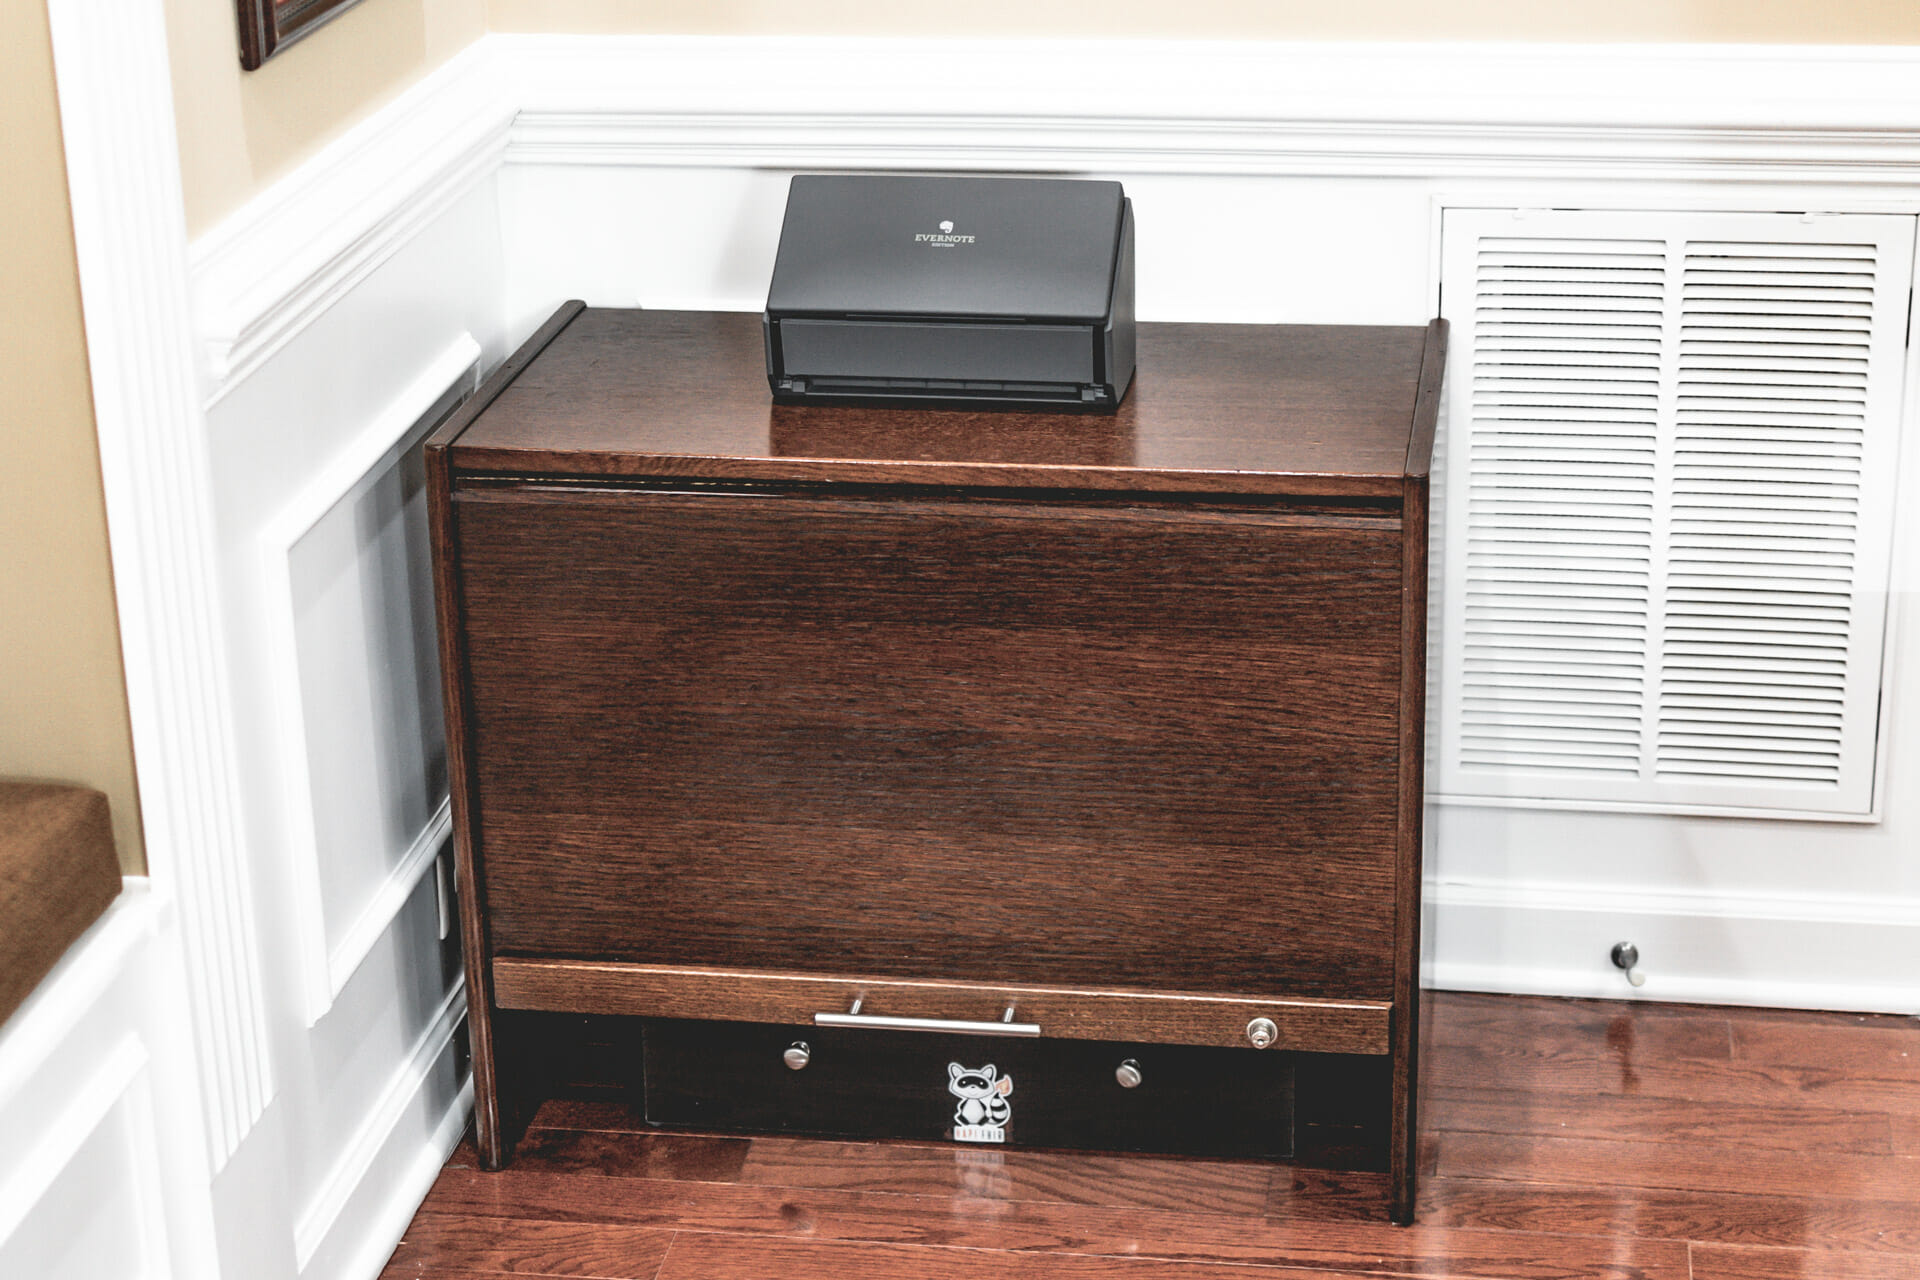
On top of the credenza sits a magical device. The out-of-production ScanSnap Evernote Edition has been the single greatest clutter-reducing force in our house in the last 7+ years. (Newer ScanSnap versions are available with even more features). Nearly all of the paper that enters our house is either recycled, shredded, or scanned. This bad boy makes it so convenient to get everything digitized and easily findable, from important documents, bills, receipts, holiday cards, papers from the boys’ schoolwork, or anything else. As the name suggests, this integrates smoothly with Evernote, which is my digital brain. Every home office needs one of these. (Some day I’ll write-up how I use Hazel and Evernote together for super-powered filing of household bills and statements).
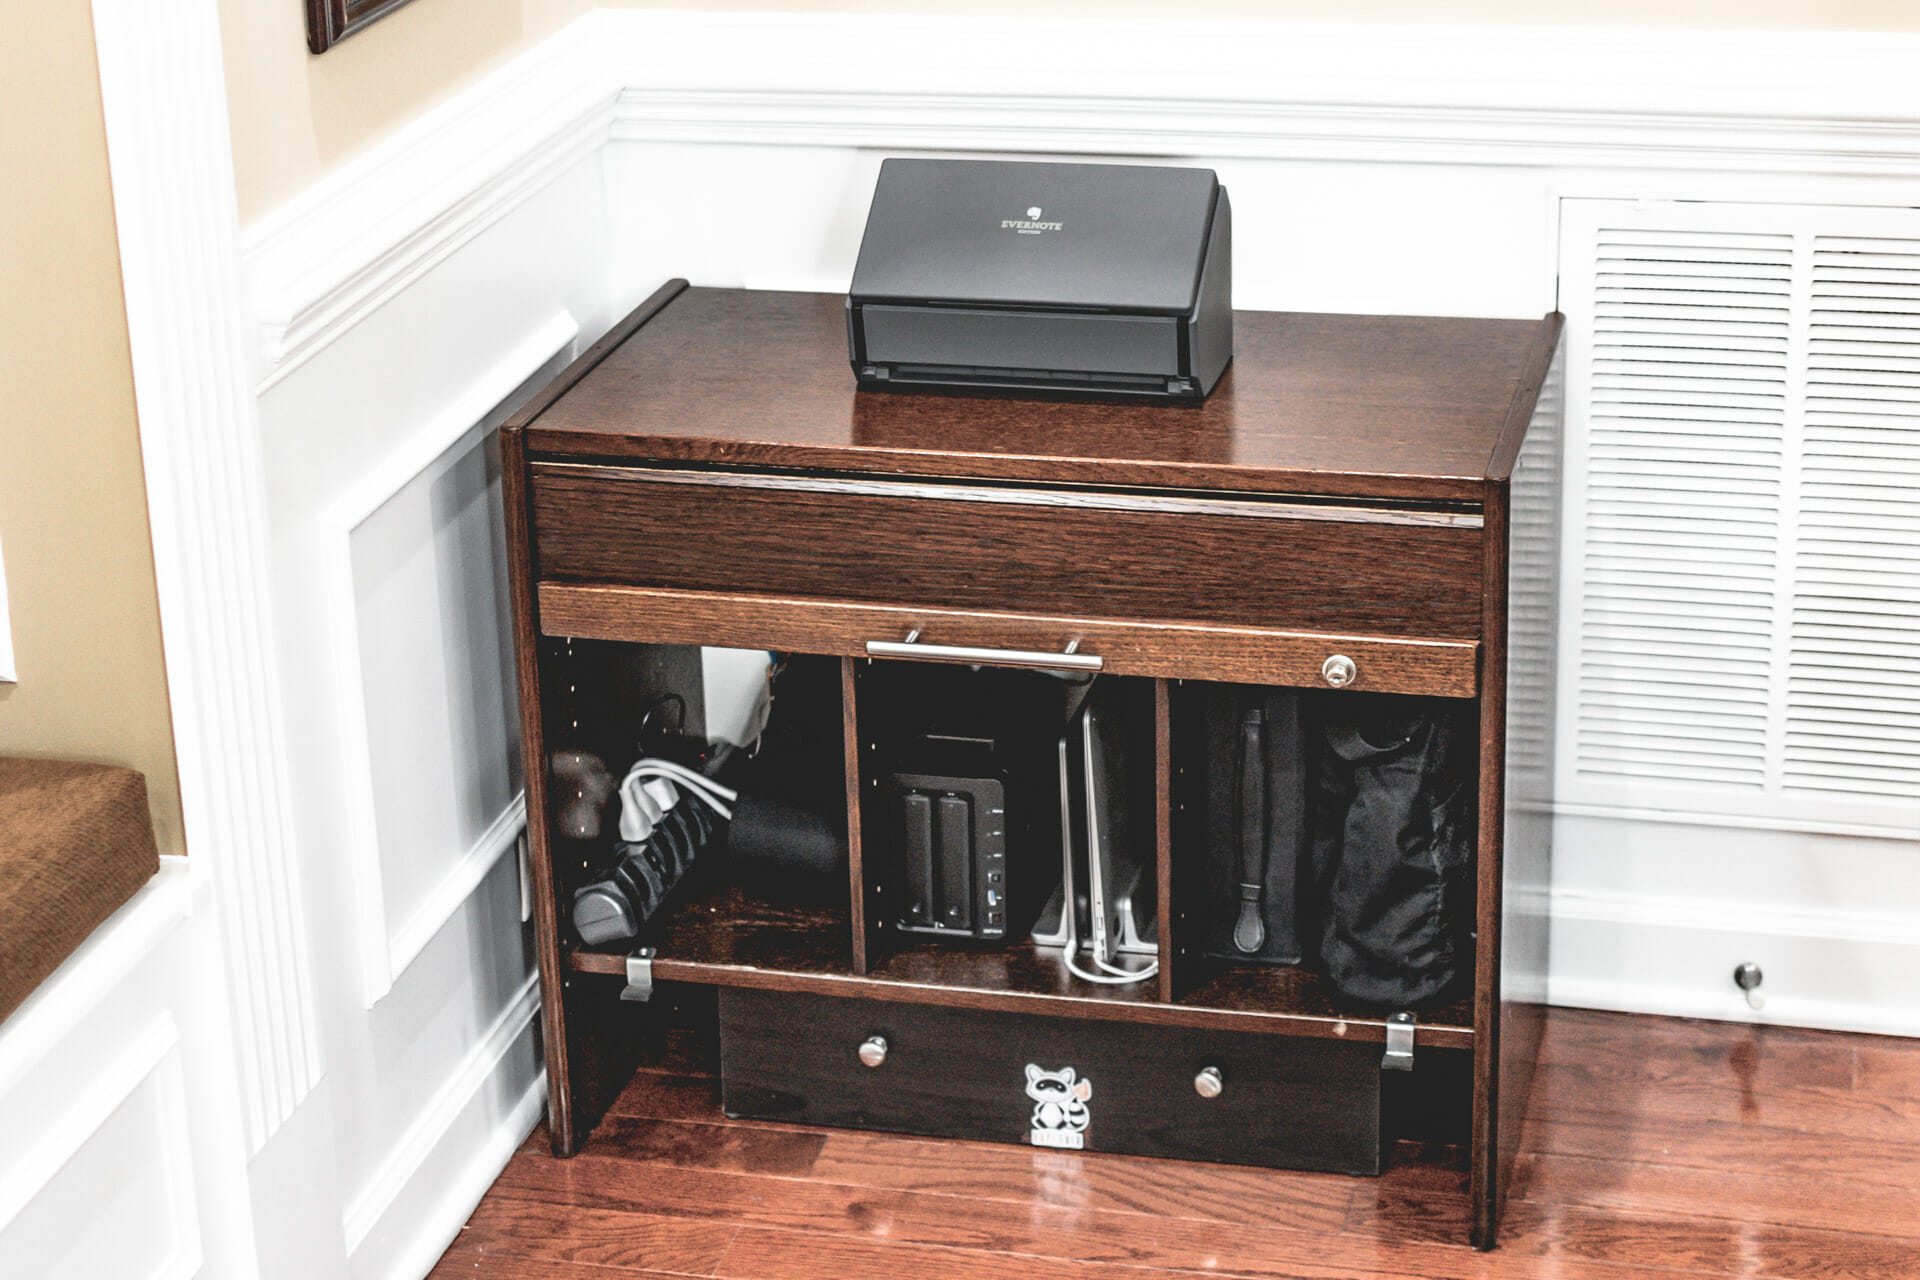
Inside the credenza, a few more digital goodies are tucked away. There’s a Raspberry Pi or three in there for various projects. I’ve got our venerable Synology DiskStation Network Attached Storage server that is our main local backup and storage solution. (Everything digital is also backed up in the cloud). You can’t see it, but there’s also a UPS battery backup and surge protector in case of short power outages.
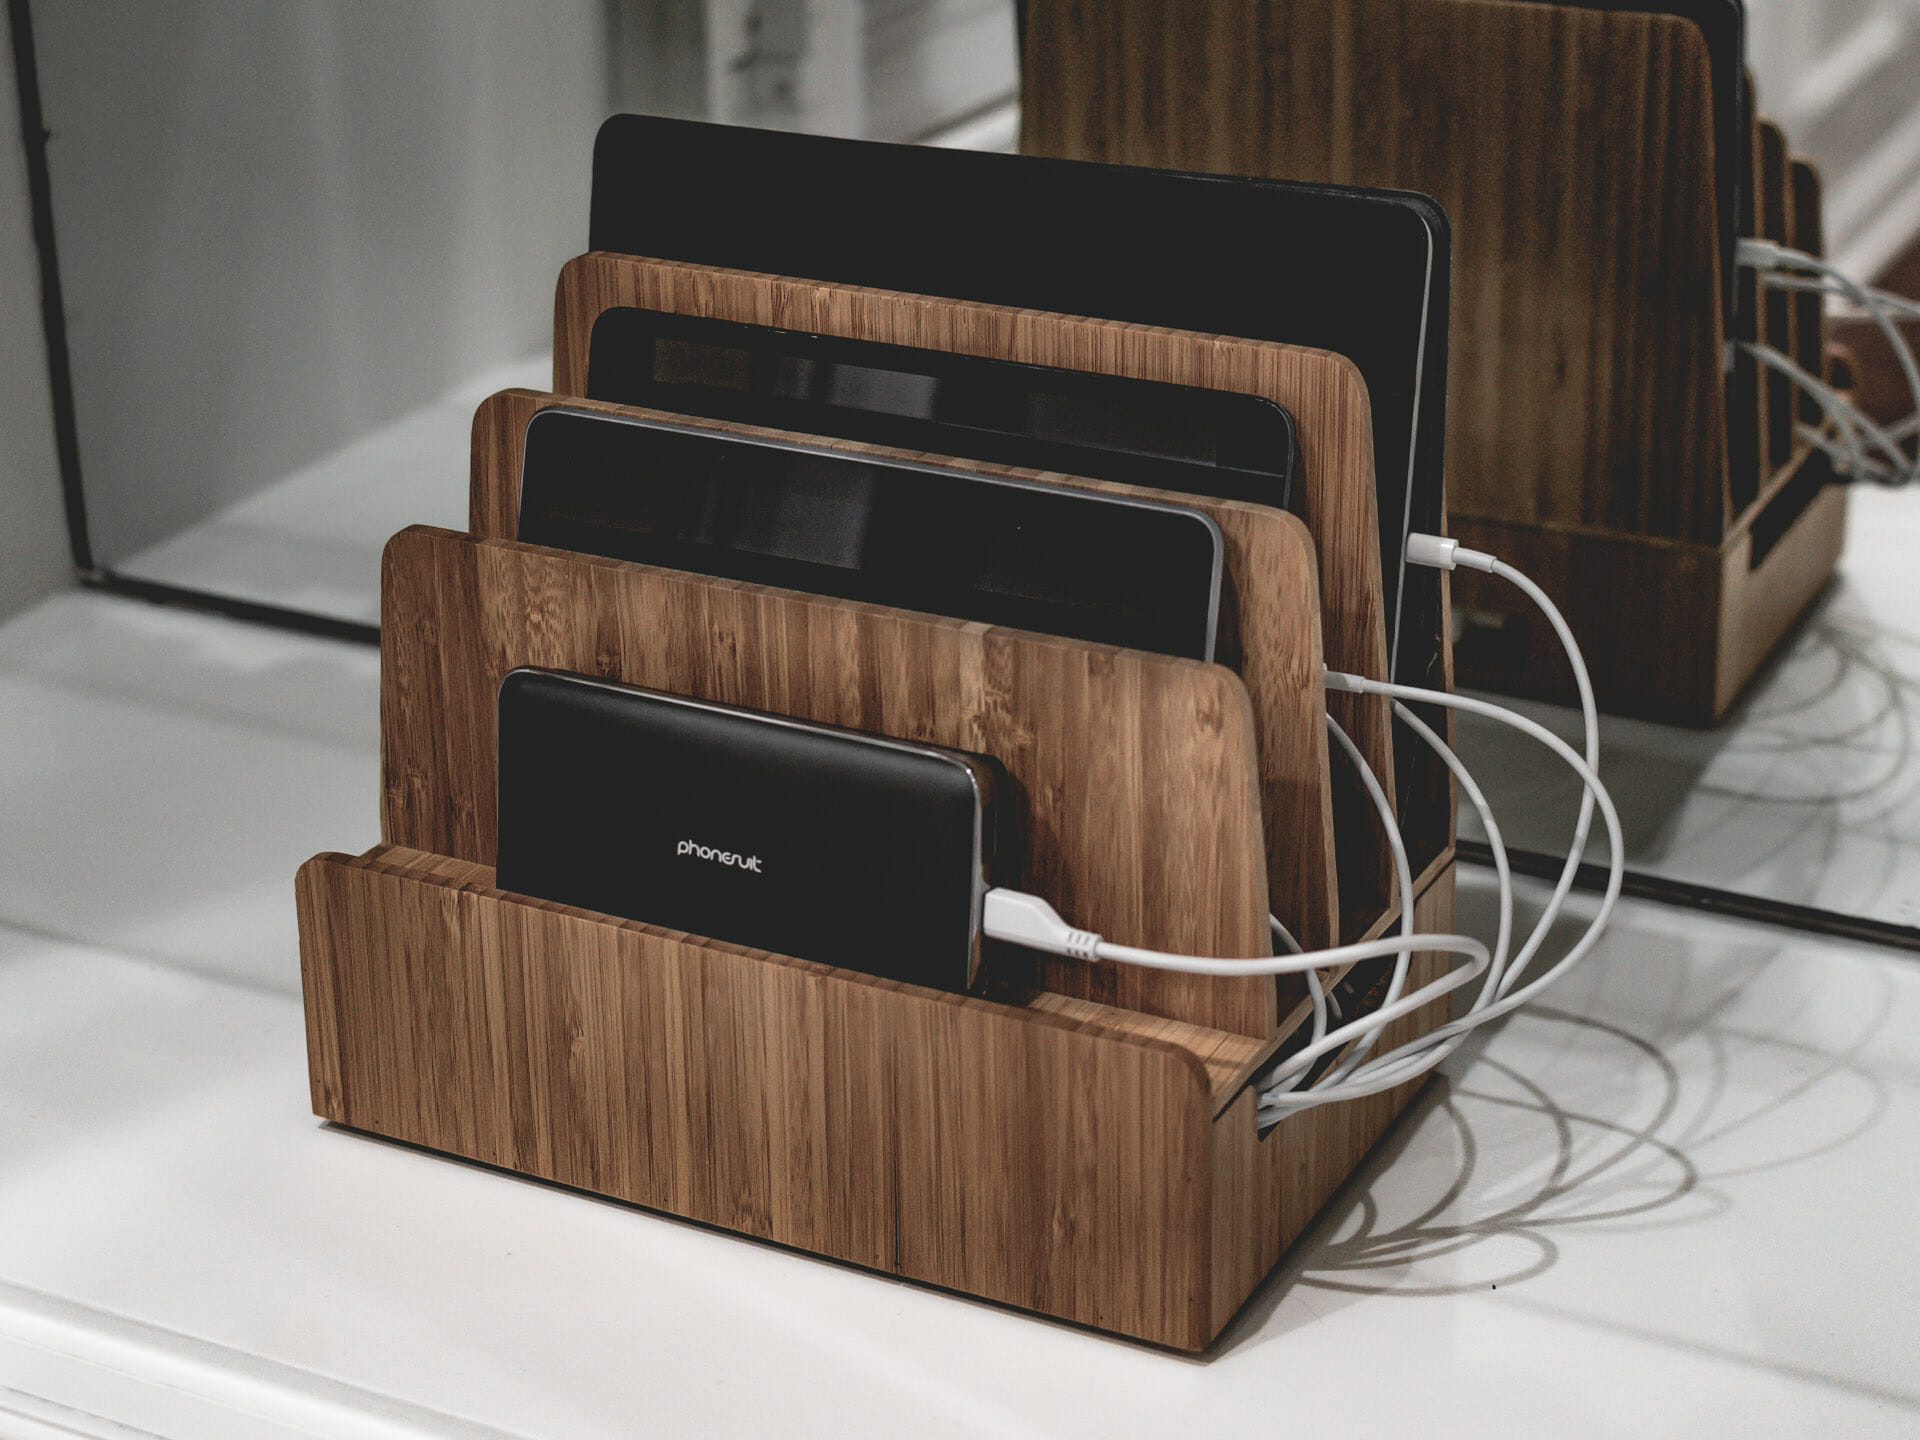
The credenza also serves as a charging station for two other laptops: the Macbook Air that my wife uses and the 13″ MacBook I use around the house for basic browsing and for international travel (it routinely gets wiped clean). A double vertical laptop stand provides a convenient, out of the way place to recharge these devices at night.
At the back of the credenza a 6″ cabinet cooling fan keeps the air flowing and the devices cool.
Battery Drawer
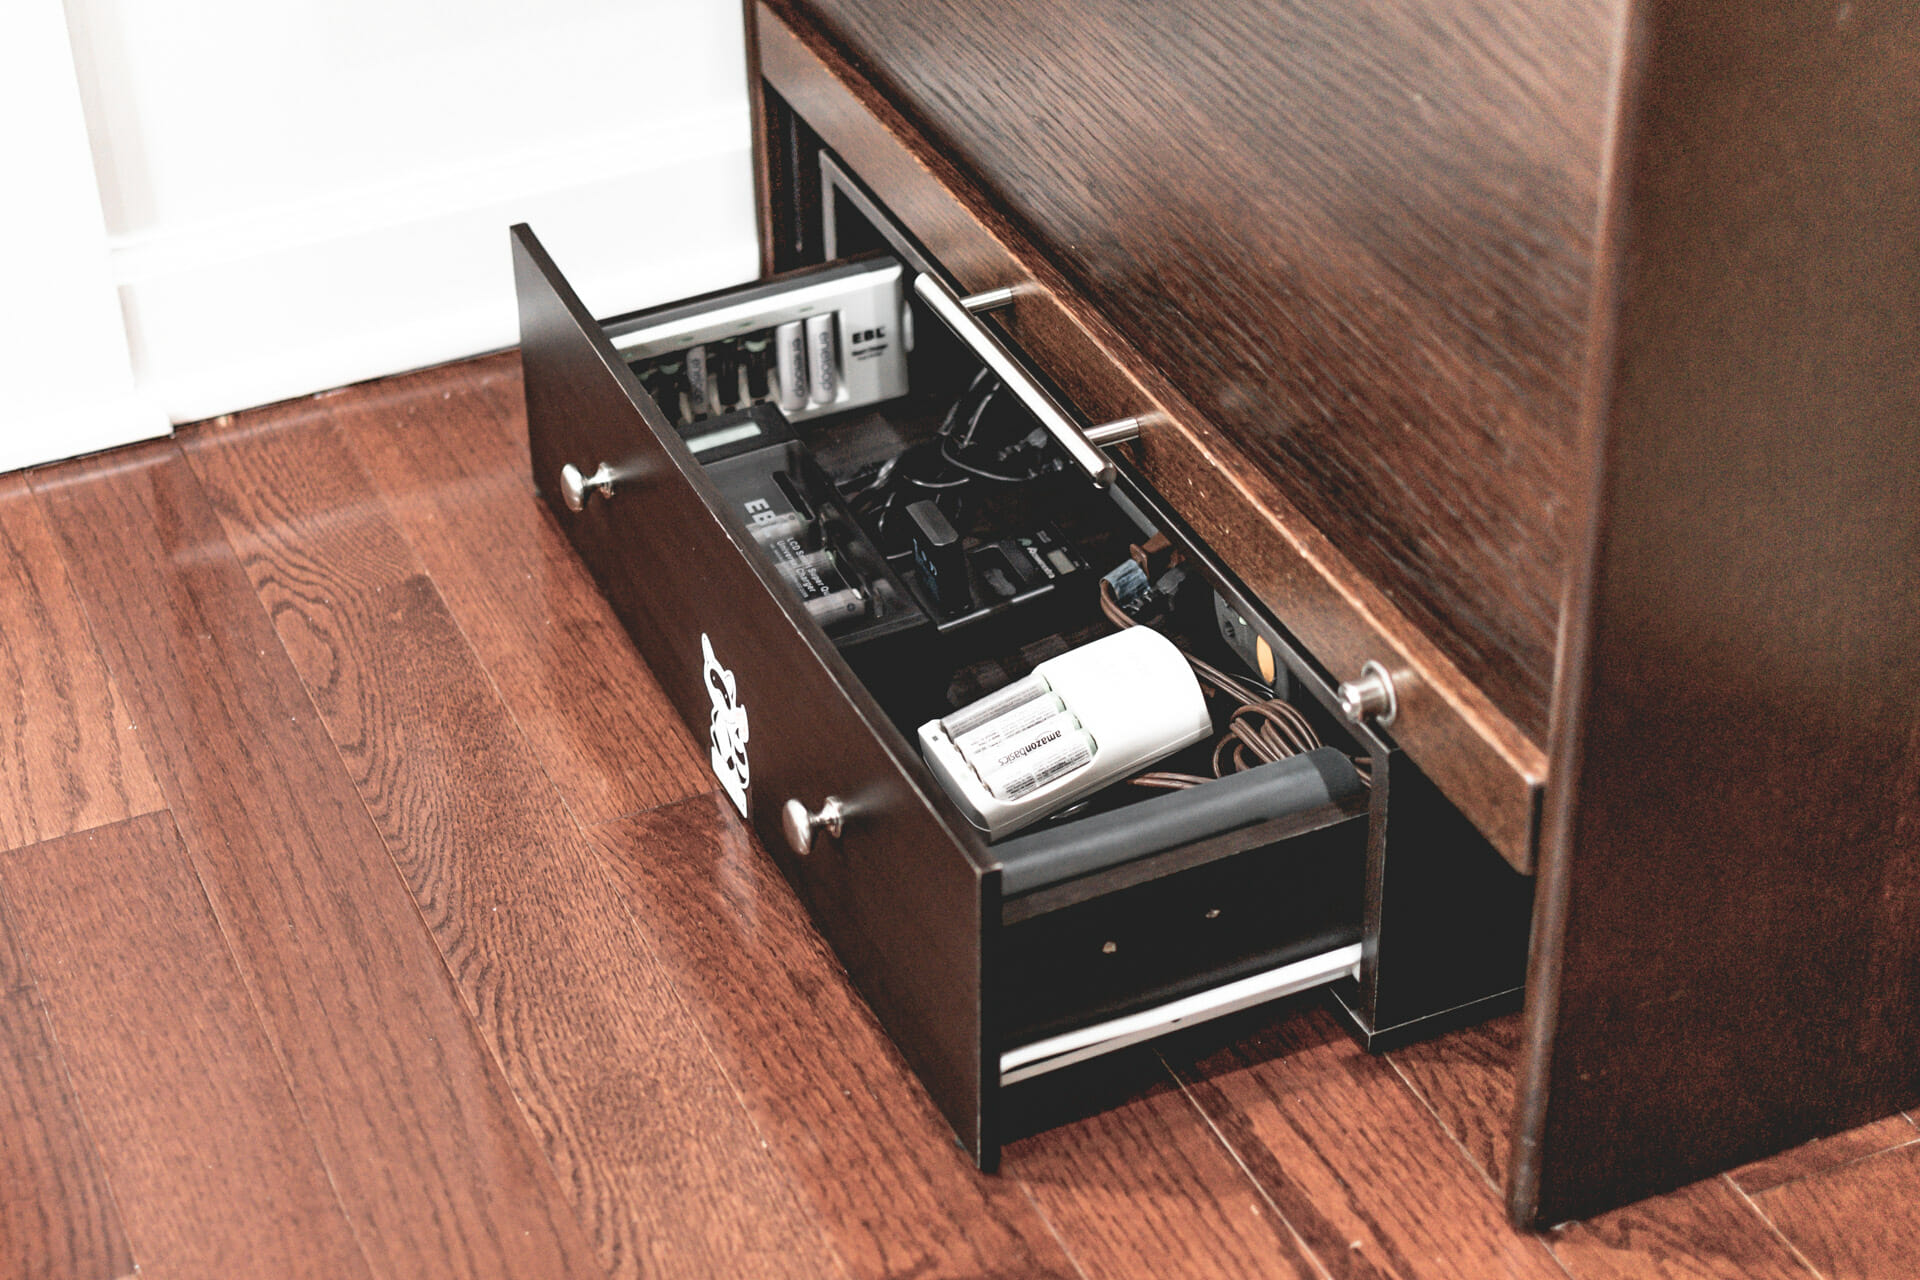
We have an insane number of regular batteries in our house. To contain the ridiculousness, we switched to all rechargeable batteries and I made a central re-charging location. (Identified by the fun HAPI FHIR mascot).
The starting point is a small stackable storage drawer that fits perfectly under the credenza. Inside the drawer, a surge protector is mounted at the back. Other either side of the drawer (mounted to the sides) are 8-bay battery chargers for AA and AAA batteries. One the floor of the drawer there is a 4-bay quick charger, and larger one for C, D, and 9V batteries, and of course a dual Nikon camera battery charger.
Key Solutions
Other optimizations
Storage
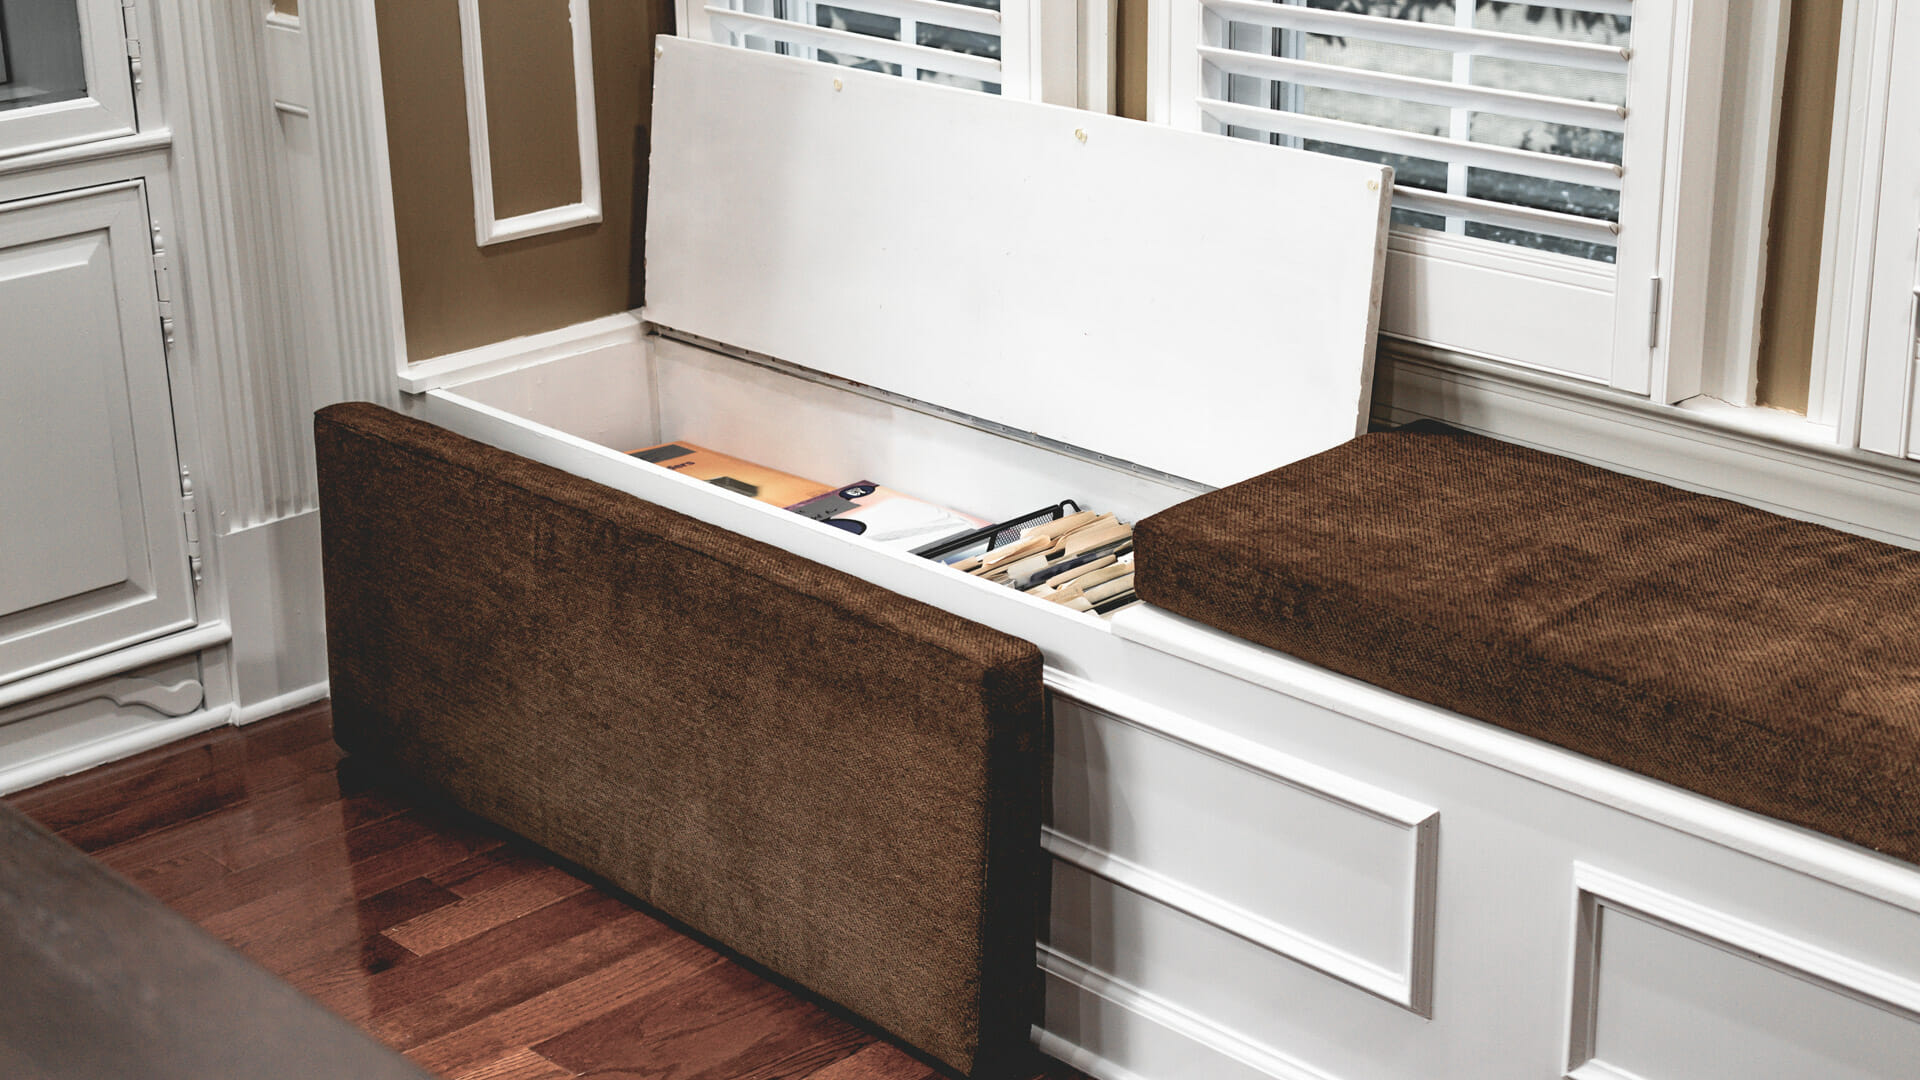
My office has ample storage with a number of built-in cabinets and drawers, but the coolest are the ones under the window seats. My ultra-talented mother custom made these dual cushions for the bench seats.
Under the window seats is great storage for general office supplies. You can also see my one hanging file holder, which is nicely hidden from sight most of the time :-).
Smooth rolling
I didn’t want to put a rug or other floor protector that would cover up the lovely hardwood floors. But of course I also don’t want a bunch of scratches from plastic rolling wheels either.
I found the perfect solution with these rollerblade style, soft polyurethane wheels for my office chair. They roll so smoothly you have to watch out when you stand up, lest your chair flies across the room!
Sounds and smells
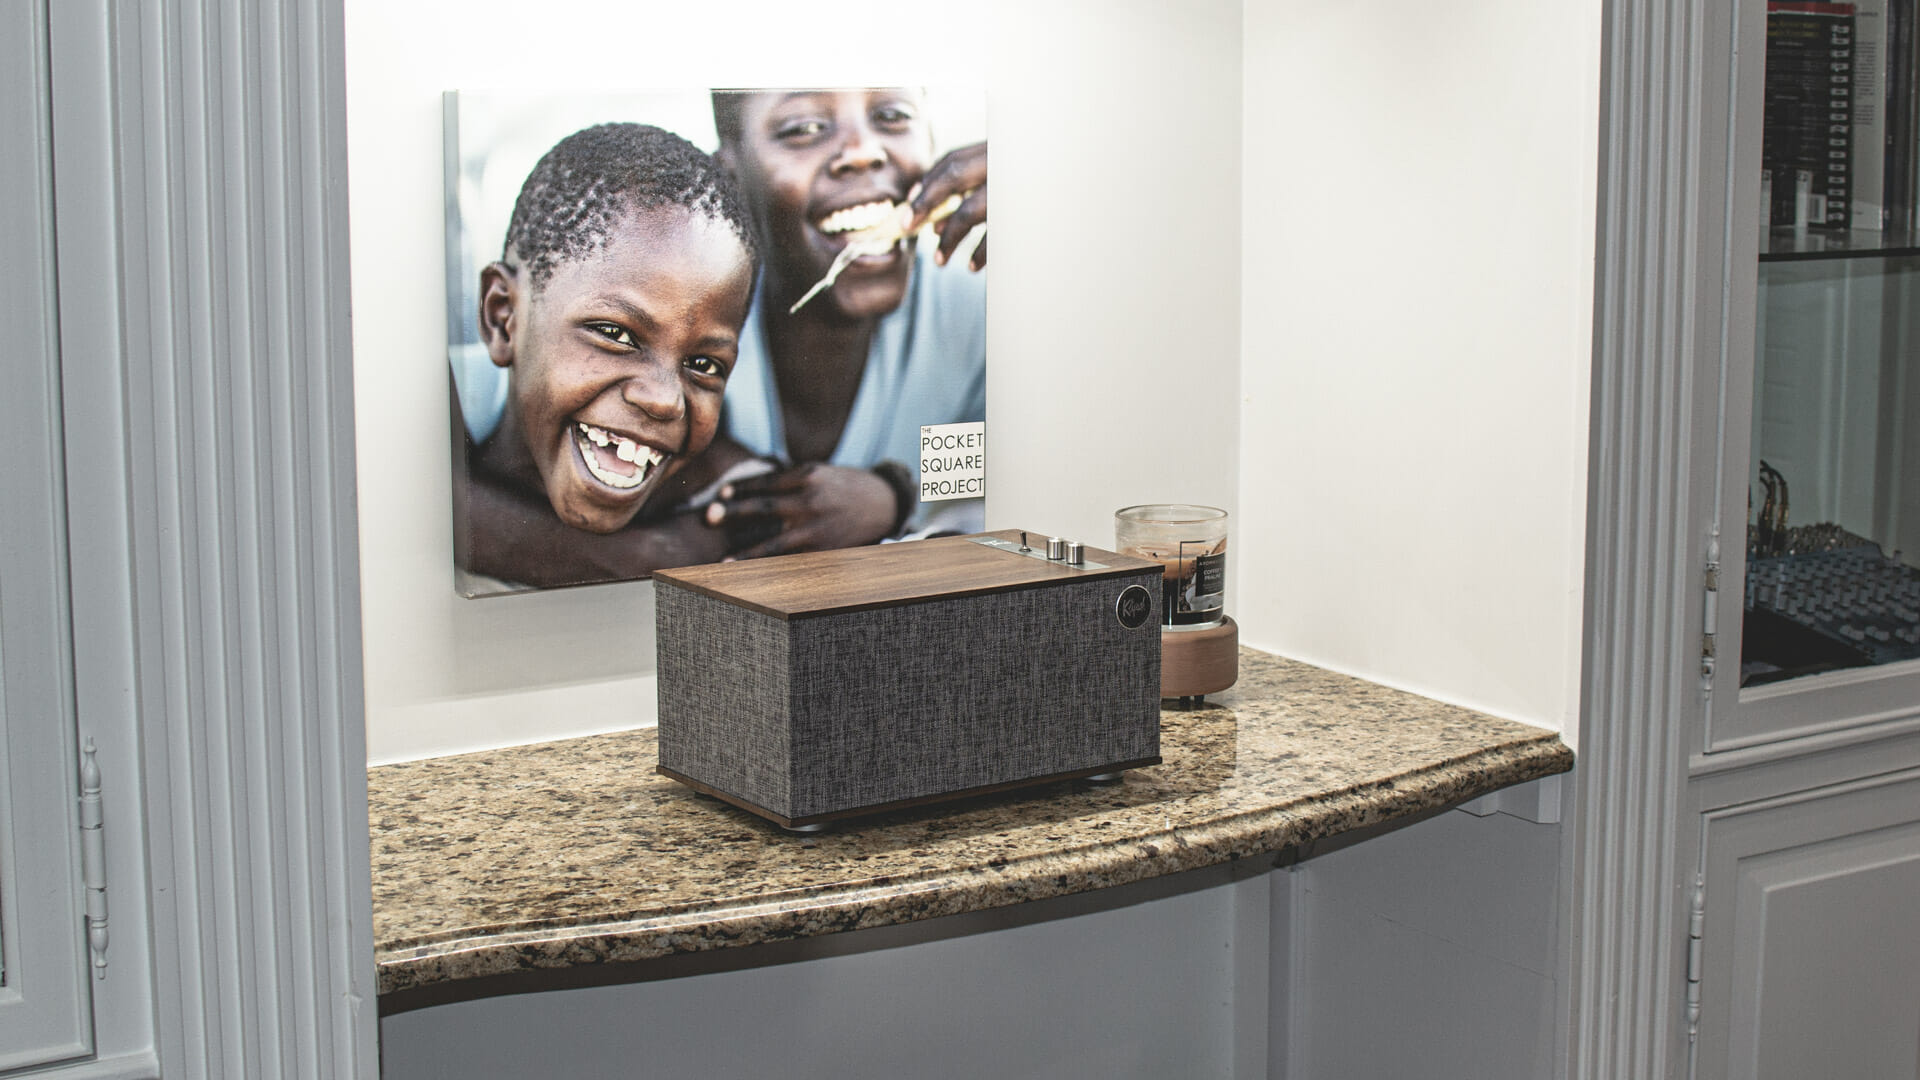
I’ve been a huge fan of Klipsch speakers for a long time, even before moving to Indianapolis. Basically all of the speakers around my house are from Klipsch. If you’re looking for the perfect office-sized sound setup that fills the room and oozes old-school craftsmanship and character, you have to check out The Three II. It’s a fabulous bluetooth tabletop stereo that sounds just amazing for its space saving size.
I love making my office smell like a coffee shop. You can get pleasant aromas without the smoke of a burning candle with a candle and fragrance warmer like the one I have here. Add a great smelling coffee candle like this Espresso Bean one, and you’ll get the vibe of your favorite coffee shop.
Now, I don’t brew my coffee in the office. That would help with the aroma too! But there’s no water line, and it’s good to have an excuse to stand up at least every hour or so. For making top a notch brew, I enthusiastically recommend the handmade Dutch masterpiece Technivorm Moccamaster.
Wrap-up
So there’s the behind the scenes look at how I’ve made a high tech, low clutter home office. Hopefully you’re inspired to take these ideas and be creative.
I’d love to see how you transformed your workspace into a special place for doing your best work. Got a great hack for your home office setup? Send me a note, I’d love to see what you came up with.
Disclosure of Material Connection
Some of the links in the post above are “affiliate links.” This means if you click on the link and purchase the item, I will receive an affiliate commission. Regardless, I only recommend products or services I use personally and believe will add value to my readers. I am disclosing this in accordance with the Federal Trade Commission’s 16 CFR, Part 255: “Guides Concerning the Use of Endorsements and Testimonials in Advertising.”

